Connecting operator to post bracket assembly, Step 8, Step 9 – GTO RB923 rev User Manual
Page 17: Step 7
14
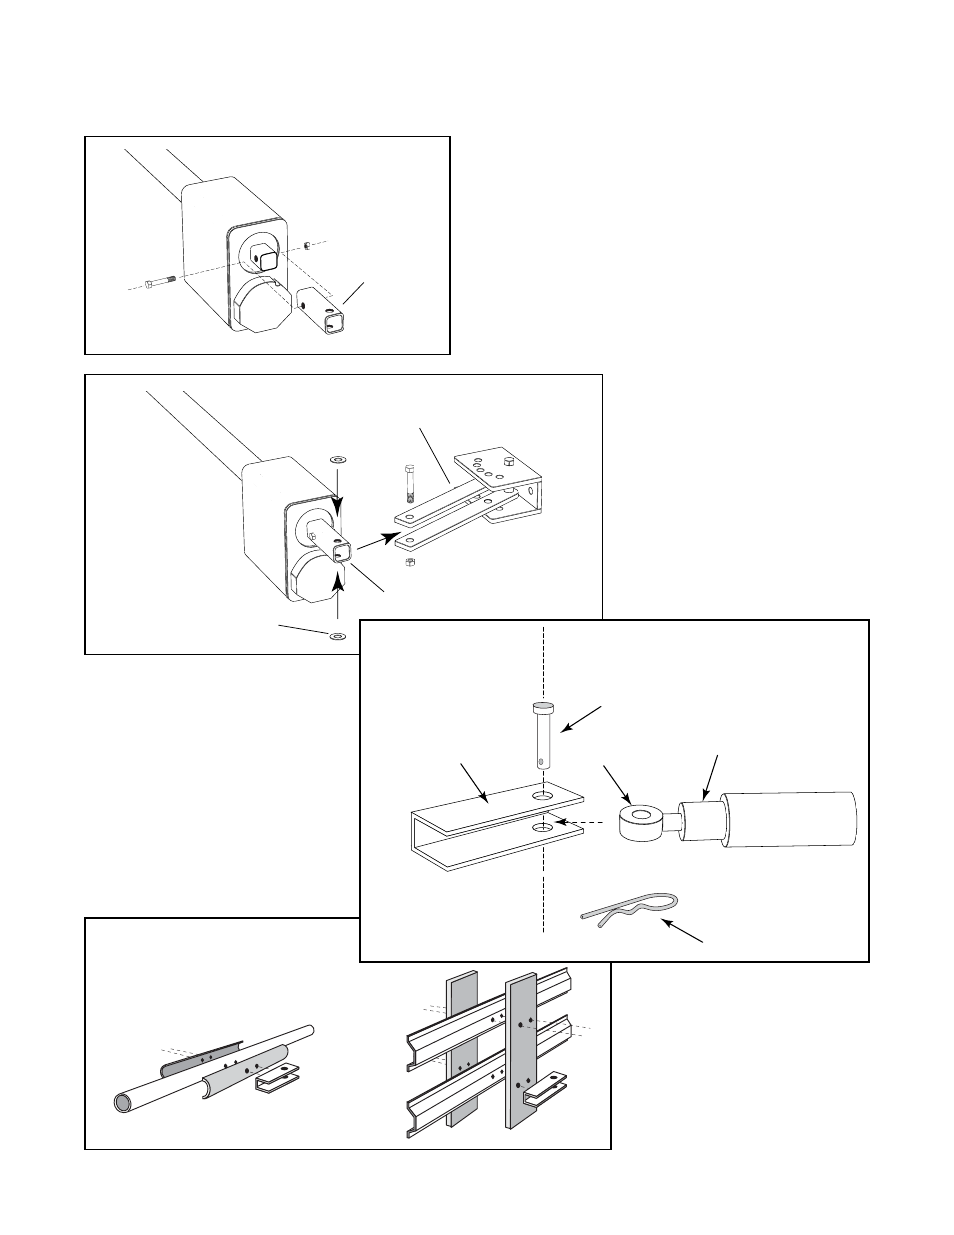
IMPORTANT: Thin walled tube and
panel gates MUST be reinforced as
shown to prevent damage to gate and
operator.
Step 8:
Position rear mount between post pivot
brackets. Place
1
/
2
" washers between
rear mount and post pivot brackets.
Align
1
/
2
" hole in rear mount and
washers with holes in post pivot
brackets. Attach the rear mount to post
pivot brackets using
1
/
2
" x 2
3
/
4
" bolt
and
1
/
2
" nut. Note: when tightening
the rear mount bolt, leave it loose
enough for the operator to pivot
freely.
Step 9:
Attach the gate bracket to the front
mount using the clevis pin and hairpin
clip.
Step 7:
Tap the rear mount onto the back of the operator. Align the
3
/
8
" hole in the rear mount with
3
/
8
" hole in the back of the
operator and insert the
3
/
8
" bolt through the holes and
secure it with the lock nut.
Connecting Operator to Post Bracket Assembly
Rear Mount
Post Pivot Brackets
1
/
2
" Washers
Rear Mount
Hairpin Clip
Clevis Pin
Gate Bracket
Front Mount
Push-Pull Tube