Bearing housing & connecting rod, Warning, Caution – Graco TEXSPRAY 1030 User Manual
Page 14
14 309662
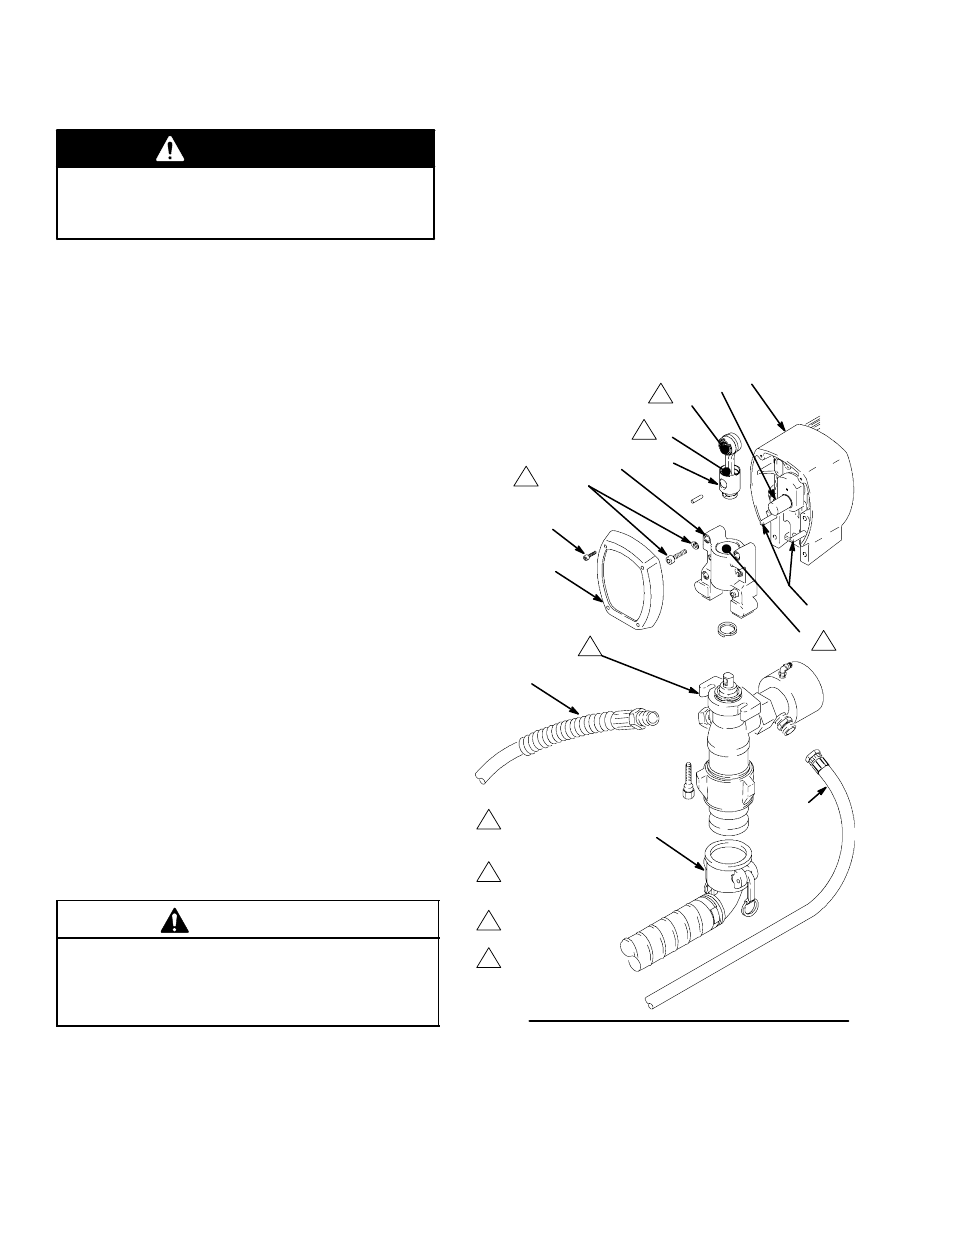
Bearing Housing & Connecting Rod
Removal
To reduce risk of injury due to sprayer starting
unexpectedly, shut off engine before performing
checks or service.
WARNING
1. Fig. 8. Perform steps 1--8 of Displacement Pump,
Removal, page 10.
2. Remove four screws (40) and front cover (21).
3. Remove four screws (48) and lockwashers (49)
from bearing housing (23).
4. Pull connecting rod assembly (22) and lightly tap
lower rear of bearing housing (23) with a plastic
mallet to loosen it from drive housing (20). Pull
bearing housing and connecting rod assembly off
drive housing.
5. Inspect crank (A) for excessive wear and replace
drive housing, if necessary, page 15.
Installation
1. Evenly lubricate inside of bronze bearing (E) in
bearing housing (23) with high-quality motor oil.
Liberally pack top roller bearing (B), lower bearing
(C) inside connecting rod assembly (22) with
bearing grease.
2. Assemble connecting rod (22) and bearing housing
(23).
3. Clean mating surfaces of bearing housing (23) and
drive housing (20).
CAUTION
Do not use bearing housing screws (48) to align or
seat bearing housing with drive housing. Align these
parts with locating pins (D), to avoid premature
bearing wear.
4. Align connecting rod with crank (A) and carefully
align locating pins (D) in drive housing (20) with
holes in bearing housing (23). Push bearing hous-
ing onto drive housing or tap it into place with a
plastic mallet.
5. Install four screws (48) and lockwashers (49) on
bearing housing (23). Torque screws evenly to 25
ft-lb (34 N.m).
6. Do steps 2 -- 5 of Displacement Pump, Installa-
tion, page 10.
TI3021A
Torque to
25 ft--lb (34 N.m)
Fig. 8
4
2
See page 10 to
remove pump
A
B
C
D
E
1
3
1
2
3
4
Liberally pack with
bearing grease
(20d), supplied
Lubricate with
high quality
motor oil
40
48,49
23
22
20
21
1f
86
85b
1