Installation instructions, Installation – Stovax 8455 User Manual
Page 15
15
NOTE: CERAMIC PARTS ARE FRAGILE.
6.1 Position the flame baffle on the rear of the tray. See Diagram
13 arrow B.
6.2 Position the front coal, make sure it sits flat onto the burner
skin. See Diagram 13 arrow C.
13
AR2190
6.3 Place the coals following the appropriate Diagrams and
Instructions:
16” AND REDUCED DRAUGHT COAL LAYOUT
6.4 Curved fronts (Holyrood and Richmond) -place 5 large coals
onto the front coal moulding ensuing that they rest against the
front Place 2 small coals on to the front coal, 1 at each end.
See Diagram 14.
14
AR1115
6.5 Flat fronts (All others) - Place 3 large coals and 4 small coals
onto the front coal moulding ensuring that they rest against the
decorative front, these should run intermittently small, large,
small etc. See Diagram 15.
INSTALLATION INSTRUCTIONS
INSTALLATION
15
AR1116
6.6 Place 5 large coals onto the flame baffle fingers. See Diagram
16.
16
AR1117
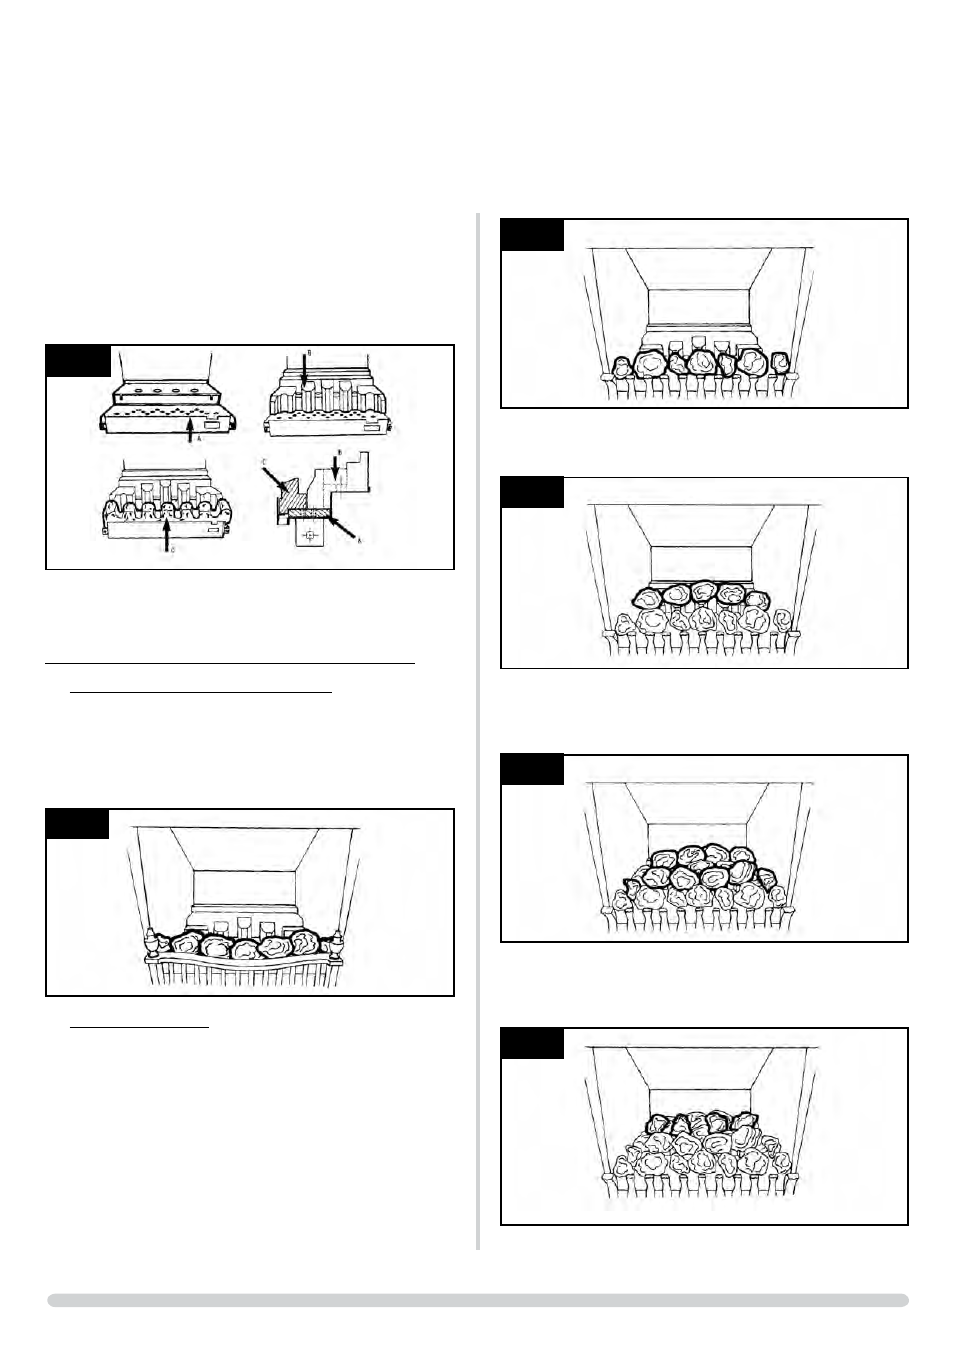
6.7 Place 4 large coals so that they form a bridge between the
other 2 rows, and 2 small coals, 1 at each end. Place 4 large
coals at the back of the fire. See Diagram 17.
17
AR1118
6.8 Place the remaining 4 small coals on top of the others so that
they form a bridge between the second and third rows. See
Diagram 18.
18
AR1119