Circle cut attachment – Grizzly G1019 User Manual
Page 32
-30-
G1019 14'' Bandsaw
4. Tighten locking bolt #2. Fine tune by turning
the knurled wheel.
5. After all positioning adjustments have been
made, tighten locking bolts #3 and #4.
To cut a circle:
1. Ensure that the bandsaw is adjusted cor-
rectly and all safety precautions are
observed.
2. Determine a point of tangency on your stock
and cut to that point. NOTE: On larger cir-
cles, it may be necessary to trim off the cor-
ners of your stock as shown in Figure 34.
3. Turn the pivot point knob so the pivot point
sets into the stock.
4. Finish cutting the circle. Let the circle-cut-
ting attachment guide the stock.
Circle Cut Attachment
The circle cutting attachment is standard equip-
ment with the Model G1019 Bandsaw. The
attachment is fully adjustable and is capable of
producing circles up to 12" in diameter in 3" thick
stock. To mount the circle cutting attachment:
Insert the circle cutting attachment into the hole in
the bandsaw table. Loosely thread the locking bolt
into position. Figure 33.
Figure 33. Circle cutting locking bolt.
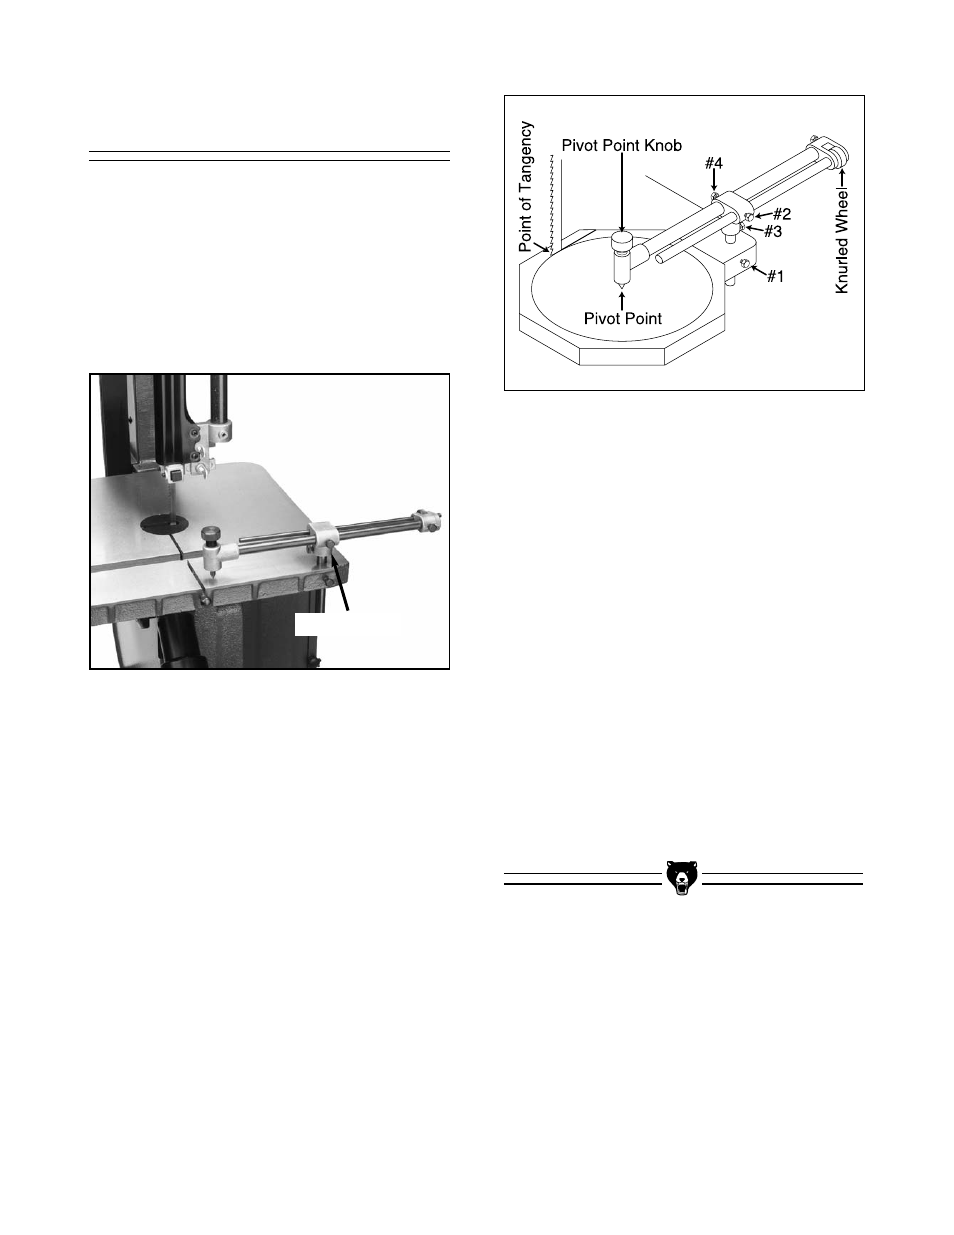
Figure 34. Circle cutting jig at work.
To adjust the circle cutting attachment (See
Figure 34):
1. Set the height of the whole attachment so
your stock will fit just under the pivot point.
Secure the locking bolt #1.
2. Determine the radius of the circle you wish
to cut and measure from the front of the
band saw blade along the blade groove in
the table.
3. Loosen locking bolts #2, #3, and #4 and
adjust the circle-cutting attachment so the
pivot point is located over the radius point
just measured (bolt #3 is hidden from view).
Locking Bolt