Table, Notice – Grizzly G1019 User Manual
Page 18
-16-
G1019 14'' Bandsaw
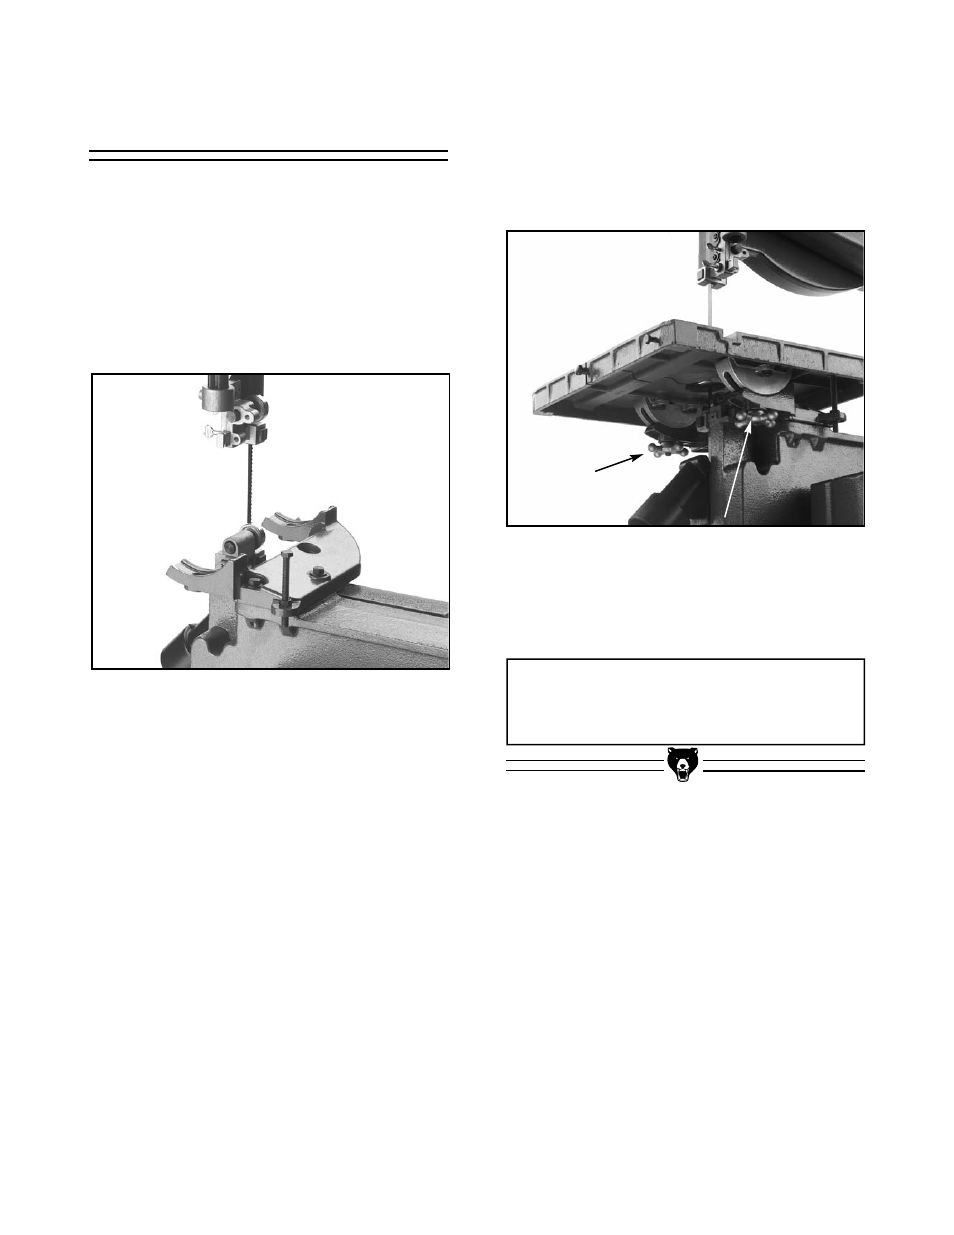
5. Secure the table to the support bracket by
tightening the two star knobs. See Figure
19. Remember to position the table so that
the miter slot is to the right of the blade as
you face the front of the bandsaw.
6. Place the table insert in the table top and
slide the tapered pin so it fits snug in the
hole on the side of the table.
Figure 19. Star knobs
NOTICE
The tapered table pin must be in position
when operating the bandsaw.
Table
To mount the bandsaw table:
1. Remove the two table support mounting
bolts from the bandsaw unit.
2. Line up the pin location on the mounting
bracket with the pin on the bandsaw unit.
Insert the two mounting bolts and securely
tighten. See Figure 18.
Figure 18. Table mounting bracket.
3. Insert the
5
⁄
16
"-18 x 3" table indexing bolt
with lock nut in the threaded hole in the
support bracket.
4. Slip the table past the blade through the
table slot and set the table trunnions onto
the support bracket. Make sure the bolts
drop through the support bracket.
- G0506 (56 pages)
- 12" Cold Cut Saw G0682 (52 pages)
- G1127 (3 pages)
- 24" & 27" Resaw Bandsaws G3619 (56 pages)
- H7197 (1 page)
- INDUSTRIAL BANDSAW W/FOOT BRAKE G0513X2F (108 pages)
- Heavy-Duty Table G1023Z (63 pages)
- G0641 (56 pages)
- Air Cut-Off G8122 (2 pages)
- Ultimate 14" Bandsaw G0555 (68 pages)
- G4186Z (48 pages)
- H8145 (36 pages)
- G0691 (11 pages)
- G0691 (92 pages)
- G0592 (60 pages)
- Model G1022proz (84 pages)
- G0605X1-6X1 (12 pages)
- Model G1023zx3 (63 pages)
- G1016 (30 pages)
- H0604 (10 pages)
- ZX (63 pages)
- g0531b (8 pages)
- G3620 (56 pages)
- G1023SL (50 pages)
- G1023SLWX (3 pages)
- 50/65 Ton Ironworker G0647 (76 pages)
- Zero Clearance Table Insert H7396 (1 page)
- H7583 (28 pages)
- G0621 (60 pages)
- G0457 (64 pages)
- G0605X1 (101 pages)
- H0629 (3 pages)
- Slow Speed Cold Cut G0665 (40 pages)
- G0717 (60 pages)
- G0659 (60 pages)
- G0606X1 (12 pages)
- G0605X/G0606X (76 pages)
- G5787 (37 pages)
- G8599 (13 pages)
- T10131 (4 pages)
- G0513P (108 pages)
- G9906 (14 pages)
- G0513X2 (108 pages)
- G7211 (34 pages)
- G1052 (34 pages)