Grizzly G1019 User Manual
Page 25
G1019 14'' Bandsaw
-23-
To tilt the table to the left:
1. Loosen the two trunnion knobs below the
table trunnions.
2. Tilt the table to the right enough to gain
clearance to the positive stop bolt. Loosen
the lock nut, then remove the positive stop
bolt.
3. The table will now tilt left to approximately 10°.
4. When the left tilt operation is complete, rein-
stall the positive stop bolt.
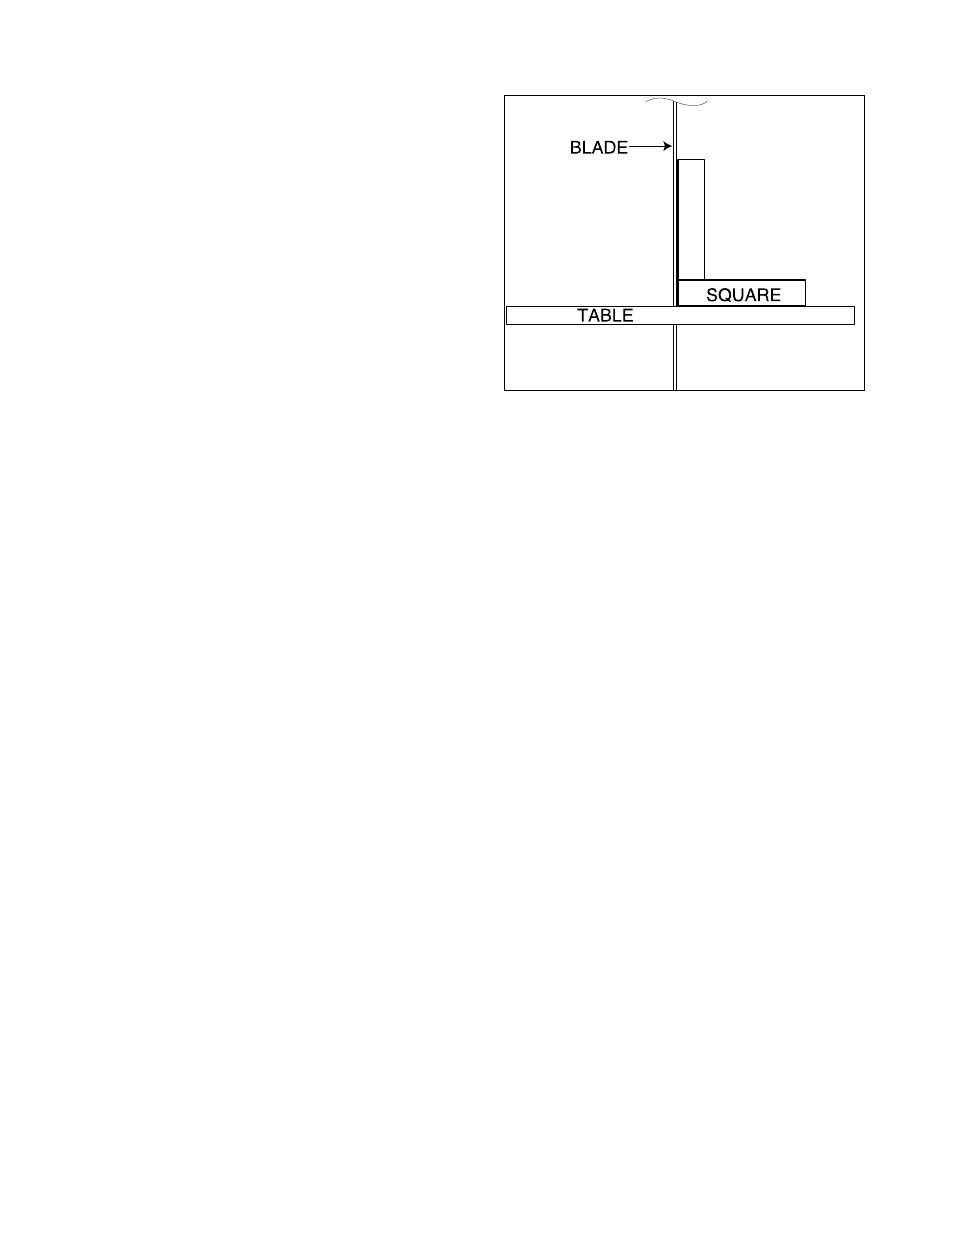
To adjust the positive stop so the table will be per-
pendicular (90°) to the blade:
1. Loosen two trunnion knobs and the locknut
securing the positive stop adjusting bolt.
2. Raise the upper blade guide assembly and
place a 6" adjustable square or try-square
on the table against the blade. See Figure
29. Adjust the positive stop adjusting bolt so
that the table is positioned at a 90° angle to
the blade.
3. Secure the trunnion knobs and lock the pos-
itive adjusting bolt by tightening the locknut.
Ensure that the bolt does not turn while
tightening the locknut. Set the angle pointer
to zero for future reference.
Figure 29. Squaring table to blade.
The table can be shifted side to side to properly
align the miter slot and the blade:
1. Loosen the 6 trunnion bolts underneath the
table.
2. Install the largest width blade available in
the machine. Lay a straightedge along side
the blade and inspect it closely to make
sure it is parallel to the blade.
Make sure the straightedge doesn’t deflect
the blade. Measure the distance between
the edge of the miter gauge slot and the
straightedge at points A and B.