Frymaster FOOTPRINT H50 User Manual
Page 10
1-5
3. After servicing is complete, reconnect the unit to the gas supply, reattach restraining devices, and
plug in the electrical cords.
1.3
Cleaning the Gas Valve Vent Tube
1. Set the fryer power switch and the gas valve to the OFF position.
2. Carefully unscrew the vent tube from the gas valve. NOTE: The vent tube may be straightened
for ease of removal.
3. Pass a piece of binding wire (.052 inch diameter) through the tube to remove any obstruction.
4. Remove the wire and blow through the tube to ensure it is clear.
5. Reinstall the tube and bend it so that the opening is pointing down.
1.4
Checking the Burner Manifold Gas Pressure
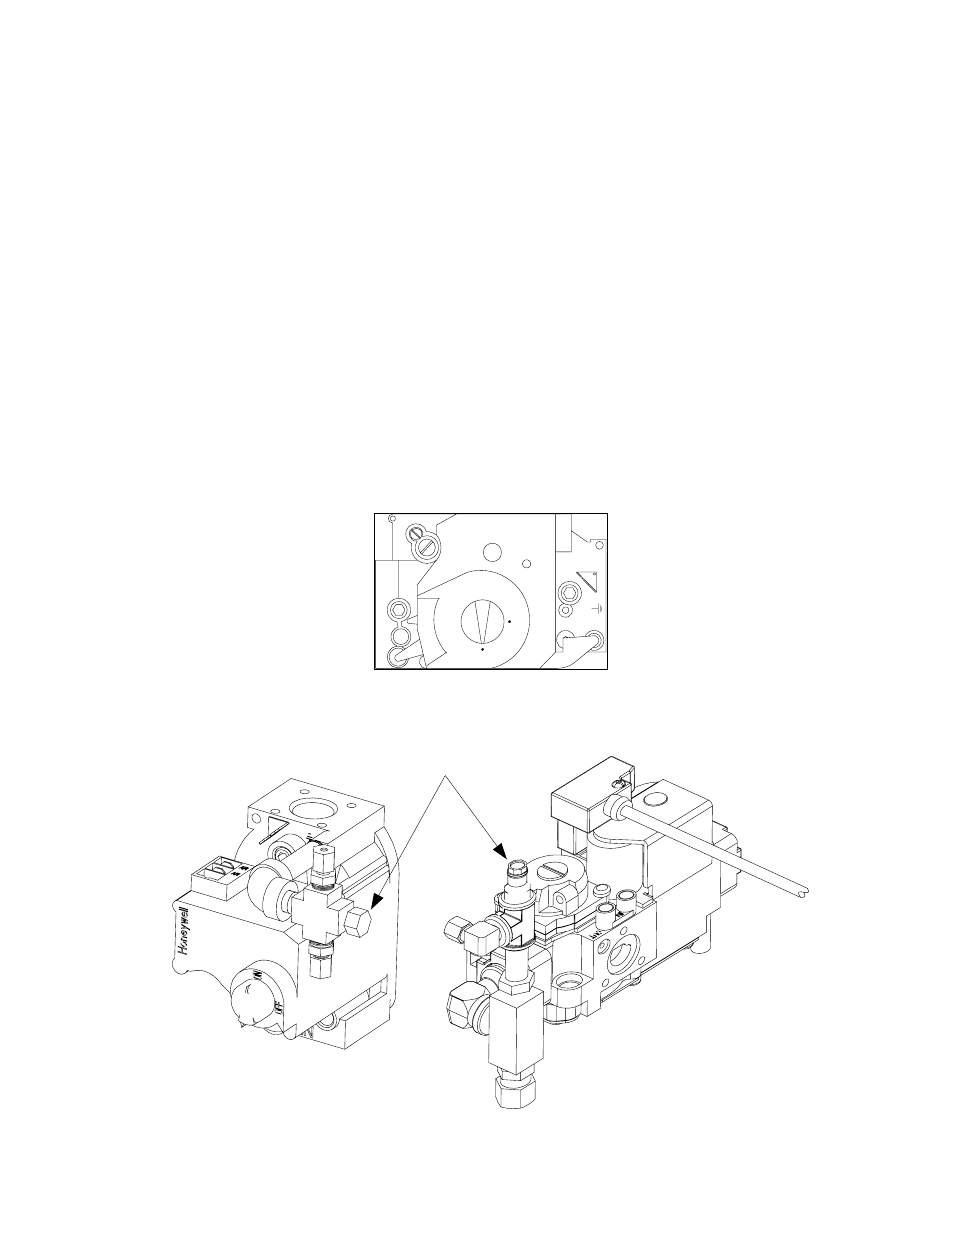
1. On non-CE fryers only, ensure that the gas valve knob is in the OFF position.
Honeywell
ON
OFF
2. Remove the pressure tap plug from the gas valve assembly.
Typical Non-CE
Valve Assembly
Typical CE Valve
Assembly
Pressure Tap Plug
3. Attach a manometer or pressure gauge to the pressure tap hole.
- D460G (2 pages)
- J3F (88 pages)
- TB14 (60 pages)
- Universal Holding Cabinet (53 pages)
- D80 Series (44 pages)
- CF SERIES J65X (50 pages)
- HCP (30 pages)
- GF40 (2 pages)
- GF14 (24 pages)
- FOOTPRINT E4 (88 pages)
- Enodis RE17TC (2 pages)
- Dean 52 Series (39 pages)
- CFESA BKSDU (13 pages)
- JCFX (76 pages)
- GEN II LOVTM BIELA14 (86 pages)
- Enodis FPRE14-7 (2 pages)
- UHC-HD (3 pages)
- FootPrint PRO FPP545 (2 pages)
- Dean SM35 (40 pages)
- FOOTPRINT RE80 (64 pages)
- 8196606 (24 pages)
- D680G (2 pages)
- 35 Series (40 pages)
- SR62 Series (14 pages)
- FPD65 (60 pages)
- LOV BIGLA30 (88 pages)
- FPD (100 pages)
- FOOTPRINT PRO SERIES 45 (50 pages)
- 1814 (10 pages)
- LOV M3000 (50 pages)
- 14 Series (78 pages)
- HD1814 SERIES HD1814G (46 pages)
- 1824/2424G (44 pages)
- YSCF14G (26 pages)
- HLZ18 (4 pages)
- FDP65 (60 pages)
- BIGLA30 (86 pages)
- BIELA14 (26 pages)
- BIRE14 (32 pages)
- FPH55 (2 pages)
- 2424G (68 pages)
- KSCF18G (68 pages)
- Enodis PF50S (2 pages)
- MH52 (115 pages)
- SM5020G (2 pages)