Follett MCC400A/W User Manual
Page 12
12
Step 2 – Installing icemaker on slide-out track
A. When icemaker is shipped with slide-out track accessory (follow either A or B)
1. Connect inlet water, drain, and power supply to back of vertical utility panel.
2. Place icemaker on slide-out track assembly.
3. Connect drain and water lines.
4. Connect electrical cords from icemaker to appropriate plug and connect to power supply.
B. When icemaker is installed in and shipped with counter
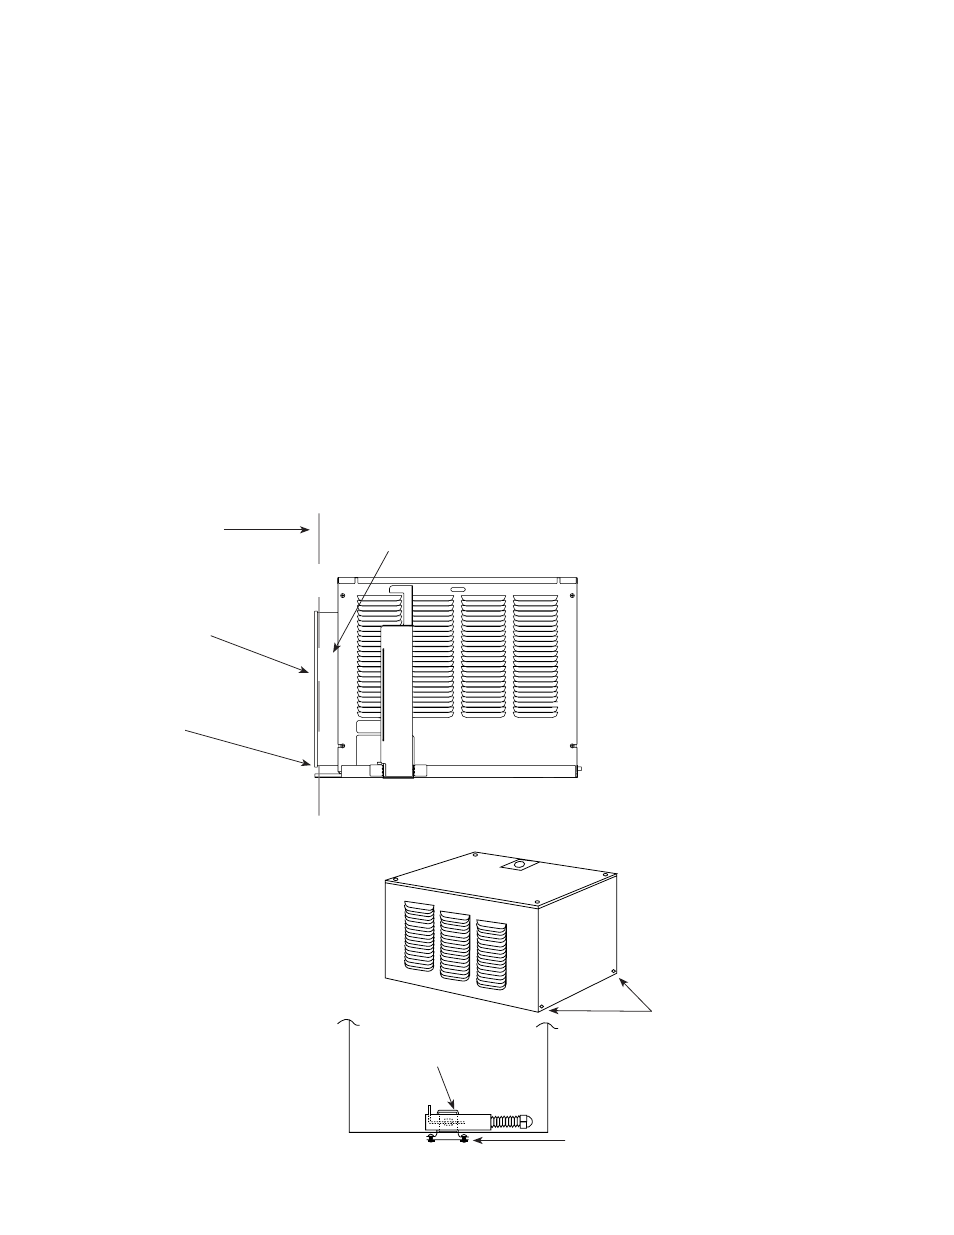
1. Remove two outer rear screws from icemaker and install supplied spacer and screw (Fig. 3).
2. Place icemaker on slide-out track assembly.
3. Connect drain and water lines.
4. Connect electrical cords from icemaker to appropriate plug and connect to power supply.
5. Remove pin from adjustable leg.
6. Place hold-down strap over leg block and secure strap to slide-out assembly with supplied screws (Fig. 4).
7. Reinstall pin in leg block.
8. At job site remove hold-down strap and make utility connections at rear utility panel.
Fig. 3
Fig. 4
Remove screw. Install supplied
screws and spacers.
hold-down strap
(for installation;
remove and discard)
supplied screws
(for installation; remove and discard)
position track accessory so that 51mm (2") duct supplied with air-
cooled remote icemaker mates with back of counter opening
counter front
grille supplied with
air-cooled Satellite-fill
icemakers
air in
(air-cooled units only)
utility connections made at back
side of panel (see next page)