Working with the router, Preliminary/fine routing, Fine adjuster for edge trimming – Festool OF 2200 EB User Manual
Page 12
12
[10.4]. Each mark represents a routing
depth of 0.1 mm. One complete turn of the
wheel is 1 mm.
Notes:
The dial ring [10.5] can be turned sepa-
rately to the "zero" setting.
The three marks [10.7] indicate the maxi-
mum adjustment range of the adjusting
wheel (20 mm) and the central position
when aligned with the edge [10.8].
Preliminary/Fine routing
11.1
11.2
C
Stop C has two stop limits with a height dif-
ference of 2 mm. Routing to the depth preset
with stop C can be performed in two steps:
Lower the router to the fi rst stop level
[11.1] for the preliminary routing step;
Lower the router to the second stop level
[11.2] to complete the routing procedure.
This procedure enables rapid routing to a
considerable depth while still achieving a good
surface quality. The fi nal routing depth is de-
fi ned by adjusting the stop level [11.2].
Fine adjuster for
edge trimming
The machine has a special fi ne adjuster for
routing tools with a bearing guide, which al-
lows quick and easy precision adjustment prior
to rounding edges and prevents offsets.
First of all, roughly preset the routing depth
and perform a test run. Then adjust the rout-
ing depth more precisely:
f
f
–
–
6
7
8
9
80
70
60
50
40
30
20
10
0
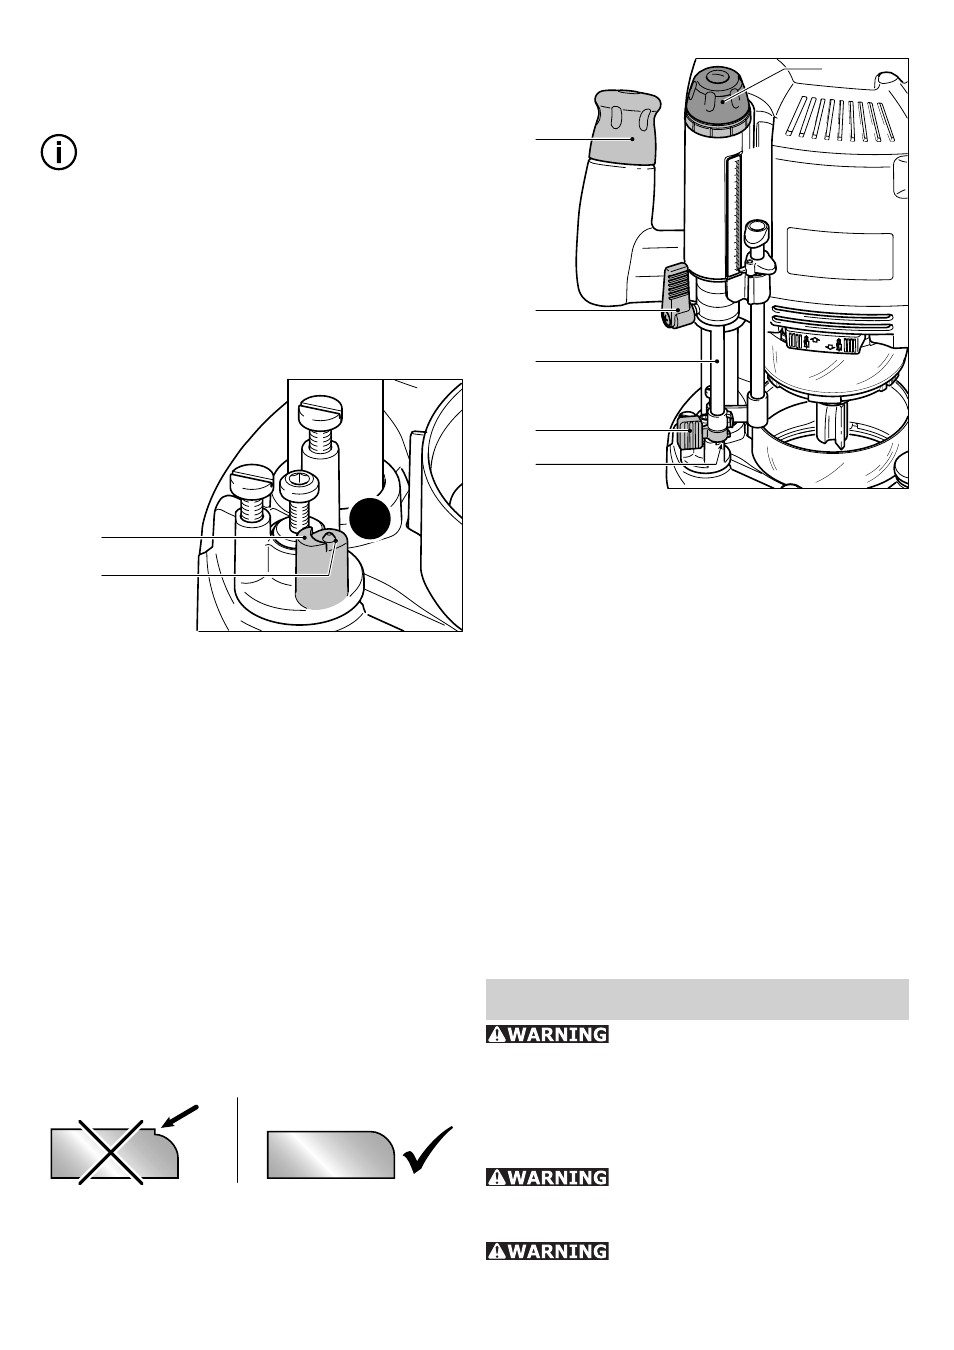
13.1
13.2
13.3
13.4
13.5
13.6
Open the clamping lever [13.2].
Push the depth stop [13.3] against the fi xed
stop C [13.5].
Clamp the depth stop using the eccenter
[13.4] on the stepped stop (turn clock-
wise).
Close the clamping lever [13.2].
Unscrew the rotary knob [13.1].
Turn the adjusting wheel [13.6] to set the
routing depth more precisely.
The routing depth can be adjusted in both
directions because the depth stop is con-
nected to the stepped stop.
Tighten the rotary knob [13.1].
Open the eccenter [13.4] (turn anticlock-
wise).
Perform more test runs and make the ap-
propriate adjustments if necessary.
Working with the router
Always ensure that your
workpieces are securely fi xed and can-
not move during routing. Otherwise, there
is an increased risk of accident. Use screw
clamps or some other suitable devices to fi x
your workpiece.
The machine must always be
held with both hands by the designated
handles.
Always switch the router on
fi rst before bringing the tool into contact
with the workpiece!
–
–
–
–
–
–
f
–
–
–