iSys iTerra Elite II Color LED Plotter User Manual
Page 39
June 2011: Revision 002
39
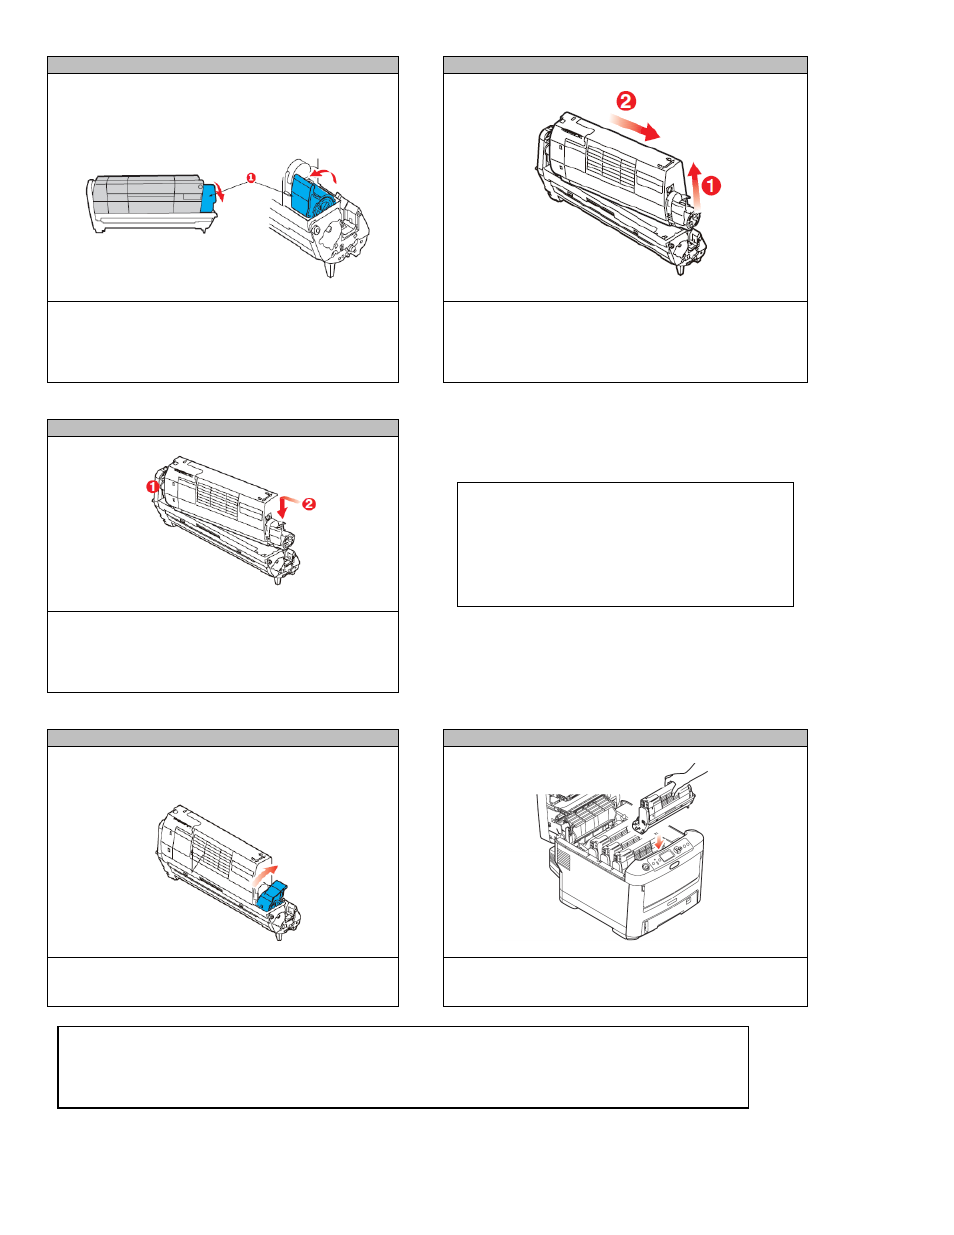
STEP 4
STEP 5
With the colored toner release lever (1) to the right,
pull the lever towards you. This will release the toner
cartridge from the drum.
Lift the right hand end of the toner cartridge (1) and
then draw the cartridge to the right to release the left-
hand end as shown (2) and withdraw the toner cartridge
out of the image drum cartridge. Place the cartridge on
a piece of paper to avoid marking your furniture.
STEP 6
Place the toner cartridge onto the new image drum
cartridge as shown. Push the left end in first and then
lower the right end in. (It is not necessary to fit a new
toner cartridge at this time unless the remaining toner
level is very low.)
STEP 7
STEP 8
Push the colored release lever away from you to lock
the toner cartridge onto the new image drum unit and
release toner into it.
Holding the complete assembly by its top center, lower
it into place in the printer, locating the pins at each end
into their slots in the sides of the printer.
NOTE: Follow the instructions that come
with the new image drum for additional
information such as the removal of
packaging material etc.
NOTE: If you need to return or transport your printer for any reason, please make sure you
remove the image drum unit beforehand and place in the bag provided. This is to avoid toner
spillage.