Playback a tape, Push play on the remote or vcr to start playback, Caution – Panasonic PV-7664 User Manual
Page 19: Push stop on the remote or vcr to stop playback, E^t push eject on the vcr to eject ie cassette, The cassette, To find a particular scene during playback, Special effects during playback, Features for a quality picture, Digital auto tracking
Attention! The text in this document has been recognized automatically. To view the original document, you can use the "Original mode".
^ Playback a Tape
IX^Check list before you begin.
□ All connections are made.
(See pages 6-9.)
□ TV and VCR are plugged in.
□ TV is turned on and set to the VCR
channel (CH 3 or 4).
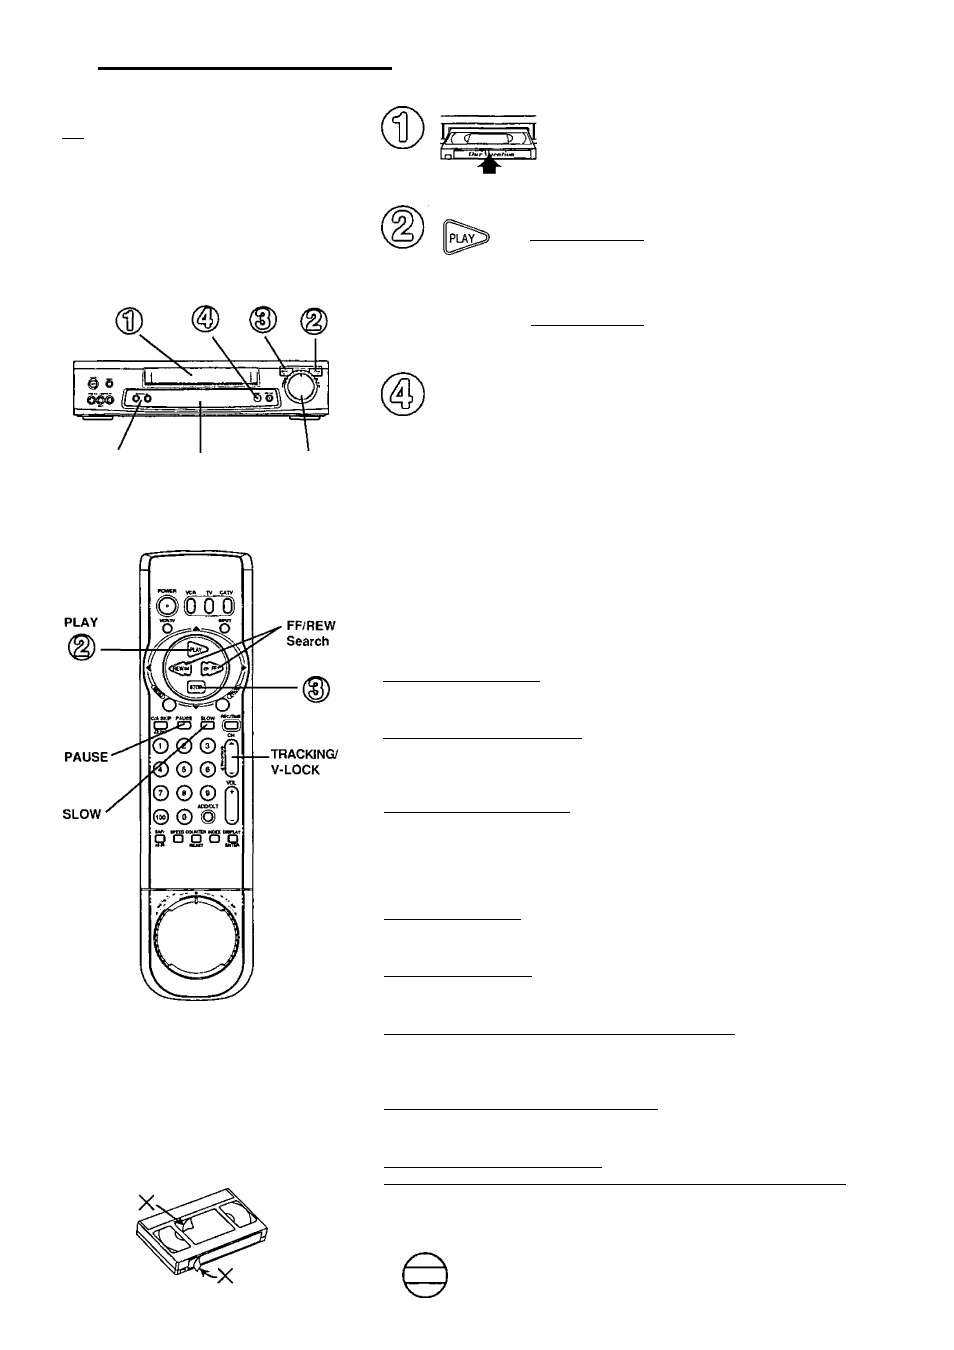
Insert a cassette.
• VCR power comes on automatically.
This indicator lights in the
Multi Function Display.
N. I ✓
- V C R -
Push PLAY on the remote or VCR
to start playback.
• Playback begins automatically if cassette has no record tab.
TRACKING/
Multi
V-LOCK
Function
Display
FF/REW
Search
Caution:
Please inspect your cassette tapes
and remove any loose or peeling
labels to prevent them from
becoming jammed in your unit.
STOP
Push STOP on the remote or VCR
to stop playback.
e^T Push EJECT on the VCR to eject
ie cassette.
You may eject a cassette with power on or off.
EJECT
r
the cassette.
To Find a Particular Scene During Playback
Push REW or FF during playback
to search for a scene.
* Search speed for SP mode tapes is 9 times and
SLP mode tapes is 27 times the normal speed.
• Some noise bars will appear during search.
Special Effects During Playback
These features work best in SP or SLP mode. The sound will be muted.
Slow Motion Playback
Push SLOW to start slow motion playback.
Push PLAY or SLOW to release.
Still (Freeze^ Frame Picture
Push PAUSE to freeze and release the picture.
• To reduce picture noise, first push SLOW. Then, use CH (TRACKING)
A./'f
to clear up the picture, then push PAUSE.
Frame by Frame Advance
In Still mode, hold down SLOW to advance the still picture one
frame at a time. Push PAUSE to release.
Features for a Quality Picture
Digital Auto Picture
This feature automatically controls the video output signal for less
noise depending on the tape condition.
Digital Auto Tracking
This feature continuously analyzes the signal and adjusts for optimum
picture quality.
Manual Tracking Control fto reduce picture noise)
Use during Playback and Slow Motion mode to reduce picture noise.
Push CH (TRACKING) A/T during playback until the picture clears up.
To return to Auto Tracking mode, push POWER off and then on again.
V-Lock Control fto reduce picture jitter)
In Still mode, CH (TRACKING) A/T operate as a V-Lock control.
Push A/T until the picture is stabilized.
DynAmorohous™ Metal Head/
CNR (Color Noise Reduction)/ ANR (Advanced Noise Reduction)
DynAmorphous^^ Metal Head increases playback and record
picture quality. Color Noise Reduction reduces the color noise.
Advanced Noise Reduction reduces the luminance noise.
After the VCR is in Still or Slow mode for 3 minutes, it will switch to
the Stop mode automatically to protect the tape and the video head.
NOTE
19