2 connecting to the network, 3 connecting the cat5 cables, 4 connecting a kvm console – Minicom Advanced Systems Minicom Smart 216 User Manual
Page 12: 5 connecting the power supply
SMART 216 / 232 IP
11
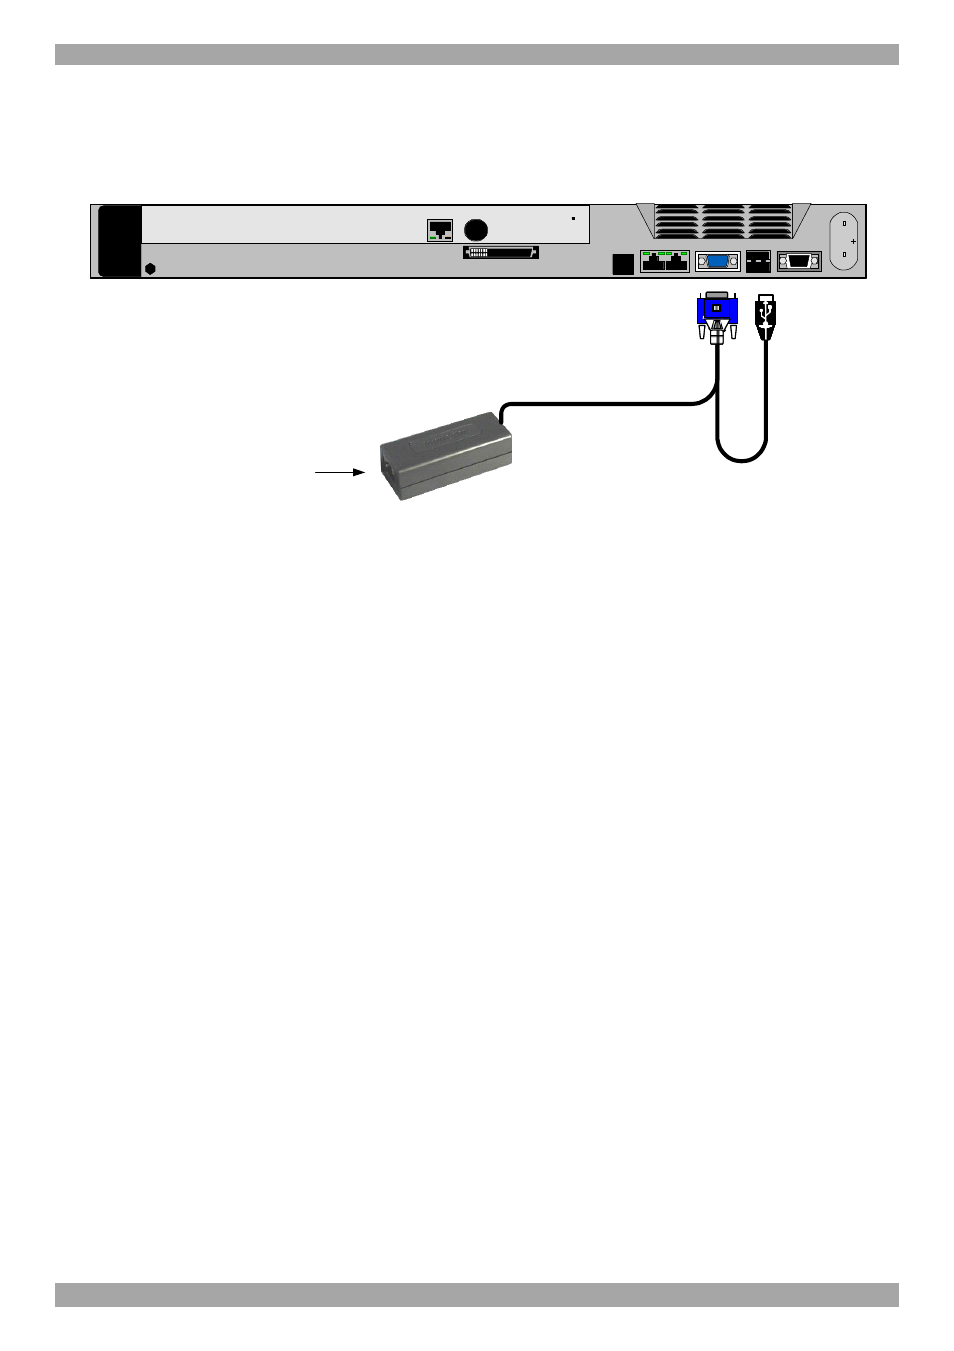
To connect the ROC USB:
1. Connect the Screen connector to the computer’s Video port.
2. Connect the USB connector to the computer’s USB port.
To USB port
To Video port
ROC USB
CAT5 cable to switch
Server port
Figure 10 ROC USB
9.2 Connecting to the network
Connect the network cable to the LAN port of the Smart 216 / 232 IP. This must be
done before powering on the Smart 216 / 232 IP.
9.3 Connecting the CAT5 cables
1. Connect one connector to the ROCs RJ45 port.
2. Connect the other connector to one of the Smart 216 / 232 IP’s Computer ports.
3. Follow the above 2 steps for each computer.
9.4 Connecting a KVM console
To operate the system locally, connect a KVM console to the Smart 216 / 232 IP:
1. Connect the monitor’s connector to the Smart 216 / 232 IP’s Monitor port.
2. Connect the keyboard’s USB connector to the Smart 216 / 232 IP’s USB
Keyboard port.
3. Connect the mouse’s USB connector to the Smart 216 / 232 IP’s USB Mouse
port.
9.5 Connecting the power supply
1. Using the Power cord provided, connect the Smart 216 / 232 IP to a socket
outlet with grounding connection. Only use the power cord supplied with the
unit.