Removing a memory upgrade module, Checking the memory capacity – Fujitsu Siemens Computers Fujitsu LifeBook B6230 notebook User Manual
Page 80
75 - Memory Upgrade Module
Checking the Memory Capacity
Once you have changed the system memory capacity by replacing the installed module with a larger one,
be sure to check that your notebook has recognized the change.
Windows XP: Check the memory capacity by clicking [Start] -> Settings -> Control Panel, then double-
clicking the System icon. Select the General tab and check the amount of memory under “Computer:”
Windows Vista: Check the memory capacity by clicking [Start] -> Control Panel -> System and
Maintenance -> System. The amount of memory is displayed next to “Memory - RAM:”
The amount of memory displayed should be approximately the total of all memory modules installed.
There may be a discrepancy which is allocated for fixed video memory.
Removing a Memory Upgrade Module
1
Turn off power to your notebook and remove any attached
power adapter (AC or auto/airline).
2
Make sure you are properly grounded.
3
Make sure that all connector covers are closed.
4
Turn the notebook bottom side up, with the battery toward
you.
5
Remove the memory upgrade module compartment
screws and remove the cover.
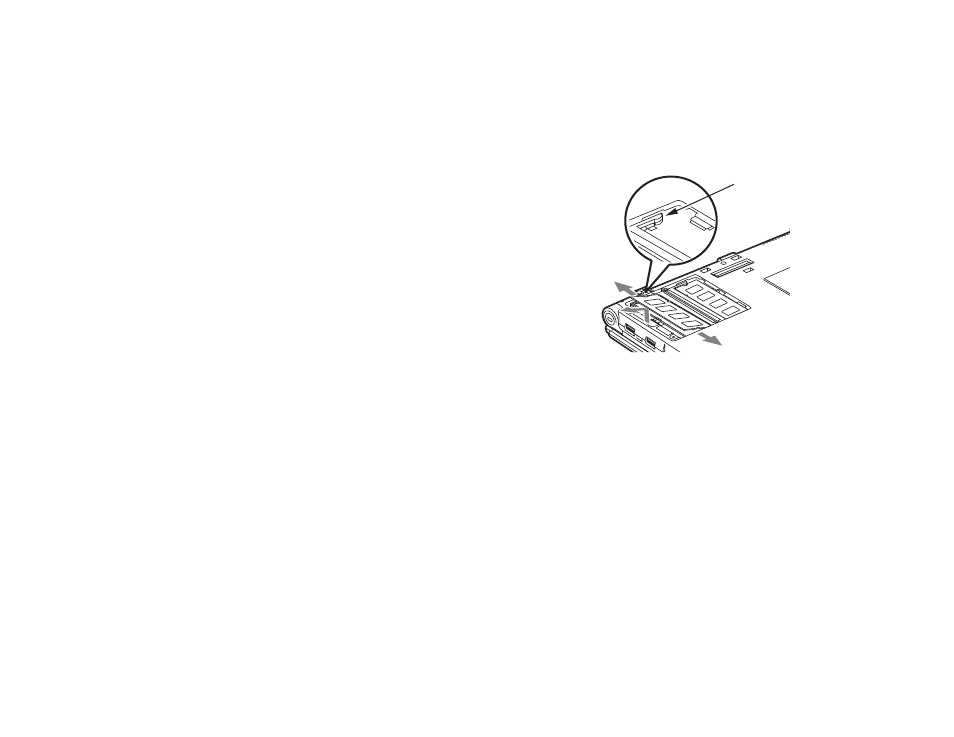
6
Pull the clips sideways away from each side of the memory
module at the same time.
7
While holding the clips out, remove the module from the slot
by lifting it up and pulling towards the rear of your notebook.
8
Store the memory module in a static guarded sleeve.
9
Install a new memory module as instructed in “Installing a
Memory Upgrade Module”.
10
Replace the cover and the screws
Figure 29. Removing memory module
Memory Clips