Installation, Wire the light control – Heath Zenith SH-5311 User Manual
Page 2
2
598-1343-00
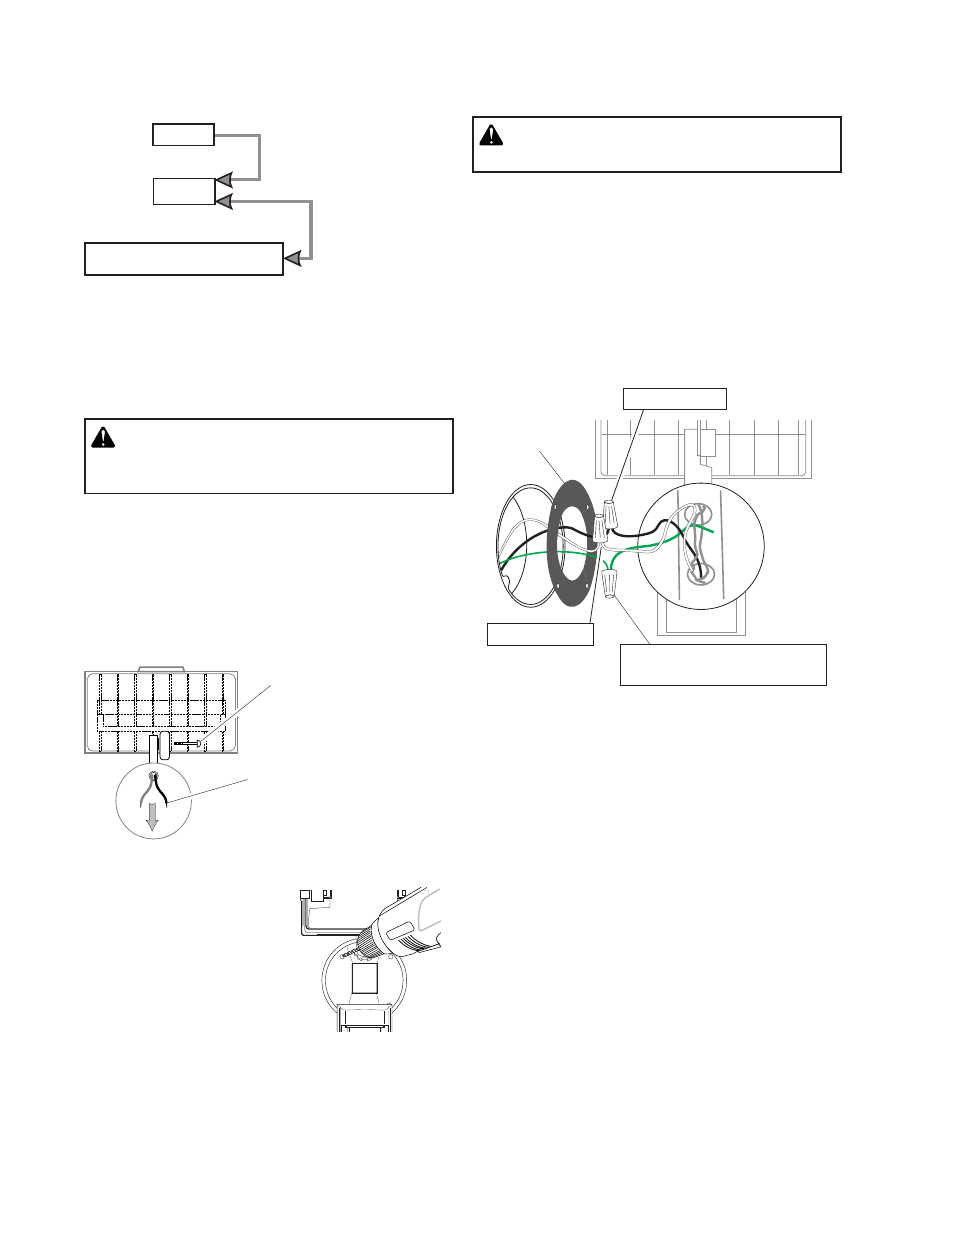
Cover Plate
Gasket
❒
Drill out the holes if needed
to mount the backplate to the
junction box.
White to White
❒
Attach the lamp arm to
the backplate arm and
secure with the long
bolt.
Note: When tightening the arm
screw, pull on the wires to make
sure the wires are not pinched
by the joint.
❒
Remove the existing light fixture.
❒
The S-hook can be used to hold the fixture while
wiring. The small end of the hook can be inserted
into a hole in the junction box. The large end goes
around the “neck” of the fixture.
❒
Route the light control’s wires through the large
hole in the gasket.
❒
Twist the junction box wires and fixture wires together
as shown. Secure with a wire connector.
Black to Black
Junction box ground wire to
green ground wire on fixture.
Wire the Light Control
WARNING: Turn power off at circuit breaker
or fuse.
INSTALLATION
Move ON-TIME Switch
to 1, 5, or 10 minutes
Mode Switching Summary
Flip light switch
off for one second
then back on*
MANUAL MODE
AUTO
TEST
* If you get confused while switching modes, turn the
power off for one minute, then back on. After the cali-
bration time the control will be in the AUTO mode.
CAUTION: Risk of fire. This fixture is designed
for wall mounting only. DO NOT install on a ceiling
or soffit.
For easy installation, select an existing light operated
by a wall switch for replacement.
For best performance, mount the fixture about 8 feet
(2.4 m) above the ground.
NOTE: If fixture is mounted
higher than 8 ft. (2.4 m), aiming the sensor down will reduce
coverage distance.