Clearing top cover fixing area jams, Clearing top cover fixing area jams 6-35, Ohdulqj7rs&ryhu)l[lqj$uhd-dpv – HP 2425 User Manual
Page 115
0HGLD-DPV
7URXEOHVKRRWLQJ3ULQWHU3UREOHPV
&OHDULQJ7RS&RYHU)L[LQJ$UHD-DPV
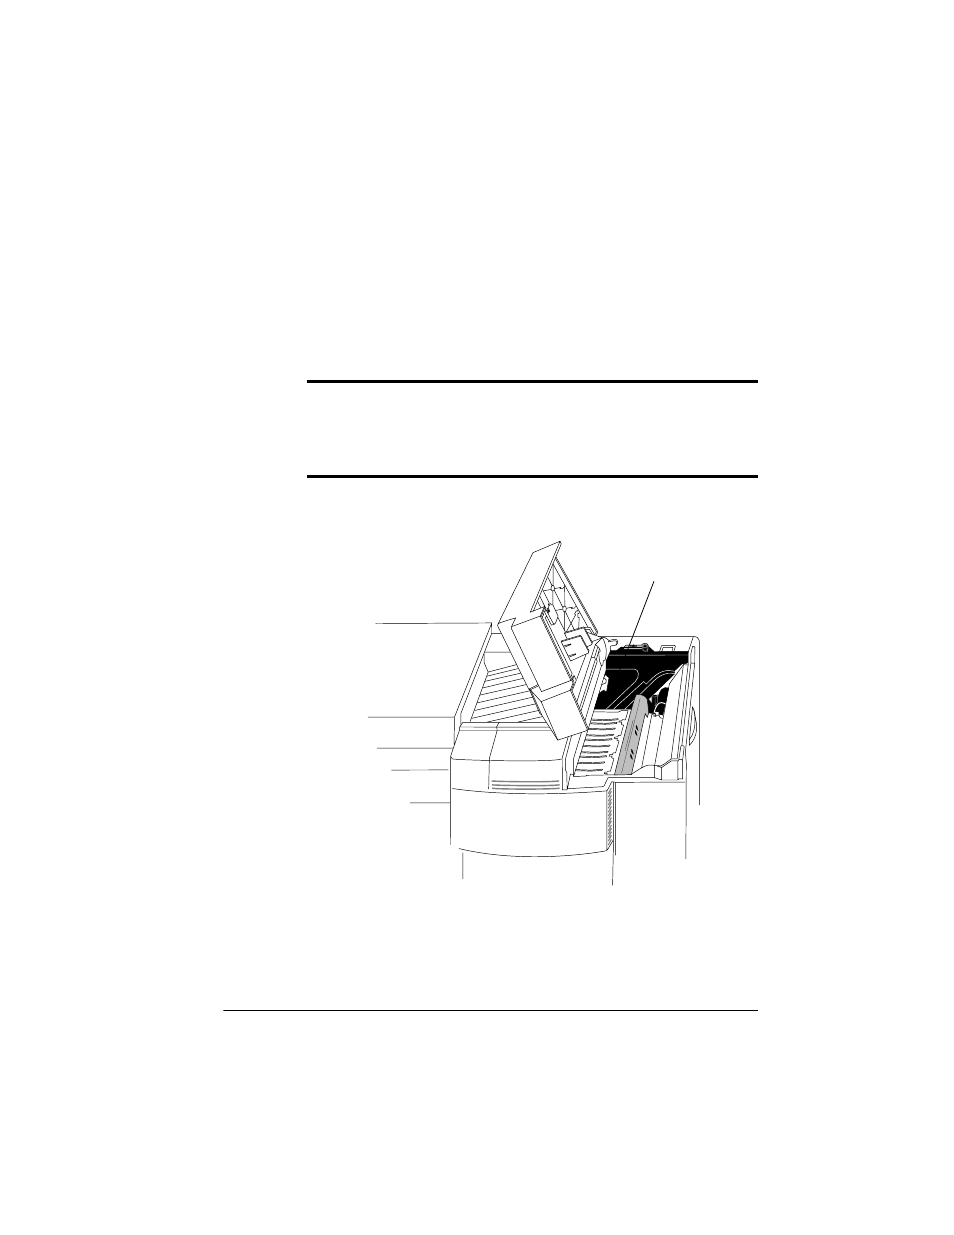
Follow these steps to clear a jam from the fixing unit area:
1
Open the printer’s top cover, remove the toner cartridge, and
locate the fixing unit assembly.
0
WARNING
: Be careful; the area around the fuser assembly is
hot.
ACHTUNG!
Verletzungsgefahr! Bei Betrieb wird die Umgebung
der Fixiereinheit heiß.
2
If the media is jammed inside the fixing unit assembly, grasp
the edge of the media and remove it.
3
If the jammed media has passed completely through the
fuser assembly and is partially visible in the upper output
bin, close the printer top cover, and then lift the media guide
arm and pull out the media slowly.
)L[LQJ8QLW-DP$UHD
See also other documents in the category HP Cameras:
- Photosmart M525 (46 pages)
- Photosmart 612 (84 pages)
- Photosmart R927 (58 pages)
- Photosmart R818 (220 pages)
- Photosmart R837 (56 pages)
- M305/M307 (154 pages)
- M407 (4 pages)
- M630 Series (48 pages)
- CC450 (82 pages)
- Photosmart E327 (130 pages)
- 320 Series (2 pages)
- Photosmart E317 (138 pages)
- R830/R840 (59 pages)
- Mz60 (28 pages)
- Photosmart Mz60 Series (48 pages)
- Photosmart 730 series (116 pages)
- R725 (56 pages)
- 612 (84 pages)
- PhotoSmart M23 (180 pages)
- M537 (49 pages)
- R818 (200 pages)
- R927 (2 pages)
- 318 (88 pages)
- M440 Series (2 pages)
- 720 Series (88 pages)
- PB360T (64 pages)
- Photosmart R927 R927 (44 pages)
- 715 (2 pages)
- PhotoSmart 945 (150 pages)
- PhotoSmart R967 (62 pages)
- R707 (191 pages)
- PhotoSmart C500 (4 pages)
- E217 (16 pages)
- R827 (56 pages)
- PhotoSmart 620 (80 pages)
- M527 (46 pages)
- PhotoSmart 850 (112 pages)
- M415 (178 pages)
- R967 (2 pages)
- Photosmart E330 series (68 pages)
- Version 3.0 (114 pages)
- 630 series (124 pages)
- R607 (179 pages)
- 930 (118 pages)