Front panel, Display, Prev button [prev – Edirol R-4Pro User Manual
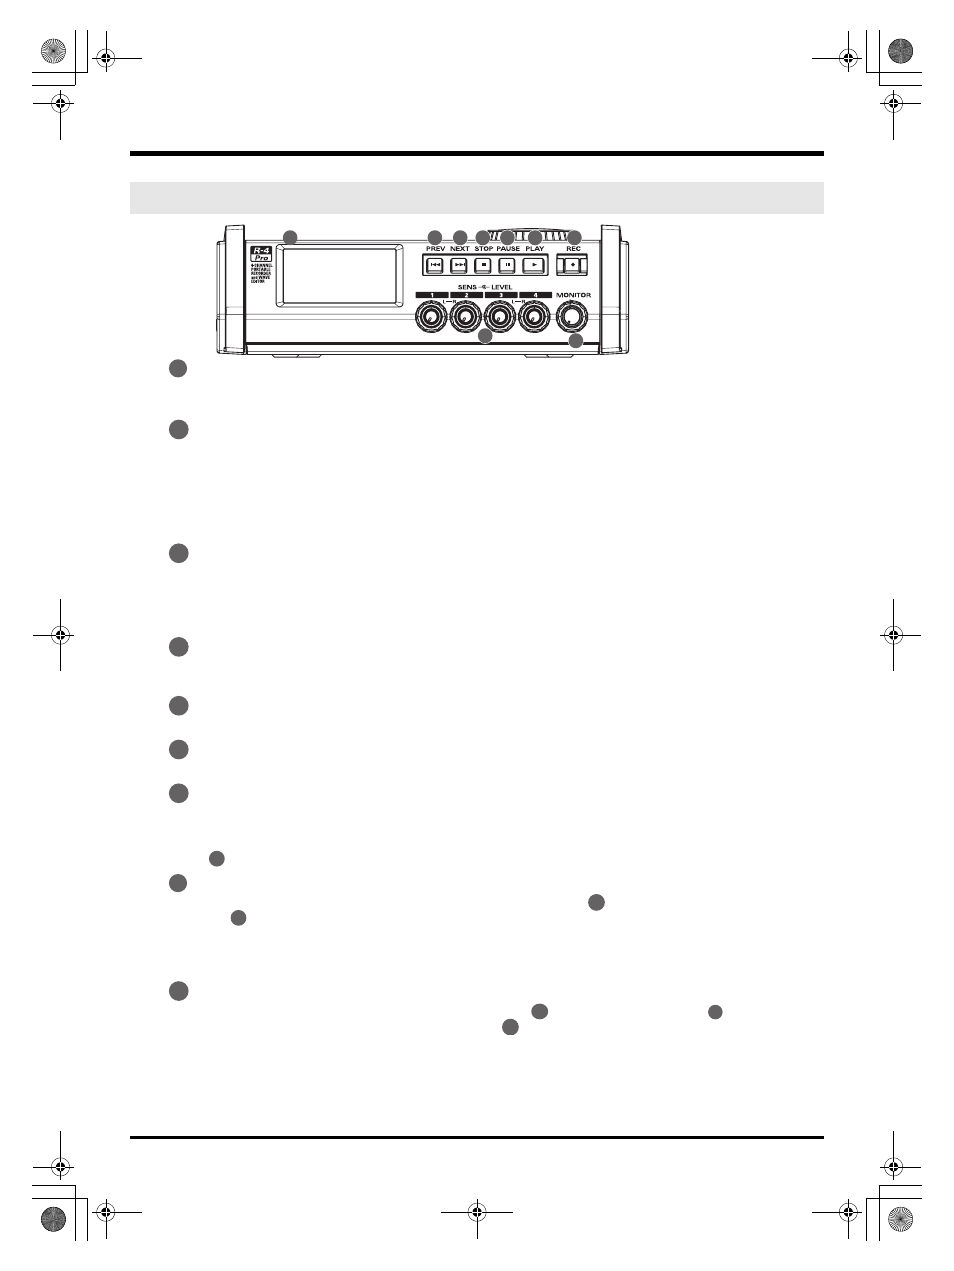
Page 13: Next button [next, Stop button [stop, Pause button [pause, Play button [play, Record button [rec, Input level knobs 1–4 [input gain]/[sens, Monitor level knob [monitor
13
Introducing the R-4 Pro
fig.panel-2.eps_50
Display
This shows information about the R-4 Pro’s status.
For details, refer to “Display” (p. 18).
PREV button [PREV]
Pressing the PREV button while a project is playing or stopped will take you to the beginning of the project
(00:00:00:00F). Pressing this button at the beginning of a project will take you to the preceding project.
You can also press and hold down this button to rewind. This is available both while playing and while
stopped.
* If Play Mode is set to Single in the Player Setup system setting, you can't move to the previous or next
project during playback.
NEXT button [NEXT]
Pressing the NEXT button will take you to the next project. You can also press and hold this button to fast-
forward. This is available both while playing and while stopped.
* If Play Mode is set to Single in the Player Setup system setting, you can't move to the previous or next
project during playback.
Stop button [STOP]
This button stops playback or recording. If you press the STOP button during playback, the timer counter
will display the time at which you pressed the STOP button.
Pause button [PAUSE]
This button pauses playback or recording.
Play button [PLAY]
This button starts playback. The PLAY button is lit blue during playback.
Record button [REC]
Recording will begin immediately when you press the REC button. The REC button is lit red during
recording. If you hold down the PAUSE button and press the REC button, the REC button will blink red,
and the R-4 Pro enters recording standby mode. Recording will begin when you then press the REC button
or
PAUSE button
.
Input level knobs 1–4 [INPUT GAIN]/[SENS]
These knobs adjust the input level from each XLR input connectors 1–4 (
). Input levels of the internal
mics
(
) are adjusted by input level knob 1 (MIC-L) and input level knob 2 (MIC-R).
You can adjust sensitivity to 11 levels: -56, -50, -44, -38, -32, -26, -20, -14, -8, -2, and +4 dBu. You can also set
LEVEL from negative infinity to +8 dB, with the central position at 0 dB.
* When the internal mics are used, sensitivity cannot be adjusted (the knob settings are invalid).
Monitor level knob [MONITOR]
This adjusts the output volume from the internal speakers (
) and the headphone jack (
).
You can’t adjust the volume from the line output jacks (
). If you want to adjust the volume of the line
output jacks, adjust the controls of the external speakers or playback system connected to the line output
jacks.
Front panel
18
19
20
21
22
23
25
26
24
18
19
20
21
22
23
24
22
25
36
1
26
2
37
40
R-4_e_new.book 13 ページ 2006年11月20日 月曜日 午後1時9分