Settings, Settings 41 – Dacor Transitional 30 Inch Double Electric Smart Wall Oven User Manual User Manual
Page 41
English 41
Oper
ating the o
v
en
Settings
In Settings, you can change the default settings to your preference or diagnose
problems with the network connection.
START
4:35 PM
Convection Bake
Faster, more even baking
UPPER
325
°F
LIGHT
TIMER
SETTINGS
OPEN/CLOSE
RESERVOIR
LOWER
UPPER
TIP
None
Cook Time
InstantHeat™
Off
Delay Start
None
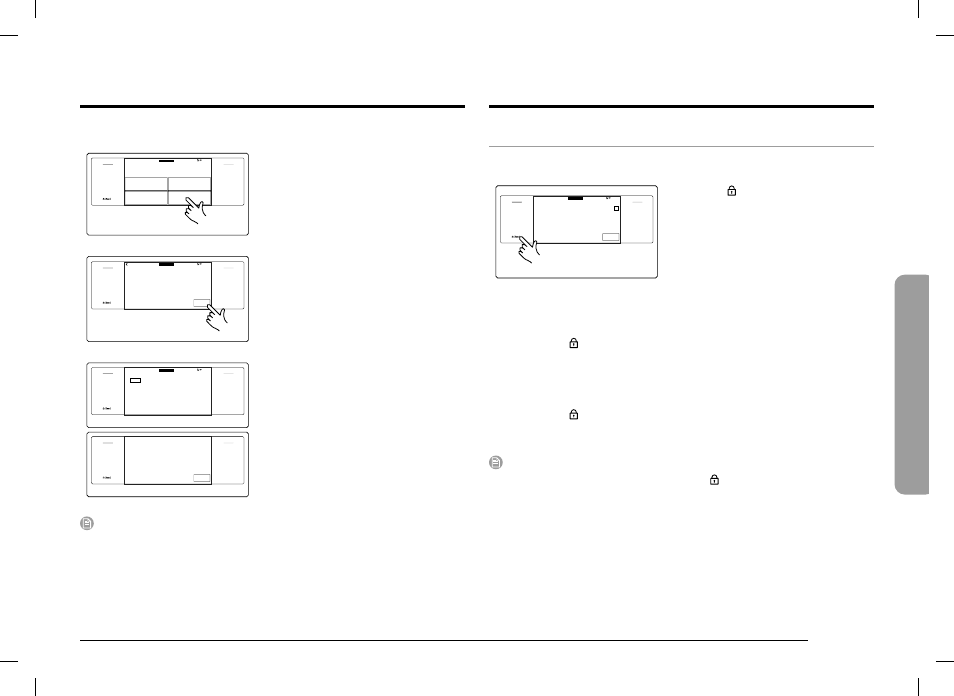
Tap
Settings
. The display will show the
Setting item.
Wi-Fi
To enable a Wi-Fi connection
1.
Tap
Settings
>
Wi-Fi
, and then tap
ON
in the right screen.
2.
Tap Wi-Fi, and then tap a Wi-Fi network in the list that appears.
3.
You will be prompted to provide a password for a secure network. Enter the
password.
To manually input an IP
1.
Tap
Settings
>
Wi-Fi
, and then tap
ON
in the right screen.
2.
Tap
Add Network
.
3.
Enter an IP manually, and then tap
CONNECT
to apply your settings.
NOTE
•
To disable a Wi-Fi connection, Tap
Settings
>
Wi-Fi
, and then tap
OFF
in the
right screen.
•
For details about the Wi-Fi connection and using the SmartThings app, see the
SmartThings app user manual.
iQ Control
To start the oven remotely.
•
Tap
Settings
>
iQ Control
, and then tap
ON
of
UPPER
or
LOWER
. (See the
using the iQ Control feature section on page 33.)
How to run a draining
Self clean
Descale
4:35 PM
GreenClean™
Draining
UPPER
Clean
LIGHT
TIMER
SETTINGS
OPEN/CLOSE
RESERVOIR
LOWER
UPPER
1.
Turn the Mode knob to Clean. The
display will show 4 cleaning selections.
2.
Tap
Draining
.
Draining
Water is draining after Steam function use.
4:35 PM
UPPER
START
LIGHT
TIMER
SETTINGS
OPEN/CLOSE
RESERVOIR
LOWER
UPPER
3.
Tap
START
. The oven drains water
from the steam generator to the water
reservoir.
Draining
Draining…
Caution: Hot Water.
Do not remove Water Reservoir while draining.
4:35 PM
UPPER
View
Summary
LIGHT
TIMER
SETTINGS
OPEN/CLOSE
RESERVOIR
LOWER
UPPER
Draining is complete.
OK
LIGHT
TIMER
SETTINGS
OPEN/CLOSE
RESERVOIR
LOWER
UPPER
4.
When draining is complete, use oven
gloves to remove and empty the water
reservoir.
NOTE
Once the oven starts draining, please wait until the draining cycle is complete.
DOB30x977Dx_AA_DG68-01313A-01_EN+MES+CFR.indb 41
DOB30x977Dx_AA_DG68-01313A-01_EN+MES+CFR.indb 41
2023-03-14 오전 10:30:40
2023-03-14 오전 10:30:40