Using the microphone, Using an external device instead of a microphone, Tion on/off (p. 7) – Roland JD-Xi Analog/Digital Synthesizer (Black) User Manual
Page 7
To obtain the Parameter Guide (PDF)
1
Enter the following URL in your computer.
http://www roland com/manuals/
2
Choose the “JD-Xi” as the product name.
Using the Microphone
* If you’re using a commercially available microphone, be
sure to set the SYSTEM parameter Mic Sel to “Other ”
When using a commercially available microphone, adjust
the INPUT Level parameter.
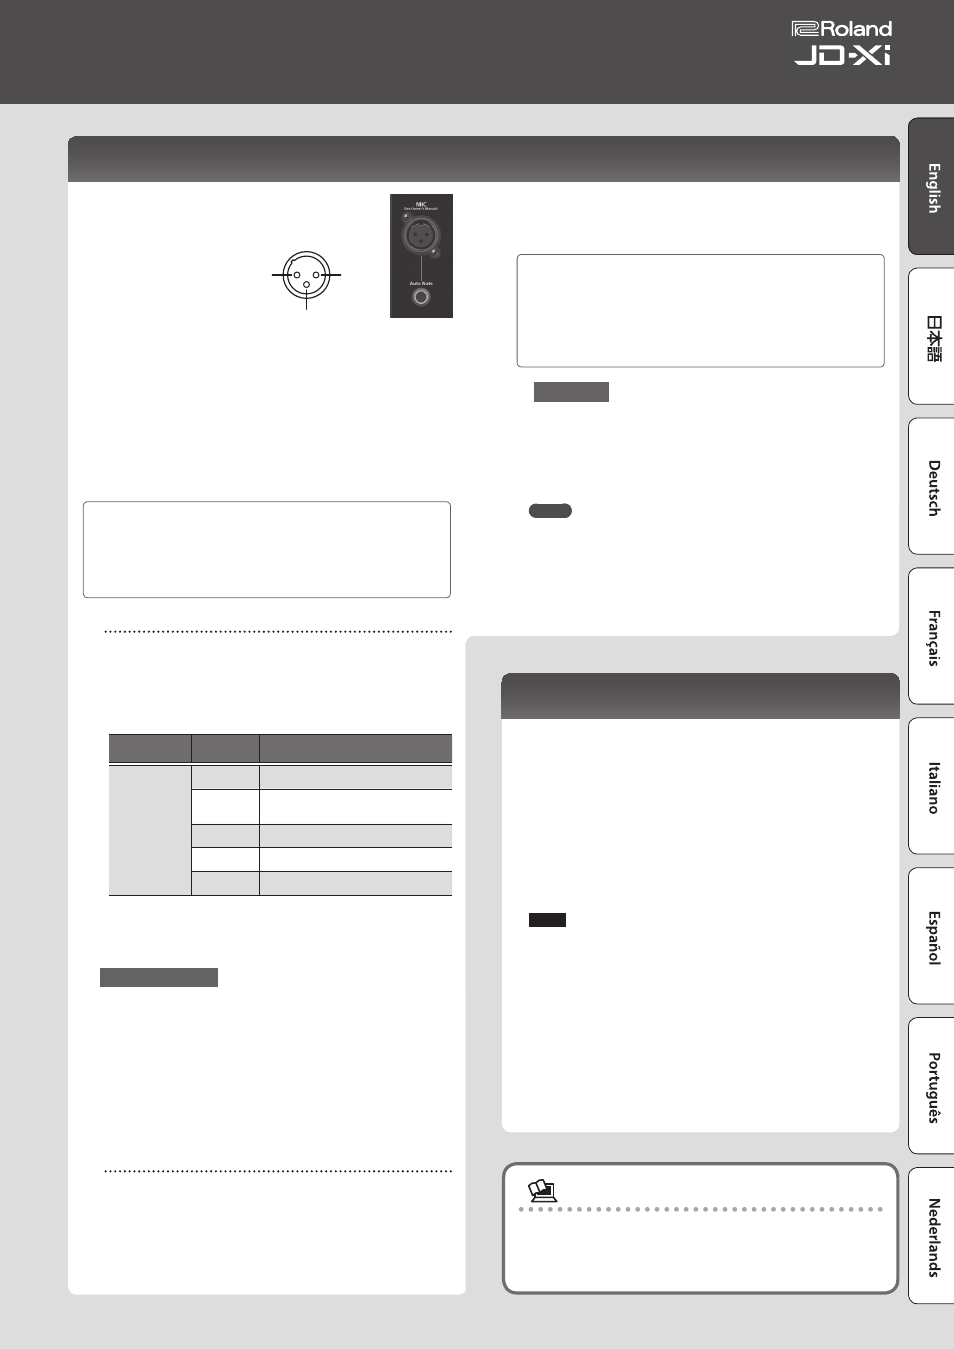
* This instrument is
equipped with XLR
type input jack. Wiring
diagrams for this jack is
shown in the illustration.
Make connections after
first checking the wiring
diagrams of other equipment you intend to connect.
* Acoustic feedback could be produced depending on the location of
microphones relative to speakers. This can be remedied by:
5
Changing the orientation of the microphone(s).
5
Relocating microphone(s) at a greater distance from speakers.
5
Lowering volume levels.
1
Connect the included microphone to the MIC jack.
After you’ve connected the microphone, adjust its direction and angle.
Instead of the included microphone, you can also use a commercially available
dynamic microphone or a device connected to the INPUT jack.
You can’t use the mic if a device is connected to the INPUT jack
If devices are connected to both the MIC jack and the INPUT jack, the
JD-Xi is designed to give priority to the INPUT jack, meaning that the MIC
jack is not available.
If you want to use the microphone, disconnect any device from the INPUT
jack.
Setup
1
Press the [Menu/Write] button.
2
Use the Cursor [
K
] [
J
] buttons to select “SYSTEM,” and press the
[Enter] button.
3
Use the Cursor [
K
] [
J
] buttons to select a parameter, and use the
Value [-] [+] buttons to edit that parameter’s value.
Menu
[Shift] + Cursor [
K
] [
J
]
Parameter
Cursor [
K
] [
J
]
Value
Value [-] [+]
INPUT
Level
(Input level)
-20–+40 dB (input level for MIC and INPUT)
Mic Sel
(Mic select)
Attached (when using the included
microphone), Other (when using a
commercially-available dynamic microphone)
NS SW
OFF, ON (turns the noise suppressor on/off)
(cuts noise during silent periods)
NS Threshold
0–127 (volume at which noise suppression
begins)
NS Release
0–127 (time from when noise suppression
begins until the volume reaches 0)
4
When you’ve finished making settings, press the [Exit] button
several times to return to the top screen.
The settings are saved automatically.
Vocoder/Auto Pitch
The “Vocoder” adds effects to a human voice. If you run your voice through the
vocoder, you can give it a toneless, robotic tone.
Control the pitch by playing the keyboard.
AutoPitch sounds suppress pitch irregularity, producing a pitch-corrected
sound. By applying a stair-step constraint to pitch change, this creates a
mechanical effect.
1
Use the category dial to select “Vocoder/AutoPitch.”
2
Use the Tone [-] [+] buttons to select a tone.
3
Vocalize into the mic while you play the keyboard.
If you’ve selected an AutoPitch tone, there’s no need to play the keyboard.
Setup
1
Press the [Menu/Write] button.
2
Use the Cursor [
K
] [
J
] buttons to select “Vocoder Edit” or
“AutoPitch Edit,” and then press the [Enter] button.
3
Use the Cursor [
K
] [
J
] buttons to select a parameter, and use the
Value [-] [+] buttons to edit that parameter’s value.
&
For details on the parameters, refer to “Parameter Guide” (PDF).
4
When you’ve finished making settings, press the [Exit] button
several times to return to the top screen.
Vocoder and AutoPitch settings are saved individually for each program.
&
“Saving a Sound (Program) (WRITE)” (p. 9)
Note when using Vocoder and AutoPitch
5
Vocoder and AutoPitch can be used only on one Digital Synth part.
5
If Vocoder or AutoPitch are selected, the Analog Synth part does not
produce sound.
5
The effect might not work correctly if you input sound other than
human voice, or if you’re using the system in a noisy environment.
Auto Note
Auto Note is a function that detects the pitch of your voice, and plays that
pitch. By inputting your voice, you can play notes as if you were playing the
keyboard.
1
Press the [Auto Note] button to make it light.
2
Input your voice from the microphone; sound is heard even
though you’re not playing the keyboard.
MEMO
If you use Auto Note to record a pattern, the Pitch Bend Range is fixed at 24. If
you turn Auto Note OFF and play back the pattern, the pitch change might be
different than when recording. If you want a pattern that was recorded with
Auto Note to play back in the same way as when it was recorded, change the
Pitch Bend Range to 24.
&
For details on the parameters, refer to “Parameter Guide” (PDF).
1: GND
2: HOT
3: GND
1: GND
2: HOT
3: GND
TIP: HOT
RING: COLD
SLEEVE: GND
Using an External Device Instead of a Microphone
You can connect a guitar or audio player to the rear panel INPUT (MONO) jack
and use it with the vocoder or Auto Note function in the same way as when
using a microphone.
1
Connect your device to the rear panel INPUT jack.
If a device is connected to the rear panel INPUT (MONO) jack, the top
microphone input is disabled.
2
Set the LINE/GUITAR select switch appropriately for the device
that you connected.
Select the GUITAR position if you connected a guitar, and select the LINE
position if you connected a keyboard or an audio player.
3
Adjust the input level as described in steps 2–5 of “Using a
Microphone.”
NOTE
5
The Vocoder, AutoPitch, and Auto Note functions are optimized for
vocal input. Unexpected sound may result if you input audio from a
guitar or an audio player.
5
The effect might not work correctly if you input sound other than
human voice, or if you’re using the system in a noisy environment.
7
Owner’s Manual