Choosing a sound (program), Using favorite sounds (programs) (favorite) – Roland JD-Xi Analog/Digital Synthesizer (Black) User Manual
Page 5
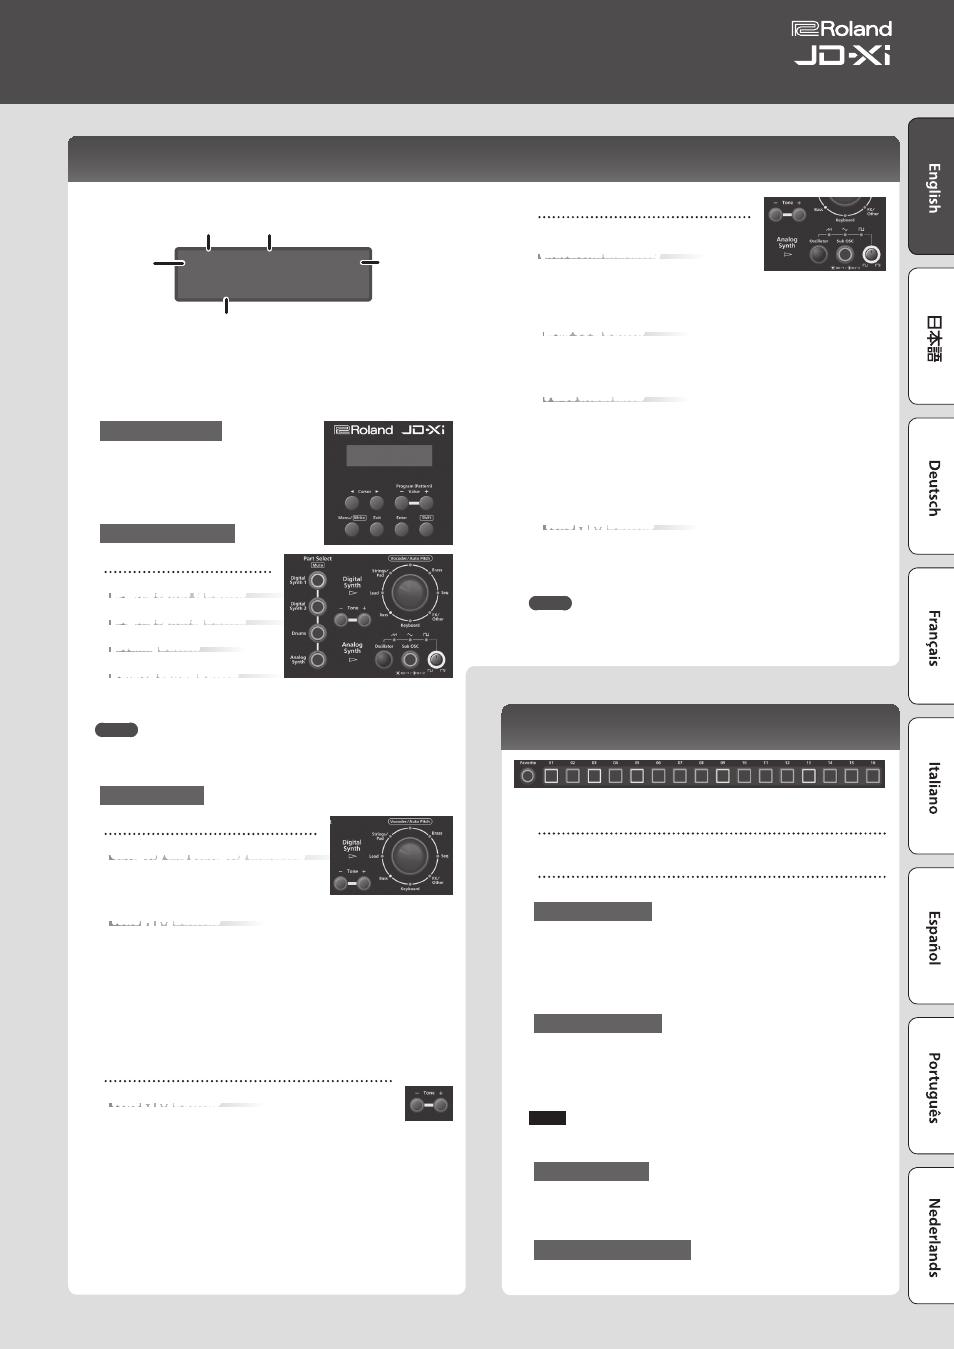
Choosing a Sound (Program)
Top screen
A64 1-1 120
256:Synth Lead01
Program number Measure–beat
Tone number: Tone name
* Sounds that don’t show a tone number are sounds that
have been edited for an individual program. If you want
to return to the original sound after you’ve switched
or edited the sound, hold down the [Shift] button and
press the [Enter] button.
Tempo
Program
bank
Choosing a Program
1
Use the Program (Pattern) Value [-] [+]
buttons to select a program.
To switch banks, hold down the [Shift] button
and use the Value [-][+] buttons (preset banks
A–D, user banks E–H).
Choosing a Part to Play
Part Select buttons
[Digital Synth 1] button
[Digital Synth 2] button
[Drums] button
[Analog Synth] button
1
Press the Part Select button of
the part that you want to play.
MEMO
You can’t select and perform on multiple parts simultaneously. However you
can make multiple parts be heard simultaneously by recording them to a
pattern.
Choosing a Tone
Digital Synth 1/2 part
Category dial (Category indicator)
Here’s how to select the category that specifies
the basic type of sound.
The category whose indicator is lit is selected.
Tone [-] [+] buttons
Select a tone.
1
Use the Part Select buttons to select Digital Synth 1/2.
2
Turn the category dial (category indicator) to select the category
that specifies the basic type of sound.
* Vocoder/AutoPitch can be used for only one part. Also, the Analog
Synth part becomes unavailable if you select Vocoder/AutoPitch.
3
Use the Tone [-] [+] buttons to select a tone.
Drums part
Tone [-] [+] buttons
Select a tone (drum kit).
1
Use the Part Select buttons to select Drums.
2
Use the Tone [-] [+] buttons to select a tone (drum kit).
The Drums part lets you play a different instrument on each key. The
instrument name is printed above each key; for example “BD1.”
Analog Synth part
[Oscillator] button
(waveform indicator)
This selects the waveform that is the basis of
the Analog Synth part’s sound. The waveform
whose indicator is lit is selected.
T
(Sawtooth wave),
S
(Triangle wave),
U
(Square wave)
[Sub OSC] button
This layers an additional sound onto the Oscillator. You can choose 1 octave
down (lit) or 2 octaves down (blinking).
The sub-oscillator is square wave only.
Pulse width knob
This specifies the pulse width.
If Oscillator is set to
U
(Square wave), this knob specifies the width of the
upper portion of the pulse wave (i.e., the pulse width) as a percentage of a full
cycle.
Lowering the value makes the pulse width narrower until it approaches a
square wave (pulse width = 50%).
Raising the value makes the pulse width wider, producing a more distinctive
sound.
Tone [-] [+] buttons
Select a tone.
1
Use the Part Select button to choose a Analog Synth.
2
Use the Tone [-] [+] buttons to select a tone.
MEMO
You can use the [Oscillator] button to switch the waveform that is the basis of
the sound.
* While you hold down the
[Shift] button, the upper line
shows the program name.
Using Favorite Sounds (Programs) (Favorite)
[Favorite] button
Use these button to register and recall your favorite sounds (programs).
[01]–[16] buttons
Use these buttons to select Favorite 01–16.
Selecting a Favorite
1
Press the [Favorite] button to make it light.
The number buttons become the Favorite select buttons.
2
Press one of the [01]–[16] buttons to select a favorite sound.
If you press a button in which nothing is registered, the screen indicates “Not
Registered!”
Registering a Favorite
1
Select a program that you want to register as a favorite.
2
Hold down the [Favorite] button and press the [01]–[16] button to
which you want to register the selected program.
The currently selected program is registered to that button.
NOTE
If you’ve edited a program, save that program first before registering it as a
favorite (p. 9).
Deleting a Favorite
1
While the [Favorite] button is on, hold down the [Erase] button
and press the [01]–[16] button whose registration you want to
delete.
Switching the Favorite Bank
&
“Switching the Favorite Bank” (p. 6)
5
Owner’s Manual