Panel descriptions, Top panel, Top panel 2 – Roland JD-Xi Analog/Digital Synthesizer (Black) User Manual
Page 2
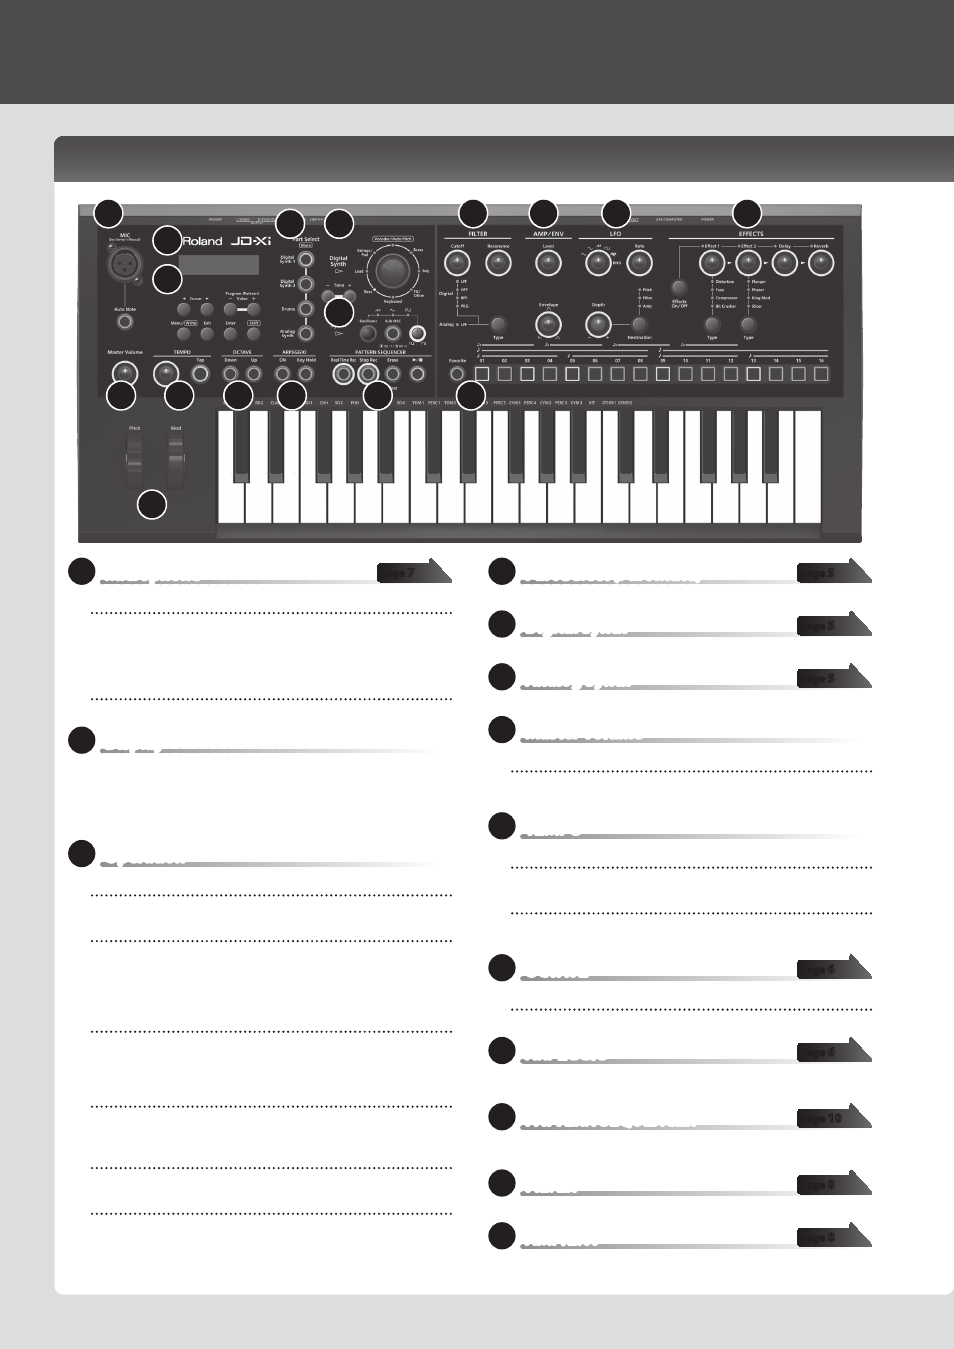
1
Microphone
MIC jack
Connect the included microphone here. If an external device is connected
to the rear panel INPUT jack, the INPUT jack takes priority.
* If you’re using a commercially available microphone, be sure to set the
SYSTEM parameter Mic Sel to “Other” (p 15)
[Auto Note] button
Turns the Auto Note function on/off (p. 7).
2
Display
Shows various information for the operation.
* The explanations in this manual include illustrations that depict what
should typically be shown by the display. Note, however, that your unit may
incorporate a newer, enhanced version of the system (e.g., includes newer
sounds), so what you actually see in the display may not always match what
appears in the manual.
3
Operation
Cursor [
K
] [
J
] buttons
Move the cursor left/right.
Program (Pattern) Value [-] [+] buttons
Select a program.
To switch banks, hold down the [Shift] button and use the Value [-] [+]
buttons.
Use these buttons to edit values in the various edit screens.
[Menu/Write] button
Accesses the Menu screen.
To save edited data, hold down the [Shift] button and press the
[Menu/Write] button.
[Exit] button
Returns you to the previous screen.
In some screens, this cancels the operation currently being executed.
[Enter] button
Press this to confirm a value or execute an operation.
[Shift] button
Use this button in conjunction with other buttons or knobs to access edit
screens for each function.
4
Part Select (Part Mute)
Here you can select the part that’s played by the keyboard.
5
Digital Synth
Here can select tones for the Digital Synth part or Drums part.
6
Analog Synth
Here you can select a tone for the Analog Synth part.
7
Master Volume
[Master Volume] knob
Adjusts the volume that is output from the OUTPUT jacks and PHONES
jack.
8
TEMPO
Tempo knob
Specifies the tempo of the arpeggio or pattern sequencer.
[Tap] button
Press the button at least three times, at quarter-note intervals of the
desired tempo.
9
OCTAVE
[Down] [Up] buttons
Raise or lower the keyboard in steps of one octave.
10
ARPEGGIO
You can play an arpeggio simply by holding down a chord on the
keyboard.
11
PATTERN SEQUENCER
You can record your keyboard playing or knob movements and replay
them repeatedly.
12
FILTER
Here you can make filter settings.
13
AMP/ENV
Here you can specify the volume and time-varying volume change.
page
page
page
page
page
page
page
page
Panel Descriptions
Top Panel
1
2
3
4
5
6
7
8
9
10
11
12
13
14
15
16
17
2