When installing the shell covering, Covering size – Roland PD-140DS V-Pad Digital Snare User Manual
Page 4
4
1.
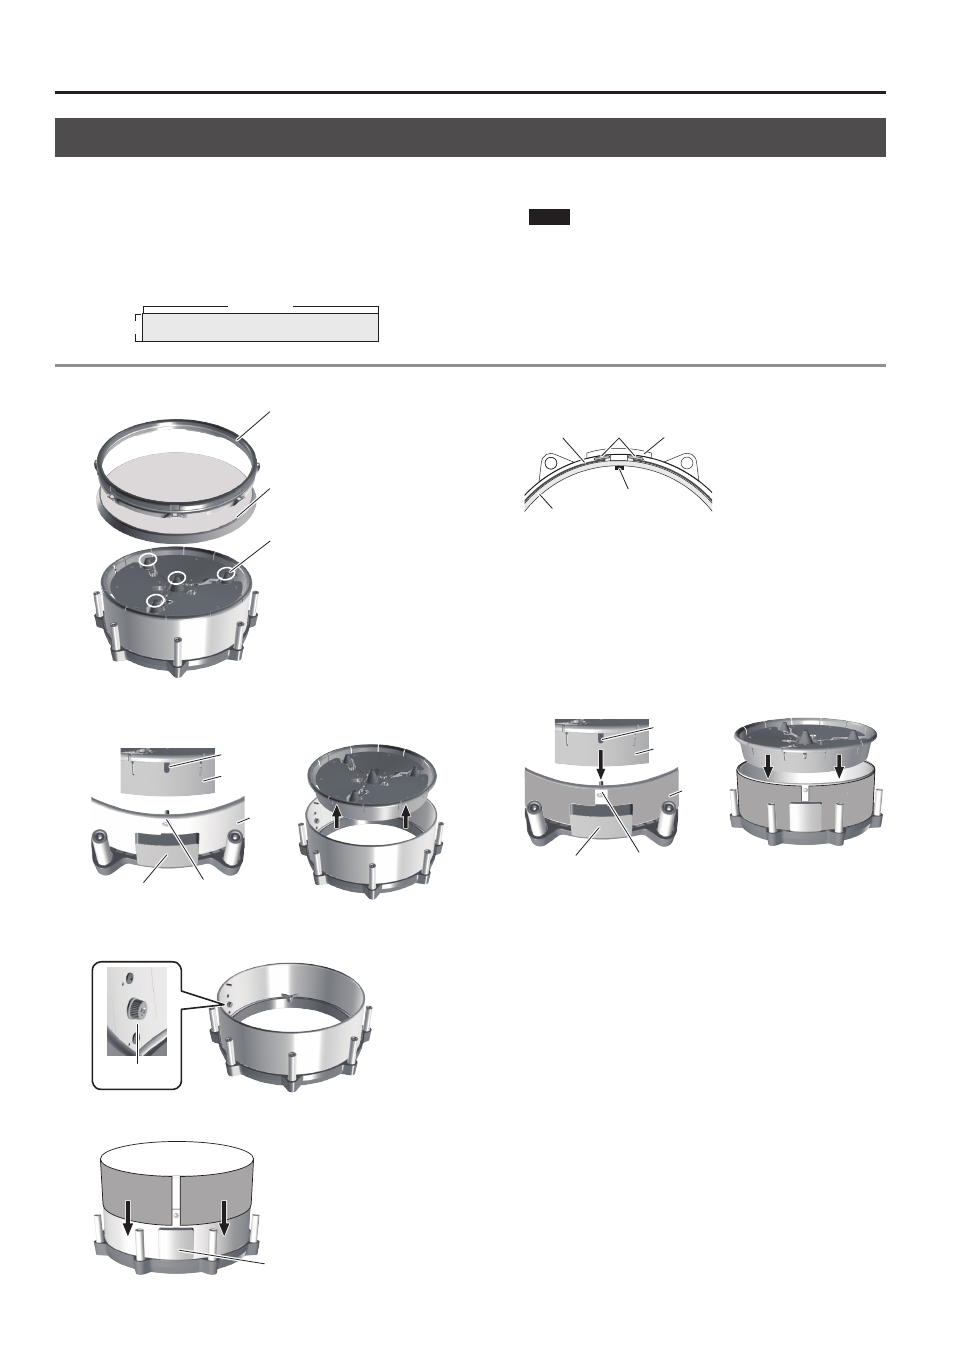
Loosen all tuning bolts, and remove the hoop and head.
Hoop
Head
Do not touch the sensors located at
the top of the frame.
Otherwise, you risk causing damage
or malfunction.
2.
Remove the frame by disengaging the pins of the shell
from the holes of the frame.
Shell
Pin
Hole
Shell cover
Frame
3.
Use a Phillips screwdriver to loosen the screw that fastens
the covering by approximately two full turns.
Screw
4.
Attach the covering.
Shell cover
Both edges of the covering will fit into the gap between the shell
and plate.
Plate
Shell
Covering
Screw
Shell cover
5.
While pulling on both ends of the covering so as to
eliminate any slack, finger-tighten the screw that holds
the covering in place.
6.
Using a Phillips screwdriver, securely fasten the screw that
holds the covering in place.
7.
Align the frame so that the pin of the shell fits into the
hole of the frame, and install the frame in the shell.
Shell
Pin
Hole
Shell cover
Frame
* Make sure that the frame is securely fitted into the shell.
8.
Attach the hoop and head, and tighten the tuning bolts.
9.
Adjust the tension of the head.
Refer to “Adjusting the Head Tension” (p. 3).
When Installing the Shell Covering
By using a covering, you can customize the shell design to your taste. Please follow the instructions below.
* You will also need to have a Phillips screwdriver.
Covering size
If you wish to install an original covering, you can use a covering of
the following size.
98 (width) x 1,060 (length) mm, maximum thickness: 1 mm
98 mm
1,060 mm
NOTE
5
Applying excessive force to the sensors located under the
head can damage them and/or interfere with accurate
triggering.
5
Be careful not to hurt your fingers on the corners or points of
the metal parts.