Chapter 3. hdd install/remove – PLANET NAS-7200 User Manual
Page 9
Chapter 3. HDD Install/Remove
3.1 NAS-7100 - 1-Bay SATA NAS Server
The NAS-7100 supports one 3.5-inch Serial-ATA (SATA) hard drive. NAS-7100 does
not support low profile or half high hard drive.
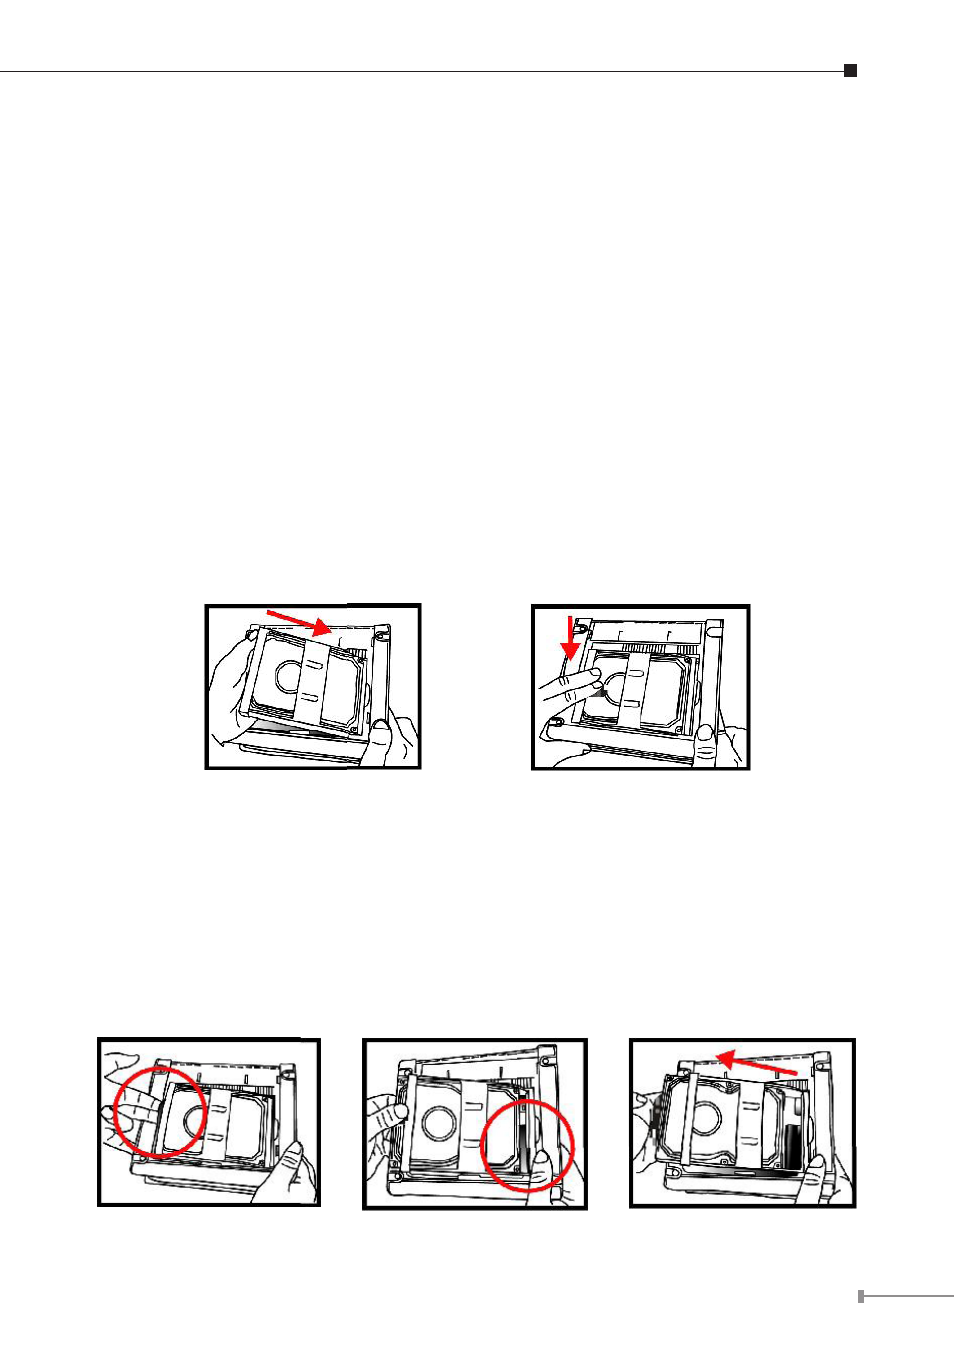
HDD Install
1. Make sure the NAS-7100 is powered off
2. Open top cover of NAS-7100
3. Make sure your hard drive is SATA interface and make sure you back up all pre-
existing data before use it on NAS-7100
4. Pull up the HDD tray then slide and push the HDD into the tray, make sure
connector well connecting
5. Push down the HDD tray
6. Put the top cover of NAS-7100 back to finish HDD install
HDD Remove
1. Make sure the NAS-7100 is power off
2. Open top cover of NAS-7100
3. Pull up the HDD tray,
4. Pull out the HDD till SATA connector release then the HDD can slide out of HDD
tray
- ISW-1022M (167 pages)
- ADE-2400A (8 pages)
- ADE-3400 (2 pages)
- ADE-3400 (61 pages)
- ADE-3400 (73 pages)
- ADW-4401 (84 pages)
- ADE-4400 (2 pages)
- ADE-4400 (2 pages)
- ADE-3100 (51 pages)
- ADE-3410 (2 pages)
- ADW-4401 (2 pages)
- ADW-4401 (2 pages)
- ADN-4000 (91 pages)
- ADN-4000 (2 pages)
- ADN-4000 (118 pages)
- ADN-4100 (2 pages)
- ADN-4100 (2 pages)
- ADN-4100 (2 pages)
- ADN-4100 (104 pages)
- ADN-4100 (115 pages)
- ADN-4102 (2 pages)
- ADU-2110A (2 pages)
- ADU-2110A (37 pages)
- ADW-4302 (8 pages)
- ADW-4302 (6 pages)
- ADW-4100 (57 pages)
- GRT-501 (51 pages)
- GRT-501 (52 pages)
- PRT-301W (32 pages)
- VC-100M (26 pages)
- CS-2000 (16 pages)
- CS-2000 (13 pages)
- CS-2000 (573 pages)
- BM-525 (205 pages)
- CS-1000 (226 pages)
- BM-2101 (278 pages)
- CS-2001 (16 pages)
- CS-2001 (848 pages)
- CS-500 (12 pages)
- SG-4800 (182 pages)
- CS-5800 (12 pages)
- FRT-401NS15 (12 pages)
- FRT-401NS15 (76 pages)
- FRT-405N (108 pages)
- FRT-405N (2 pages)