Installation – Electrolux PLHV36W6CC User Manual
Page 5
5
Installation
Preparation of mounting surface (Drywall)
1. Select a mounting height comfortable for the user and mark on wall behind
cooktop.
2. Mark center line of cooktop and draw vertical line from bottom of hood to the
ceiling.
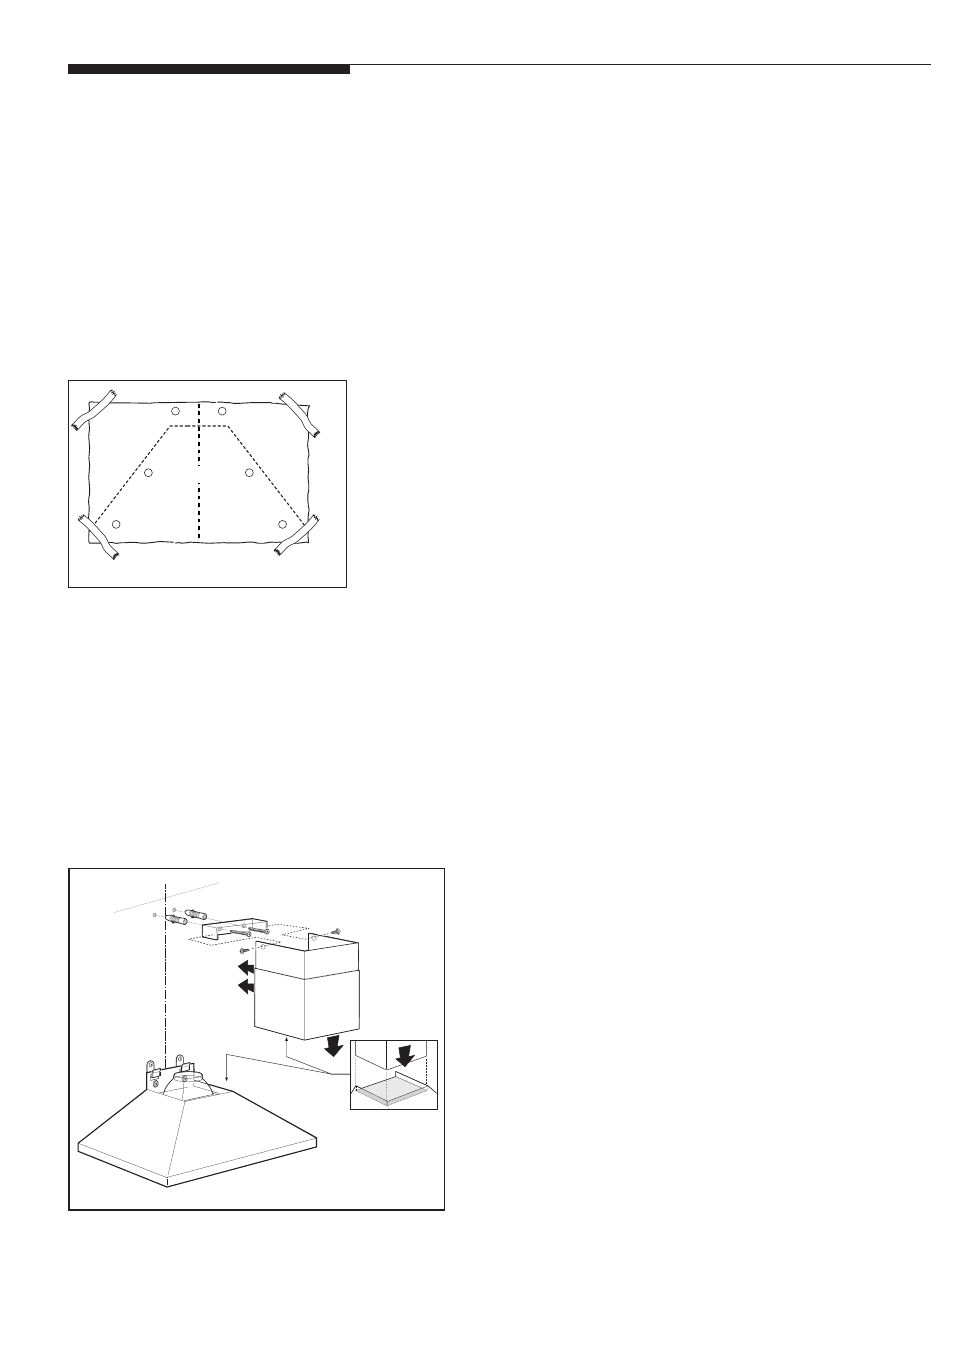
3. Tape template, matching center-line and hood bottom as shown in Figure 2.
4. Mark centers of the 6 fastener locations through template on wall then remove
template.
5. Mark wall with horizontal line 1" above highest and 1" below lowest fastener
location.
6. Find studs behind drywall by
tapping wall or using a stud finder. Mark the center of the studs with a vertical
line to the right and left of the marked fastener location.
Note: 2 x 6's must span at least 2 studs side to side.
7. Cutout drywall along marked lines. Install 2 x 6's between studs firmly flush with
stud front. Make sure all mounting screws will anchor to added lumber. Replace
drywall and refinish.
8. Remark center line and hood bottom on same location as before and tape
template on wall as in step 3 above.
9. Mount 2 mounting hooks with wood screws (supplied in mounting hardware kit)
on locations
marked on template, then remove template.
10. Install duct cover ceiling bracket to wall flush to ceiling with drywall anchors
supplied. Figure 3.
Figure 2
CL
16
16
Figure 3
Tools required for installation
Screw driver
(flat head, pozidrive n°2 and torx 10)
Allen key 4mm
Electric drill with twist bit Ø 10 mm