Setting up the mgp to work with the switcher, Setting up the mgp to work with the switcher, Preliminar y – Extron electronic Multi-Graphic Processor MGP 464 DI User Manual
Page 121
PRELIMINAR
Y
6-3
MGP 464 • Special Applications
In this type of configuration, the following occurs:
On the MGP, window 1 displays input 1, window 2 displays input 2, and so
•
forth.
Input switches are made at the matrix switcher instead of at the MGP.
•
Input presets are recalled on the MGP to correctly set up the input coming
•
from the switcher. This setup can include the video signal type; picture
controls; advanced input configuration functions such as setting the active
lines/pixels, total lines/pixels, and pixel phase; and the input name.
You can perform the required MGP setup operations using any of the following:
SIS commands (See chapter 4.)
•
The MGP 464 Web pages (See chapter 5.)
•
The Windows-based control software (See chapter 4 and the software’s
•
Help.)
Setting up the MGP to work with the switcher
Follow these steps to set up the MGP to work with a matrix switcher.
1
.
Install and connect the MGP as described in the “Installation Overview”
section of chapter 2, “Installation,” with the exception of step
3
.
In place of
step 3, do the following:
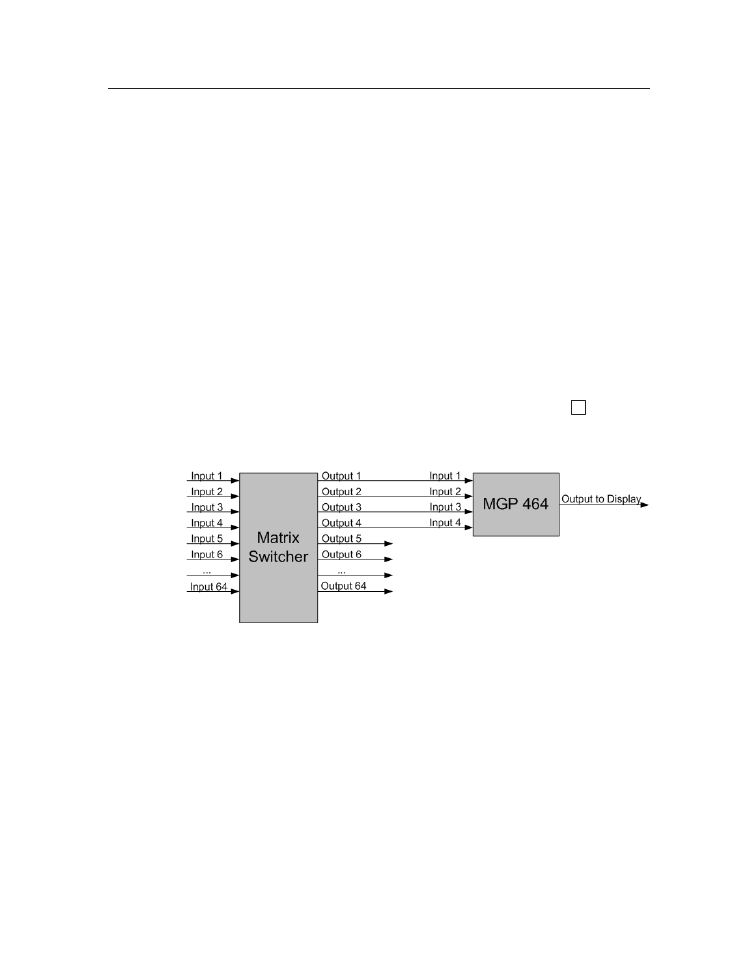
Connect the MGP’s four fully-configurable inputs to four of the matrix
switcher’s outputs. (See the diagram below.)
Connecting the matrix switcher to the MGP 464
2
.
Size the windows on the MGP to full screen. You can do this quickly by
selecting window preset 1, 31, 61, 91, or 121.
3
.
On the matrix switcher, tie input 1 to the four switcher outputs that are
connected to the MGP 464. (Refer to your matrix switcher user’s manual for
the procedure.)
4.
Select window 1 on the MGP, and configure the input as follows:
a
. Set the following input sampling parameters as desired: signal type,
horizontal and vertical start, total pixels, active pixels, and active lines.
b
. Set the following picture controls as desired: image size, image position,
color, tint, brightness, and contrast.
c
. Set the pixel phase for window 1, then mute the window to display the
next window behind it. Repeat this step for windows 2, 3, and 4.
d
. Save the adjusted settings as Input Preset 1.