Epson 7800 User Manual
Page 19
R4CD380/E850
Unpacking and Setup Guide
Rev.C
ENGLISH.FM
A4 size
4/6/05
R
Proof Sign-off:
KOW M.Arai K.Nishi
K.Nishi
NOC K.Lee
19
En
g
lis
h
6. After inserting all ink cartridges in their
corresponding slot, lower the ink levers. The
printer starts initial ink charging.
7. After a while, ink lever messages appear on
the LCD. Raise or lower the ink levers
accordingly until READY appears on the LCD,
which indicates initial ink charging is
completed.
8. Close the ink compartment cover.
After installing all eight ink cartridges, the printer
begins charging the ink delivery system and the
Power light flashes (for about 10 minutes). When
the ink delivery system is charged, the Power light
stops flashing.
c
Caution:
Never do the following while the Power light is
flashing; otherwise damage may occur:
❏ Turn off the printer
❏ Open the front cover
❏ Set the ink lever in the up position
❏ Move the paper lever to the released
position
❏ Remove the maintenance tank
❏ Unplug the power cord
❏ Remove the ink cartridges
Loading the Roll Paper
To load the roll paper onto the printer, follow the
instructions below.
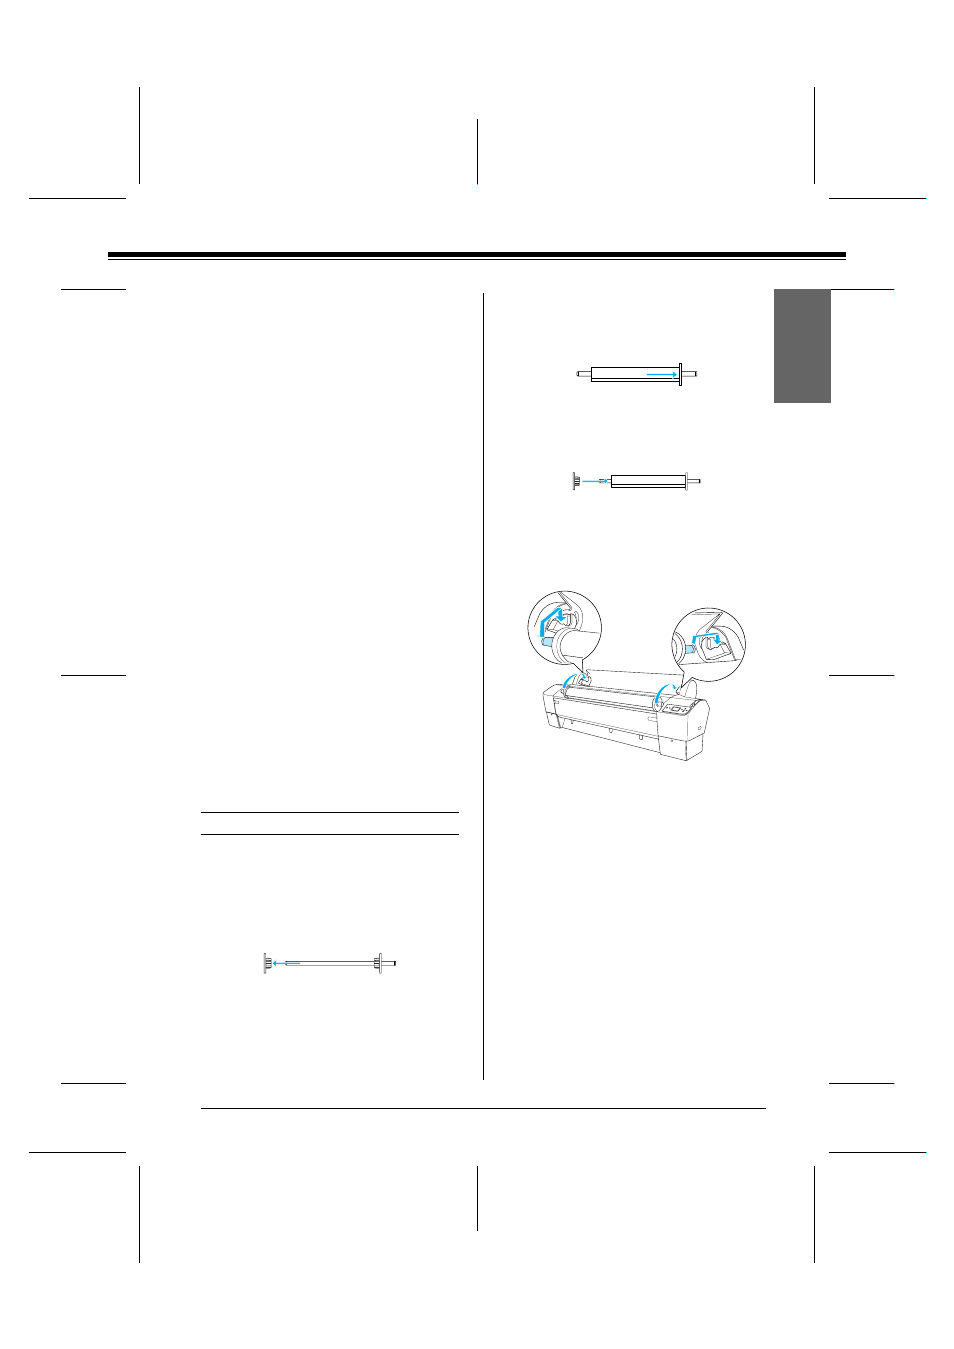
1. Slide the movable flange off the end of the
spindle.
2. Place the roll paper on a flat surface so that it
unwinds in the direction shown. Slide the roll
paper onto the spindle and fully onto the fixed
flange.
3. Slide the movable flange back onto the spindle
until it fixes into place in the end of the roll
paper.
4. Open the roll paper cover. Holding the
spindle, fit the left and right ends of the
spindle into the mounting brackets inside the
printer.
Note:
The spindle and mounting brackets are
color-coded. Mount the spindle into the mounting
bracket that is the same color as the end of the
spindle.
5. Make sure that the printer is turned on.