Eiki LC-NB3E User Manual
Page 17
-17-
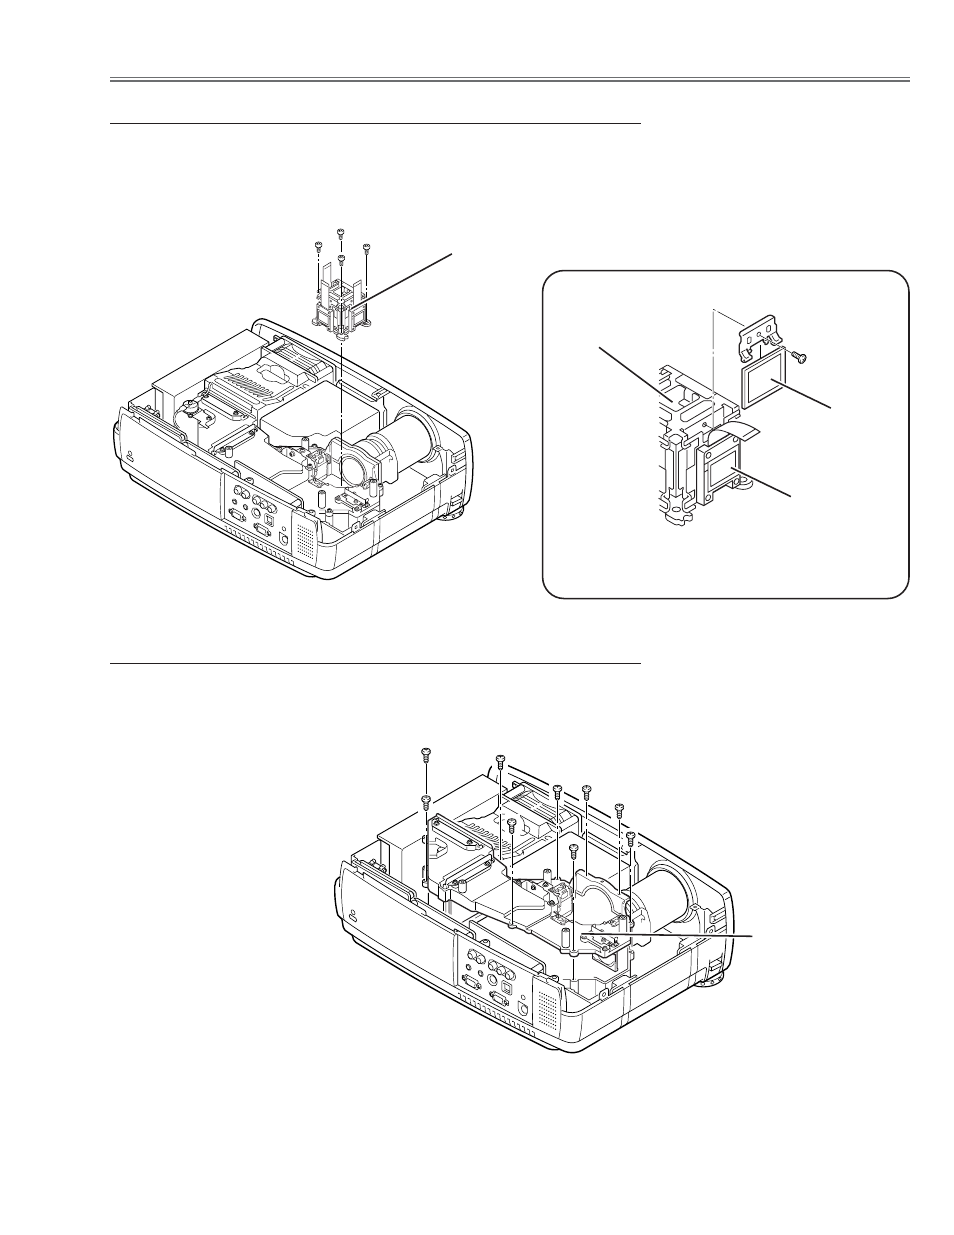
1
Remove 4 screws
A
and take the LCD/Prism ass’y off upward from the
optical unit.
2
Remove each screw
B
and take the glass off upward.
Polarized
Glass-Out
LCD Panel/Prism
Ass’y
LCD Panel/Prism Ass’y
Fig.7-
2
* Glass should be placed as the film
attached side comes to the LCD
panel side.
LCD Panel
Note:
Do not replace the LCD panel
separately otherwise it can
not obtain proper picture.
1
Remove 9 screws to take the Optical Unit Top off upward.
Fig.7-
1
Fig.8
Polarized Glass-Out removal
Optical Unit Top removal
Optical Parts Disassemblies
B
A
A
A
Optical Unit Top
See also other documents in the category Eiki Projectors:
- LC-SX1U (1 page)
- LC-XNB4M (1 page)
- LC-XNB5M (1 page)
- AH-55301 (2 pages)
- Portable Visual Presenters V5300 (1 page)
- LC-HDT10 (52 pages)
- LC-XT9 (64 pages)
- LC-XB31 (1 page)
- AH-51401 (2 pages)
- LC-XT3 (2 pages)
- OHP-3000M (1 page)
- LC-XG250 (1 page)
- LC-SD10 (1 page)
- LC-XNB5MS (1 page)
- EIP-1600T (69 pages)
- LC-X1 (1 page)
- LC-XB10 (48 pages)
- EZ 250 (30 pages)
- LC-NB4 (48 pages)
- LC-X990 (54 pages)
- LC-XE10 (60 pages)
- LC-SVGA860 (1 page)
- LC-X1100 (1 page)
- LC-X71 LC-X71L (107 pages)
- LC-XM4 (1 page)
- EIP-3500 (2 pages)
- LC-XB20 (2 pages)
- LC-W3 (60 pages)
- EIP-X350 (35 pages)
- LC-X2U (58 pages)
- SXGA Powerhouse Two Series LC-SX2U (1 page)
- LC-NB3S (1 page)
- LC-XB25 (1 page)
- EIP-1000T (1 page)
- LC-XGA970UE (1 page)
- LC-X4LA (1 page)
- LC-SX4LA (1 page)
- 3850A (1 page)
- EIP-200 (68 pages)
- QXXAVC922---P (144 pages)
- LC-SM3 (44 pages)
- LC-SB22 (64 pages)
- EIP-1 (31 pages)
- LC-X2UL (1 page)
- AH-45601 (2 pages)