Jordan Valve Mark ED & ET Series (8) Globe Style Control Valve User Manual
Page 5
-5-
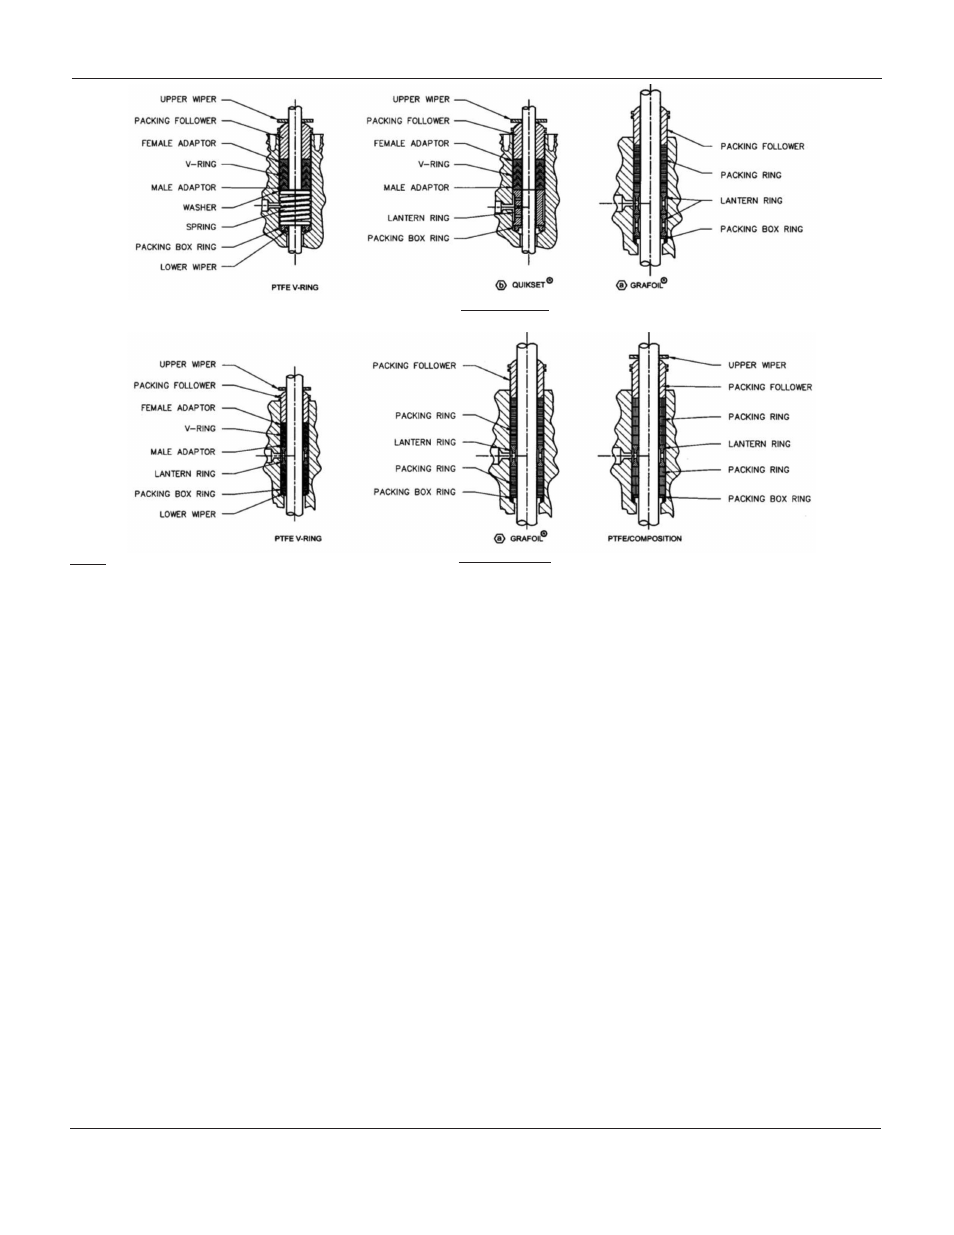
Double Packing
All Yoke sizes
Single Packing
All Yoke sizes
Notes:
a.) Grafoil is a registered trademark of Union Carbide
b.) Quickset is a registered trademark of Garlock Inc.
Making Up the Stem Connection
Direct-Acting Actuators
1.
Move the valve plug to the closed position.
2.
Thread the actuator stem locknuts to the bottom
of the plug stem threads. Position the
travel indicator disc, cupped edge downward,
over the stem. Apply enough spring force to the
actuator stem to ensure the actuator is in the
“full up” position.
3.
Move the actuator stem to the full downward po-
sition by applying full loading pressure
to the diaphragm case. Measure the distance
between the lower end of the actuator stem and
the travel indicator disc on the stem locknuts.
4.
Slowly decrease the load on the actuator, allow
ing the stem to rise up approximately by 1/8”.
Using the two-piece stem connector and
cap screws, secure the actuator stem and valve
plug stem together.
5.
Place the travel indicator disc against the bot-
tom of the stem connector. Secure the disc in
place with the upper locknut. Adjust the
travel indicator scale so it reads “closed.”
6.
Relieve the diaphragm loading pressure
and check for sufficient travel. i.e.) Move
ment of valve plug to the fully “Open”
position. Tighten the lower stem locknut
against the upper locknut. The connection
is now complete.
To increase desired length of travel:
a.
Loosen both stem locknuts away
from the stem connector by ap-
proximately 1/4” and then tighten
them
together.
b.
This adjustment will allow a wrench
to be used on the locknuts to
screw the valve plug stem to the
desired
position.
c.
Caution: ensure that the valve plug
is not seated while being rotated.
Do not exceed the 1/8” adjustment
made in Step 4.
d.
Retighten the stem connector and
locknuts after adjustment.
e.
Reposition the travel indicator
scale to reflect the change.
Figure 3: Packing Arrangements
M
ark
ED
anD
ET S
EriES
8-
inch
G
lobE
S
TylE
c
onTrol
V
alVES