Radio software, Site controller hardware, Site controller software – Ericsson LBI-39076B User Manual
Page 14: Figure 6 - location of prom card in older computer
LBI-39076B
INSTALLATION
14
1. RADIO SOFTWARE
The 1st step to install the ELI option applies only to
MDR full-duplex radios. If you plan to use this type of
radio with your ELI system, make sure each radio contains
344A4271Gx software (where x = 2 or higher). See the
manual for the radio to get instructions on where to find the
software and how to determine its version.
2. SITE CONTROLLER HARDWARE
The 2nd step to install the ELI option is to verify that
the Site Controller computer is a VAX model. PDP models
will not support the ELI option. Since some PDP models
have been upgraded to a VAX model, you cannot tell if it is
a PDP or VAX from the outside. To know for sure, you
must look inside the PDP system chassis and check what
cards are installed. PDP models that have been upgraded to
a VAX model will have their cards arranged in the card cage
as shown in Figure 3.
KA620-BA
MS630-BB
MRV11-D
H3656-00
CQ1610#1
CQ1610#2
EMPTY
EMPTY
EMPTY
Figure 3 - Card Layout for PDP Upgraded to VAX
If you find that the Site Controller computer is a PDP
model, upgrade kits are available through Ericsson Service
Parts. Alternatively, the PDP model may be replaced with
the current 19A149302P9 VAX model.
3. SITE CONTROLLER SOFTWARE
The 3rd step to install the ELI option consists of the
following two parts:
1. Check the revision of the Application Software
PROMs (replacement might be necessary).
2. Replace the Personality PROMs.
Both sets of PROMs are located on the PROM card in
the Site Controller computer. Access to the PROM card in
the latest VAX version of the Site Controller computer is
through the back. Use the following procedure:
3. Turn off the Site Controller computer.
4. Loosen the two fastener screws holding the back
panel to the chassis (see Figure 4).
2
3
4
5
6
7
8
15
28
29
30
31
1
0 SM
14
13
12
11
10
9
27
26
25
24
20
21
22
23
19
18
17
16
Fastener
Screws
Figure 4 - Location of Fastener Screws on Computer
3. Rotate the back panel down and out of the way (be
careful not to damage the ribbon cables).
4. Remove the PROM Card (see Figure 5) by pulling
on the two tabs fastened to the front edge of the
card. (Observe standard handling practices for
static sensitive components.)
PROM Card
Figure 5 - Location of PROM Card in Computer
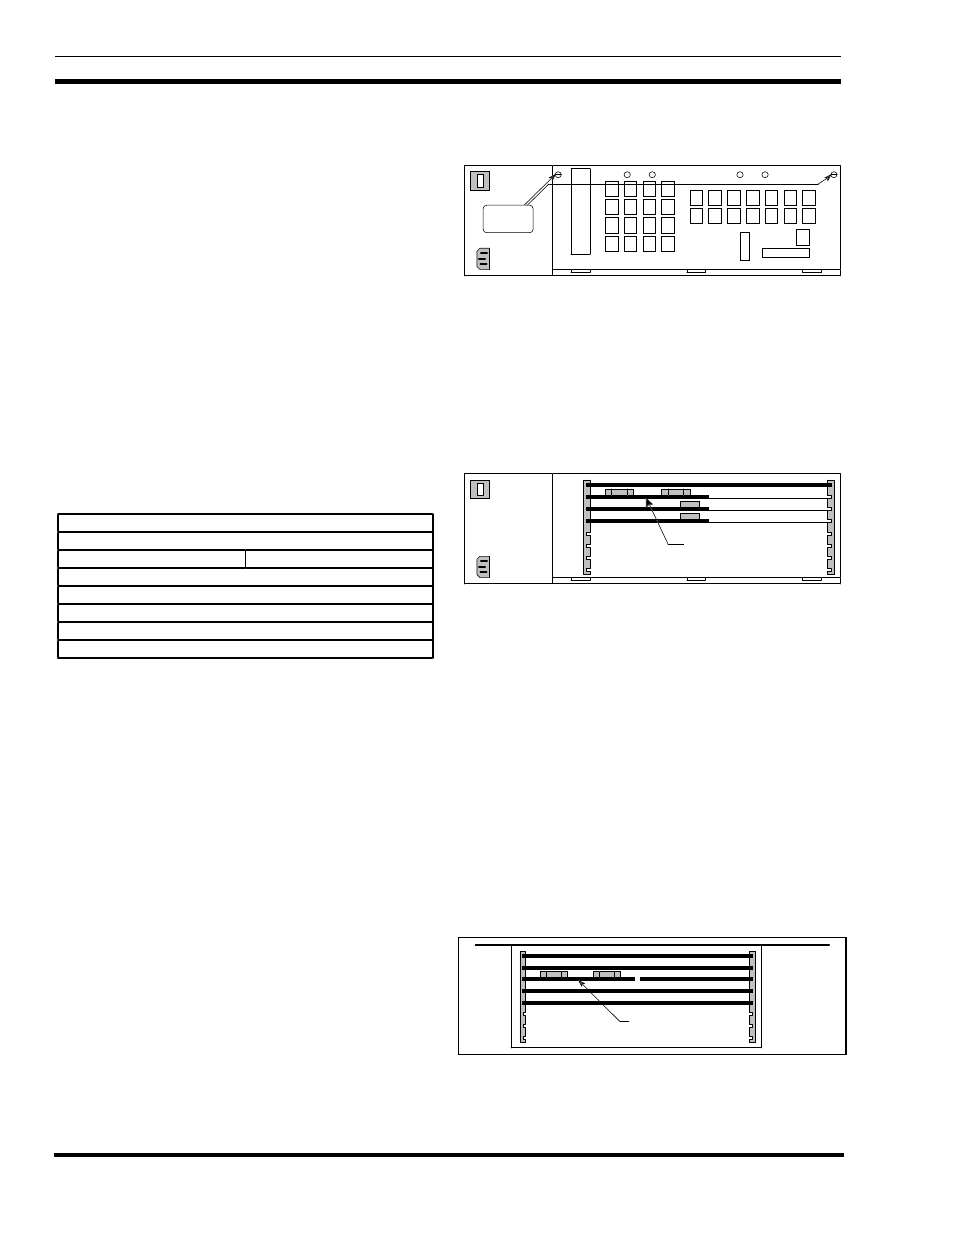
Access to the PROM card in previous VAX versions
and older PDP versions that were upgraded to a VAX
version is through the top. Use the following procedure:
1. Turn off the Site Controller computer.
2. Pull the Site Controller computer chassis all the
way forward on its slide-out track.
3. Pull up the top cover and the attached card cage.
4. Remove the PROM Card (see Figure 6) by pulling
on the two tabs fastened to the front edge of the
card. (This is a three-handed operation - observe
standard handling practices for static sensitive
components.)
PROM Card
Figure 6 - Location of PROM Card in Older Computer