Grass Valley T2 Classic iDDR Addendum User Manual
Page 28
28
Users Manual (Addendum for SP3)
November 30, 2010
Chapter 2 T2 XDCAM Option
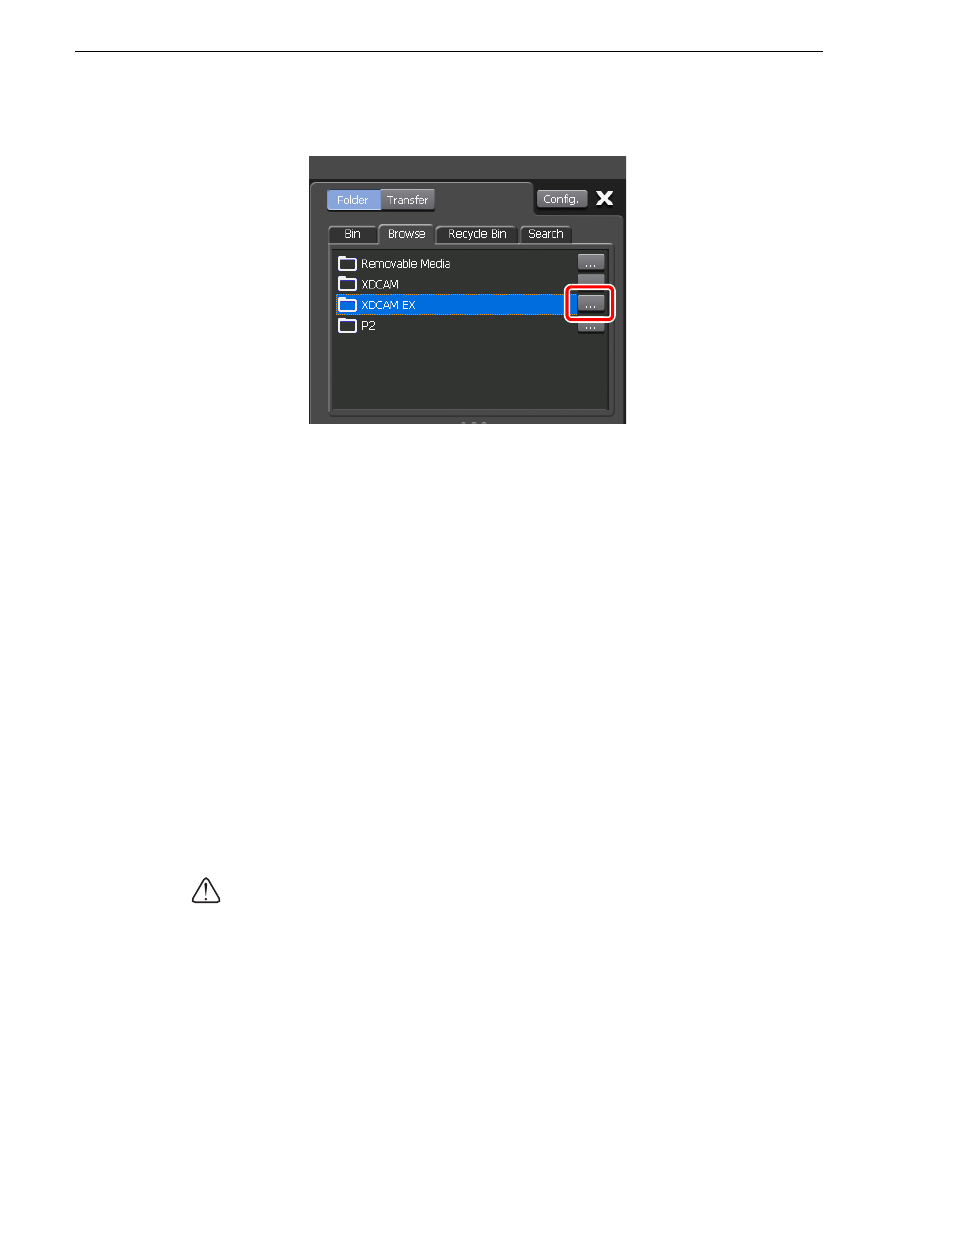
2. In the Browse tab, click
...
for XDCAM EX.
3. Select the XDCAM EX drive in the "Browse For Folder" dialog box, and then click
OK
.
• The drive name is added to the XDCAM EX node in the Browse tab, and the clip
list is displayed.
4. Select the clip(s) you want to import, right-click on it, and then click
Import
.
• Multiple clips can be selected.
• The Import dialog box appears.
5. Select the import destination bin.
• You can click
New Bin
to create a new bin and specify it as the import
destination.
• You can select a clip in the clip list on the Import dialog box and click
Up
or
Down
to change the import order.
• You can select a clip in the clip list on the Import dialog box and click
Delete
to
delete it from the import list.
6. Click
Start
.
• The conversion and import begin. You can check the progress in the transfer
screen.
CAUTION: By default, the system will pause any transfer and conversion during a
recording or playback. If you want to change the setting to allow transfer and
conversion to be performed even during a recording or playback, click
Config.
and
then click
Common
in the "Transfer" tree. Unchecking
Pause file transfers while
recording or playing out.
enables transfer and conversion even during a recording
or playback. However, if this option is unchecked, the recording/playback
operations may not be performed normally, therefore, we recommend that you use
the system with this option checked.