Lcd control, Setup mode, User’s guide – Grass Valley NV9642 v.1.2 User Manual
Page 75
65
NV9642
User’s Guide
If the ‘Panel ID’ button is high-tally, you may change the panel ID. Normally, only your system
administrator would do that.
Press ‘Exit’ on the right to return to the menu.
LCD Control
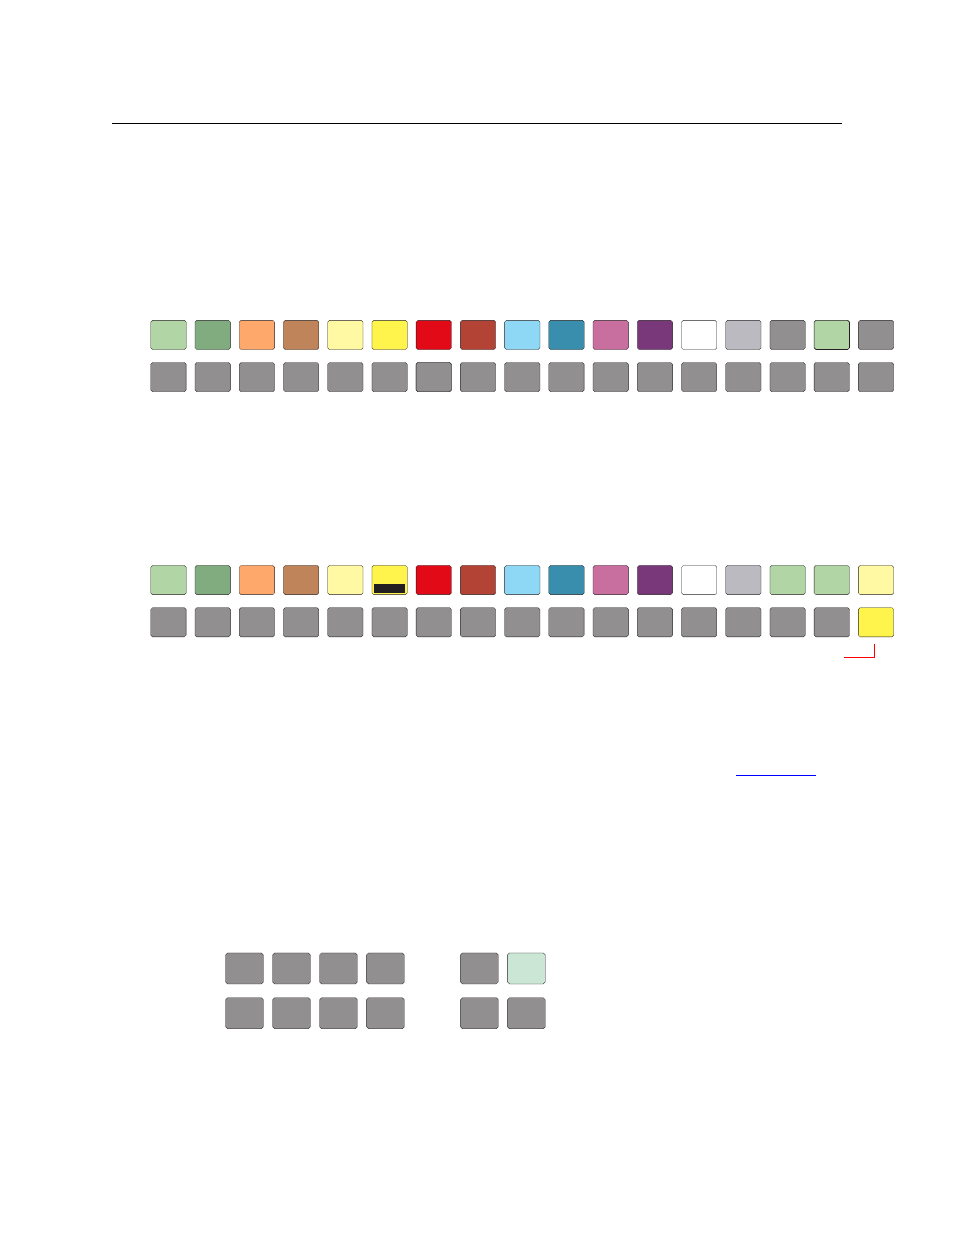
Press the ‘LCD Control’ button to view and change LCD brightness. When you do, the current
LCD button state appears on the 14 top left buttons:
The 14 buttons occur in pairs
—
one pair for each defined color. The pair shows the high tally
and low tally values for the particular color.
You can change high-tally from high to medium brightness and change low tally to medium or
low brightness, as long as high tally is brighter than low tally. (They cannot both be medium, for
instance.)
To change a color’s brightness, select the button for the color you want to change. Press either
the ‘Make Color Lighter’ button or the ‘Make Color Darker’ button, whichever is available:
If you make a change, press ‘Save’ to commit the change or press ‘Cancel’ to discard the change.
If you have made no changes, just press ‘Exit’ to return to the menu.
The actual colors cannot be represented accurately in print or in a PDF file displayed on your
screen. There is a small amount of variation in color from button to button. See
page 81 for a color chart.
Setup Mode
Setup mode occurs when the NV9642 is disconnected from its network and is freshly powered
up. In setup mode, you can set or change the panel ID, determine software versions, and
perform a test of the panel’s buttons. It is in setup mode that you must initially set the panel ID.
The panel powers up with the top right button illuminated in green and reading ‘Menu’:
It can take a few seconds for the menu buttons to appear.
LCD HI
LCD HI
GREEN
GREEN
HIGH
HIGH
LCD LO
LCD LO
AMBER
AMBER
LOW
LOW
EXIT
EXIT
LCD LO
LCD LO
GREEN
GREEN
LOW
LOW
LCD HI
LCD HI
AMBER
AMBER
HIGH
HIGH
LCD HI
LCD HI
YELLOW
YELLOW
HIGH
HIGH
LCD HI
LCD HI
RED
RED
HIGH
HIGH
LCD LO
LCD LO
RED
RED
LOW
LOW
LCD LO
LCD LO
YELLOW
YELLOW
LOW
LOW
LCD HI
LCD HI
BLUE
BLUE
HIGH
HIGH
LCD LO
LCD LO
PURPLE
PURPLE
LOW
LOW
LCD LO
LCD LO
BLUE
BLUE
LOW
LOW
LCD HI
LCD HI
PURPLE
PURPLE
HIGH
HIGH
LCD HI
LCD HI
GREY
GREY
HIGH
HIGH
LCD LO
LCD LO
GREY
GREY
LOW
LOW
LCD HI
LCD HI
GREEN
GREEN
HIGH
HIGH
LCD LO
LCD LO
AMBER
AMBER
LOW
LOW
SAVE
SAVE
CANCEL
CANCEL
LCD LO
LCD LO
GREEN
GREEN
LOW
LOW
LCD HI
LCD HI
AMBER
AMBER
HIGH
HIGH
LCD HI
LCD HI
YELLOW
YELLOW
HIGH
HIGH
LCD HI
LCD HI
RED
RED
HIGH
HIGH
LCD LO
LCD LO
RED
RED
LOW
LOW
LCD LO
LCD LO
YELLOW
YELLOW
LOW
LOW
LCD HI
LCD HI
BLUE
BLUE
HIGH
HIGH
LCD LO
LCD LO
PURPLE
PURPLE
LOW
LOW
LCD LO
LCD LO
BLUE
BLUE
LOW
LOW
LCD HI
LCD HI
PURPLE
PURPLE
HIGH
HIGH
LCD HI
LCD HI
GREY
GREY
HIGH
HIGH
LCD LO
LCD LO
GREY
GREY
LOW
LOW
MAKE
MAKE
COLOR
COLOR
BRIGHTER
BRIGHTER
MAKE
MAKE
COLOR
COLOR
DARKER
DARKER
Controls (only one or the other of these is
available at any moment)
MENU
MENU