Replacing components – England's Stove Works 25PAH User Manual
Page 35
35
IMPORTANT! READ AND FOLLOW ALL INSTALLATION AND MAINTENANCE INSTRUCTIONS, INCLUDING
CLEANING THE UNIT AS SPECIFIED, AND REPLACING GASKETS ANNUALLY, AND PARTS AS NEEDED.
ENGLAND’S STOVE WORKS IS NOT RESPONSIBLE FOR ANY DAMAGE OR INJURY INCURRED DUE TO NEGLECT, OR
DUE TO UNSAFE INSTALLATION OR USAGE OF THIS PRODUCT. CALL TECHNICAL SUPPORT WITH QUESTIONS.
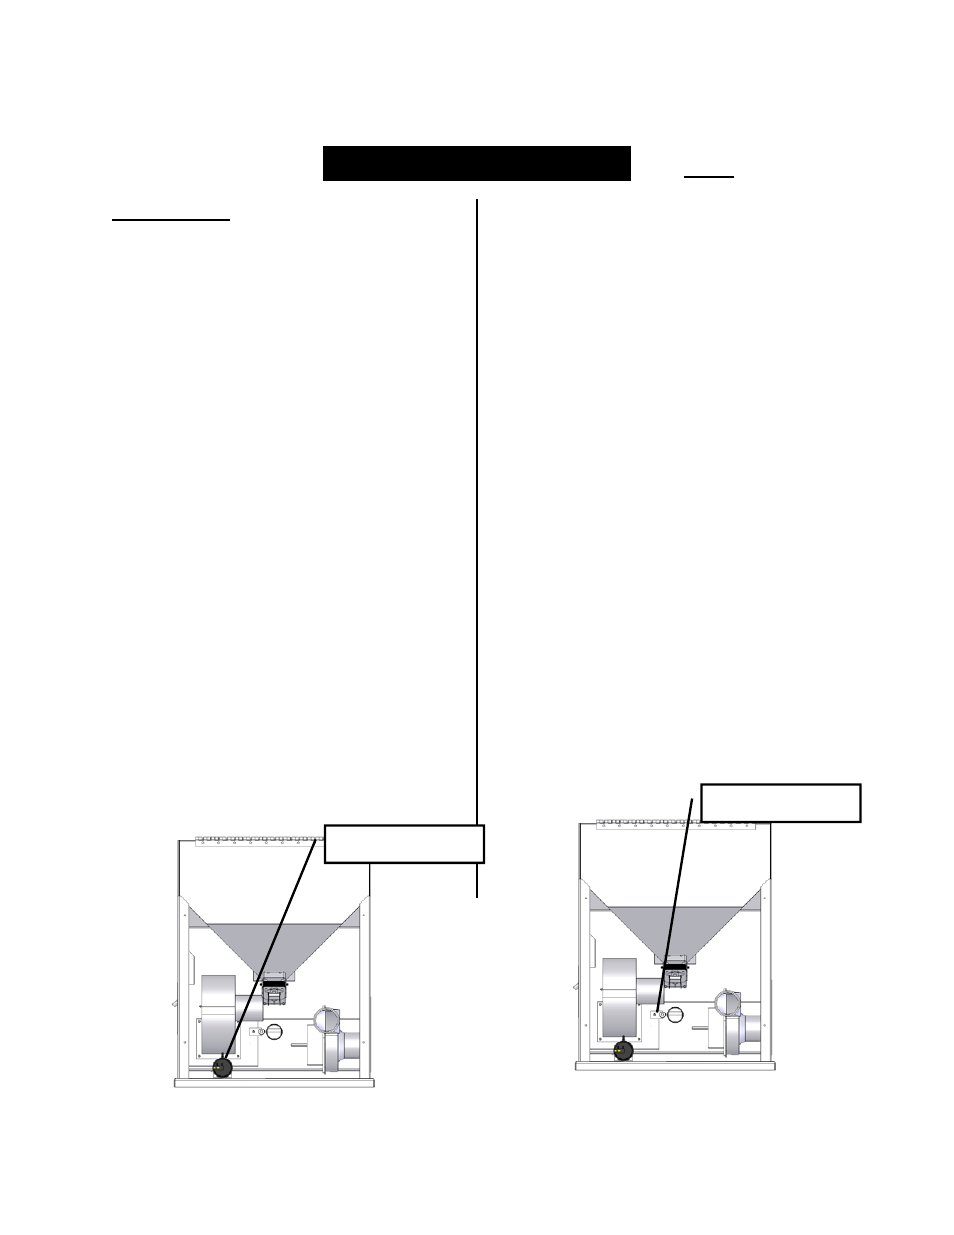
REPLACING COMPONENTS
Vacuum Sensor
1.
Before beginning any component
replacement, be certain the unit is
unplugged and thoroughly cooled
down.
2.
Remove the exhaust outlet cover
plate and rear panel of unit.
3.
Locate the vacuum sensor as shown
in the diagram below.
4.
Disconnect the stove wiring harness
and vacuum hose from the vacuum
sensor, taking note of where
connections were made.
5.
Remove the two screws which hold
the vacuum sensor to the vacuum
sensor bracket, using a Phillips screw
driver.
6.
Installation is the reverse of
removal; be absolutely certain the
wires and vacuum hose are
connected according to the wiring
diagram in this manual.
Igniter
1.
Before beginning any component
replacement, be certain the unit is
unplugged and thoroughly cooled
down.
2.
Remove the exhaust outlet cover
plate and rear panel of unit.
3.
Locate the igniter as shown in the
diagram below.
4.
Disconnect the igniter wiring from
the control board and use a 5/16”
wrench to remove the igniter
retaining screw.
5.
Loosen the allen set screw (1/8”
allen wrench) and remove the old
igniter cartridge.
6.
Install the new igniter in the igniter
tube, retighten the set screw and
reinstall the assembly into the stove.
Be certain to reconnect the new
igniter wires to the circuit board
before reassembly.
Igniter Assembly
Vacuum Sensor
Igniter