Installing a raid controller or expansion adapter, Replacing a power supply, Chapter 3 servicing the k2 lx0 raid – Grass Valley K2 Lx0 RAID Storage User Manual
Page 44: Power supply controller or expansion adapter, Finish inserting
44
K2 Lx0 RAID Instruction Manual
July 31, 2008
Chapter 3 Servicing the K2 Lx0 RAID
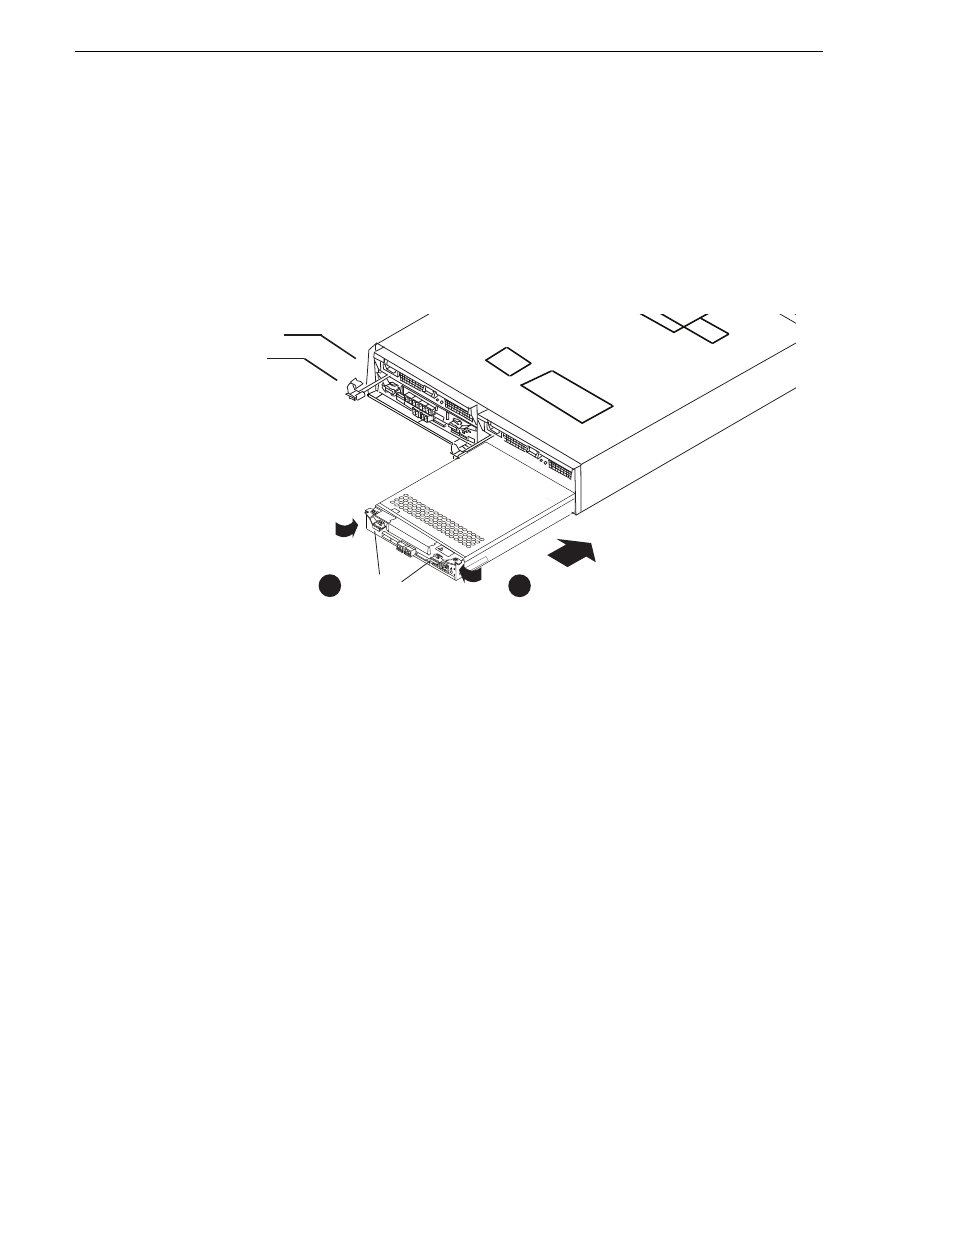
Installing a RAID controller or expansion adapter
To install a RAID controller or expansion adapter:
1. Install the module part way into the chassis, far enough in so that it is supported
physically by the housing.
2. Connect the cables.
3. Continuing installing the module in the chassis, as shown in the following diagram.
4. If inserting an expansion adapter on a system that has a redundant controller,
remove and reinsert the controller to start initialization. If inserting a controller or
expansion adapter on a system that does not have a redundant controller, power up
the system.
5. Verify RAID controller initialization as displayed by the module’s Ready LED.
This process takes approximately three to eight minutes. Refer to
controller status LEDs” on page 35
.
6. Check RAID controller status using NetCentral or the Grass Valley Storage Utility.
Replacing a power supply
• Use power cables that are shipped with the RAID unit.
• The K2 Lx0 RAID and K2 Lx0 Expansion Chassis have dual power supply
configurations so that they do not halt if one power supply breaks down. Even if a
power supply is not functioning, the fan inside can draw power from the other
NF
CO
DE L
AB
EL
OPT
ION
LABEL
Power supply
Controller
or expansion
adapter
HO
T
UNIT
LA
BEL
Ejectors
1
Finish inserting
2
the module in the chassis.
Close the ejectors, firmly pressing
the protruding portions of the ejectors.
Confirm that both ejectors are locked.