Starting up the itx playout appliance – Grass Valley iTX Playout Appliance v.2.3 User Manual
Page 24
12
Installation and Setup Instructions
Starting up the iTX Playout Appliance
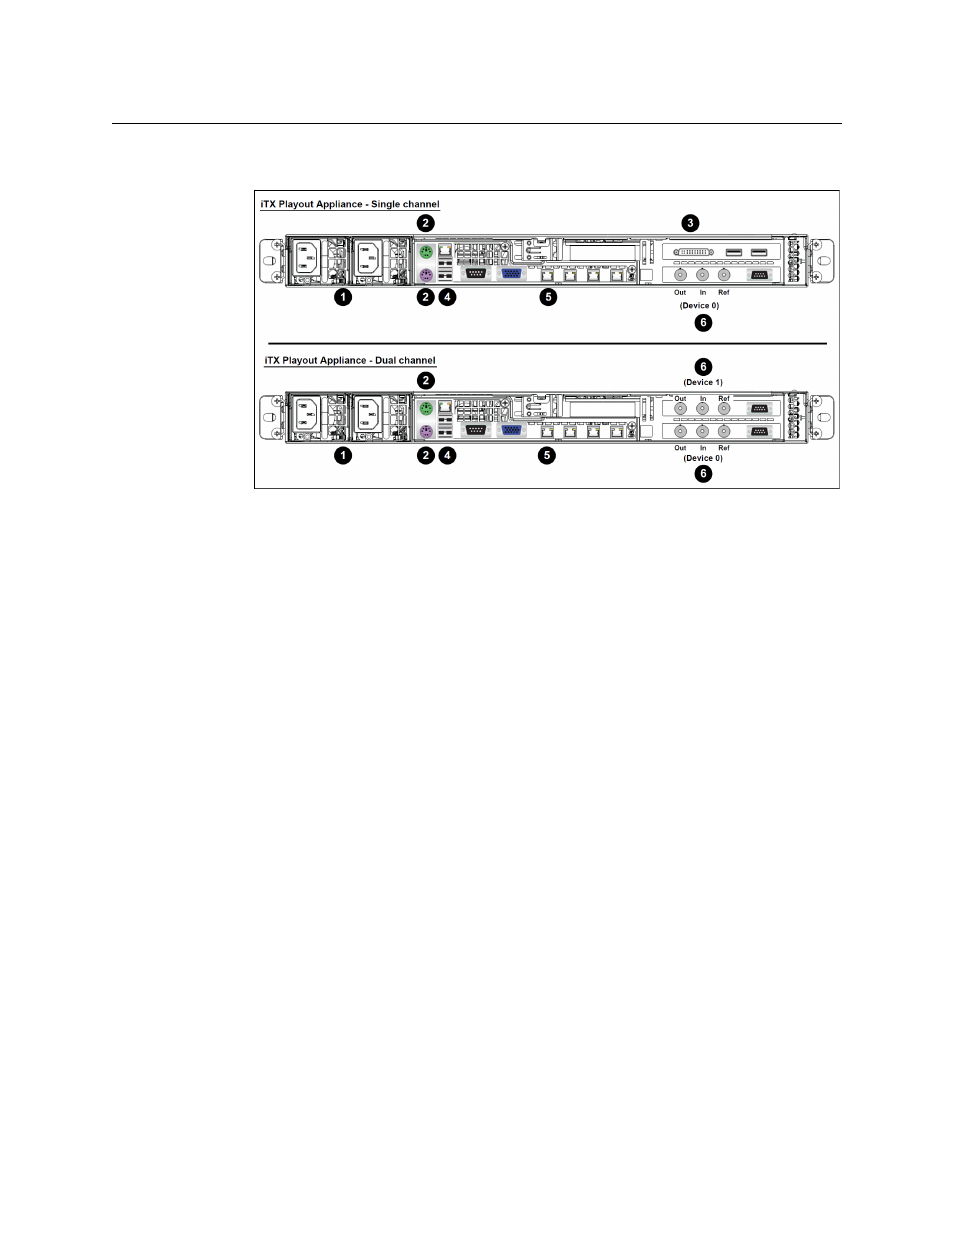
6 Connect the SDI Video input, SDI output and reference cables to the video card
connectors.
Fig. 2-5: Rear connections for both the single and dual channel models of the iTX Playout
Appliance
Starting up the iTX Playout Appliance
Once the iTX Playout Appliance is properly racked and connected, you can make the power
connections and perform the first-time start up of the iTX Playout Appliance.
1 Plug the iTX Playout Appliance’s power supply cable into a power socket.
2 Plug the VGA monitor’s power supply cable into a power socket and power on the
monitor.
3 Power on the iTX Playout Appliance by pressing the Power button on the unit’s front
panel.
4 Observe the front panel’s Power LED to be sure that it lights up (see
Upon startup, the iTX Playout Appliance automatically logs on as
itx-user
and runs a
number of interacting iTX services under the control of a Server Controller:
• TXPlay manages live schedules. It notes the start times of events with fixed start
times; it calculates the start times of other (automatic) events. It sends commands
through the Output Server to the iTX Player to play out events at the specified
times.
• The Output Server passes playout commands to the iTX Player from TXPlay; also
from iTX Desktop components, for live logos and CGs.
• In the media-caching process, the Output Server responds to cache requests from
the Media Cache Service to copy media files from an iTX Media Store to the Output
Server cache.
• The
iTX Player
responds to TXPlay commands to play out media files and live video
feeds through an SDI video card. In the process, it performs any required video and
audio mixing operations.
• It gets media files from the Output Server cache.