Grass Valley iTX Playout Appliance v.2.3 User Manual
Page 22
A
B
C
10
Installation and Setup Instructions
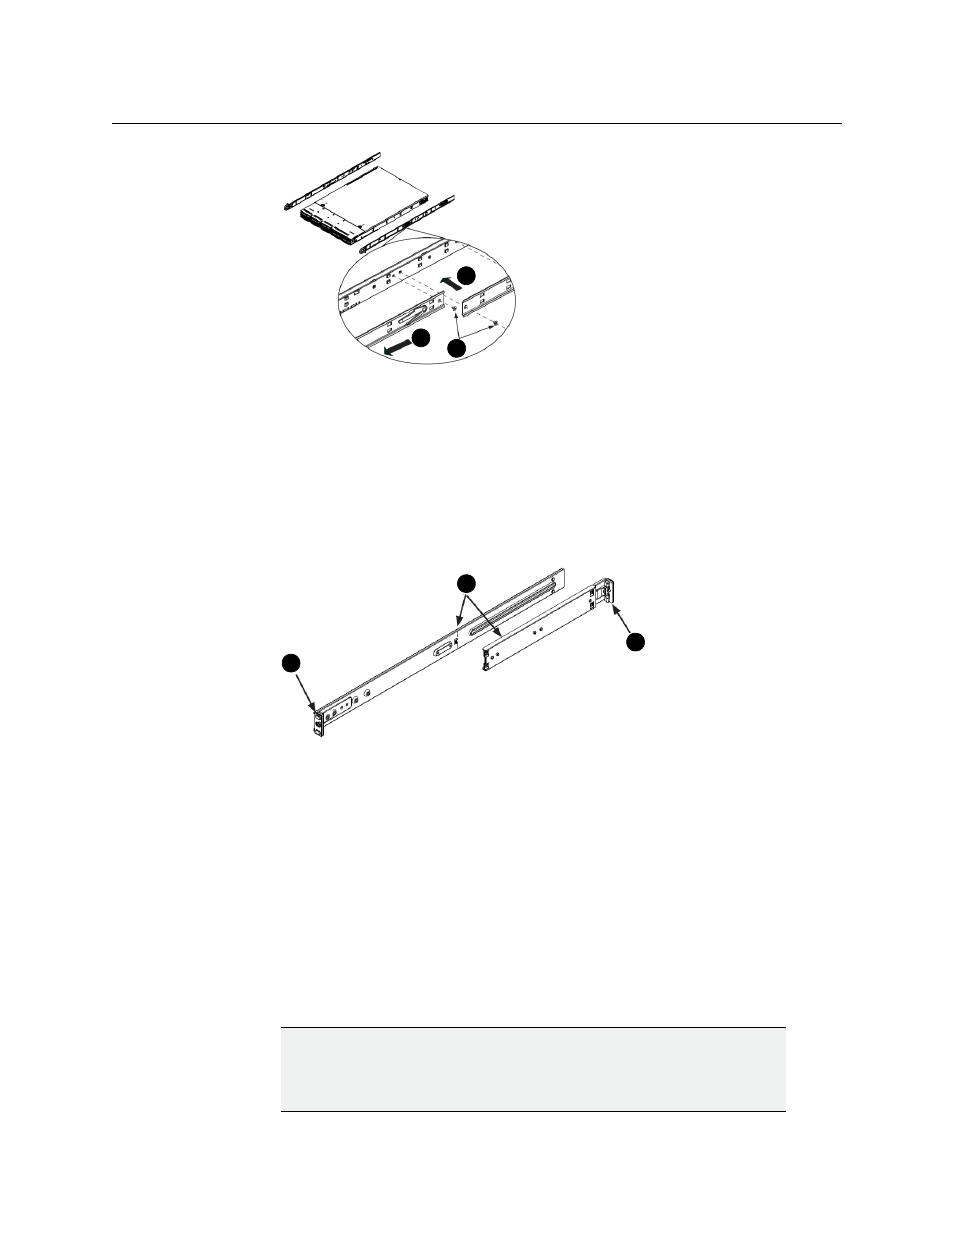
Mounting the iTX Playout Appliance chassis in a rack
Fig. 2-2: Installing the inner rail extensions
3 Install the outer rails to the rack (Figure 2-3).
a Attach the shorter outer rail to the outside of the longer rail. You must align the
pins with the slides. Both bracket ends must face the same direction.
b Adjust the outer rails so that they fit snugly with the rack.
c Secure the longer outer rail to the front of the rack with two screws.
d Secure the shorter outer rail to the rear rack with three screws.
e Repeat steps 3A - 3D for the remaining outer rail.
A
D
C
Fig. 2-3: Installing the outer chassis rails to the equipment rack
4 Mount the iTX Playout Appliance chassis into the rack (Figure 2-4).
a Align the inner rails on the chassis with the front of the outer rails on the rack.
b Slide the inner rails into the outer rails, keeping the pressure even on both sides (it
may be necessary to depress the locking tabs when inserting). When the server has
been pushed completely into the rack, you should hear the locking tabs click into
the locked position.
The chassis may not slide into the rack smoothly or easily when installed for the
first time. Adjustments to the slide assemblies might be necessary to achieve a
smooth insertion.
c (Optional) Insert and tighten the thumbscrews that hold the front of the chassis to
the rack.
WARNING
Due to the heavy weight of the iTX Playout Appliance, ensure that the rack is
securely anchored onto a unmovable surface or structure before installing
the chassis into the rack.