Grass Valley iTX Playout Appliance v.2.3 User Manual
Page 21
9
iTX Playout Appliance
Installation & Quick Start Guide
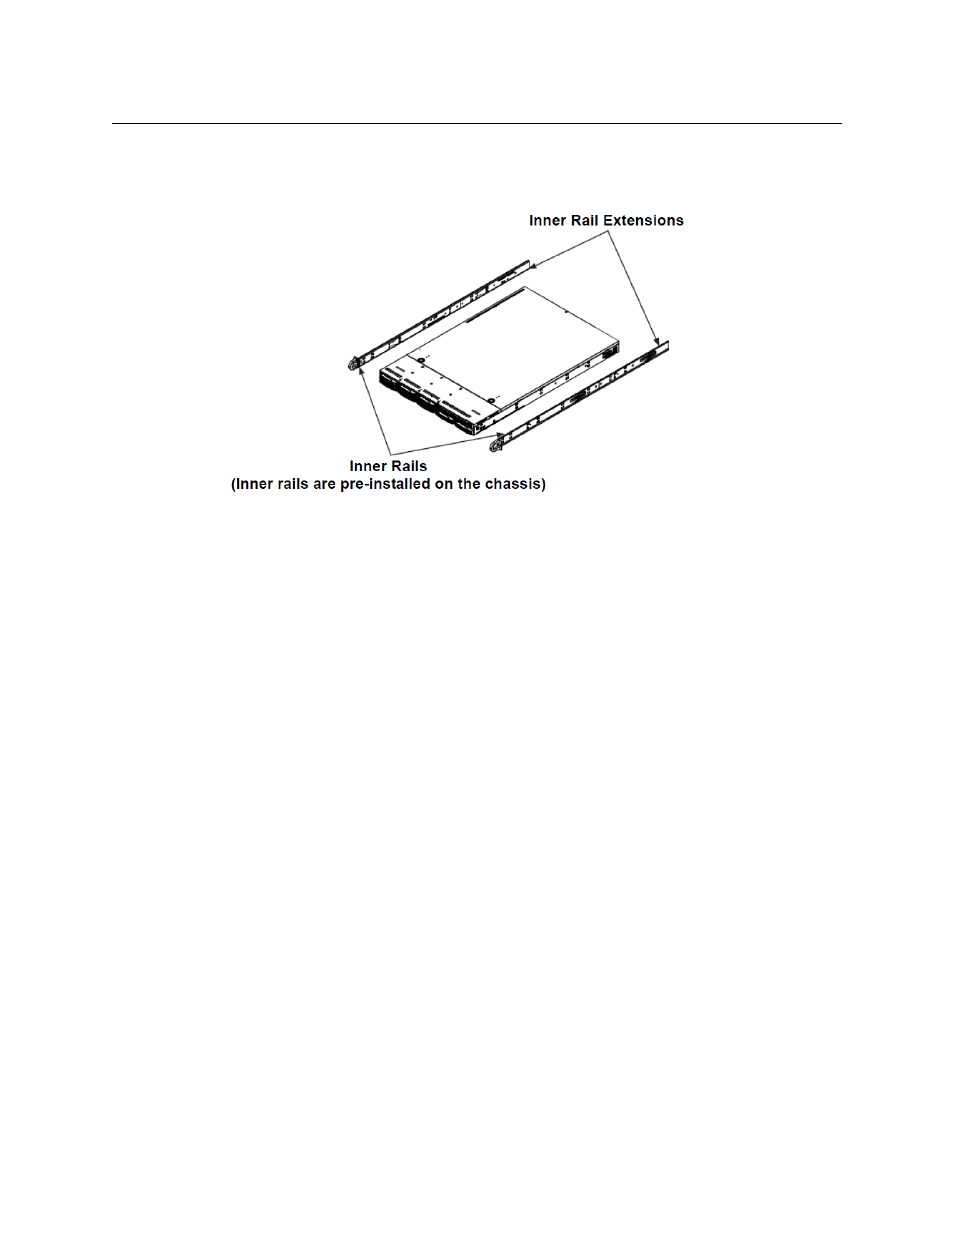
Figure 2-1 demonstrates that the inner rail assemblies are composed of two sections: inner
rails and inner rail extensions. The inner rails are pre-attached to the chassis, while the inner
rail extensions must be installed manually to the chassis.
Fig. 2-1: The iTX Playout Appliance’s inner rail assemblies
Once the inner rails are attached to the chassis, you must assemble and install the outer
rails to the rack. Once both the inner and outer rail assemblies are properly installed, you
can mount the iTX Playout Appliance’s chassis into the rack by sliding the inner rails into the
outer rails.
Both chassis rails have a locking tab, which serves to lock the server in place when installed
and pushed fully in the rack, as well as preventing the server from coming completely out
when it is fully extended from the rack.
To install chassis rails and mount the iTX Playout Appliance’s chassis into an equipment
rack:
1 Remove the iTX Playout Appliance’s faceplate by pulling the faceplate’s handles away
from the chassis.
2 Install the inner rail extensions to the server’s chassis.
a Place the inner rail extensions on the side of the chassis aligning the hooks of the
chassis with the rail extension holes. Be sure that the extension faces “outward” just
like the pre-attached inner rail.
b Slide the extension toward the front of the chassis.
c Secure the chassis with two screws as shown in Figure 2-2.
d Repeat steps 2A - 2C for the other inner rail extension.