Connecting to the camera system, Page 8 – Grass Valley 3-CCD ANALOG CameraMan Rev.B User Manual
Page 11
Page 8
CameraMan
®
3-CCD Camera System Installation and Operations Manual
Connecting To The Camera System
On page five, you learned where the CameraMan’s video and network connection ports and jacks are located. Now, you can begin
connecting the camera to your system..
Tip: After connecting each cable to the camera, let it hang loosely behind the camera.
Then follow the instructions in the “Restraining the Cable Connections” section before
attaching the other ends of the cable to other equipment. This will relieve undue stress
on the cables, allowing the camera to move freely.
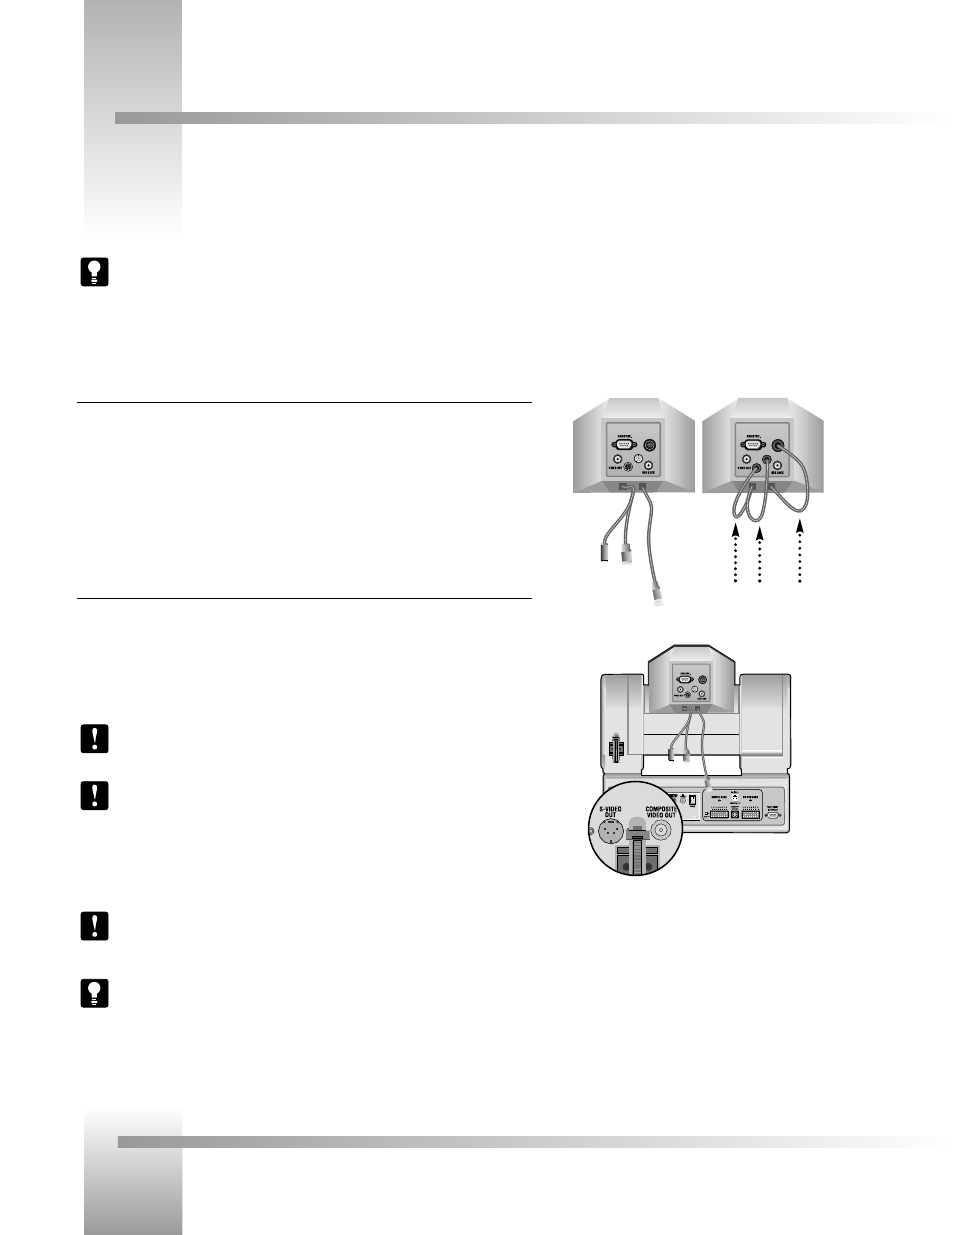
Connecting The Camera Control Cables
On the back of the camera, you’ll notice three cables. These control the camera’s lens, power
and video signals. These must be attached for the camera to operate properly.
• Connect the 8-pin male connector (#1) to the middle female jack.
• Connect the 12-pin female connector (#2) to the left male jack.
• Connect the 20-pin female connector (#3) to the right male jack.
Connecting The Video Output (on connector box)
The 3-CCD General Pan/Tilt Camera System supports NTSC and PAL versions (dependent on your
camera-type) of both Composite and S-Video formats, although only one can be used at a time.
For Composite format, connect to the BNC jack on the back of the camera, labeled
COMPOSITE VIDEO OUT, using a standard coaxial cable with a BNC connector (not provided).
Note: Verify that the Video Select switch is set to COMPOSITE on the back of the
General Pan/Tilt camera. (See Page 12)
Note: Only connect one signal output (composite or S-Video) at a time.
For S-Video format, connect to the S-VIDEO jack on the back of the camera, labeled
S-VIDEO, using a standard S-video cable (not provided).
Note: Verify that the Video Select switch is set to S-VIDEO on the back of the General
Pan/Tilt camera. (See Page 12)
Tip: For video output specifications, see Appendix C: CAMERA SPECIFICATIONS on page 16.
1
2
3
2
3
1
S-Video and Composite
Video Out Jacks