Step 4: install the camera to the wall, Step 5: connect the cable(s), E 11 – ACTi Outdoor Dome on Tilted Wall User Manual
Page 11
Installation Guide
Step 4: Install the Camera to the Wall
1.
If necessary, insert a memory card (not supplied) into the card slot of the camera.
2.
Align the camera screw holes and the conduit hole (if necessary) to the holes on the wall and
attach the three (3) supplied screws to secure the camera.
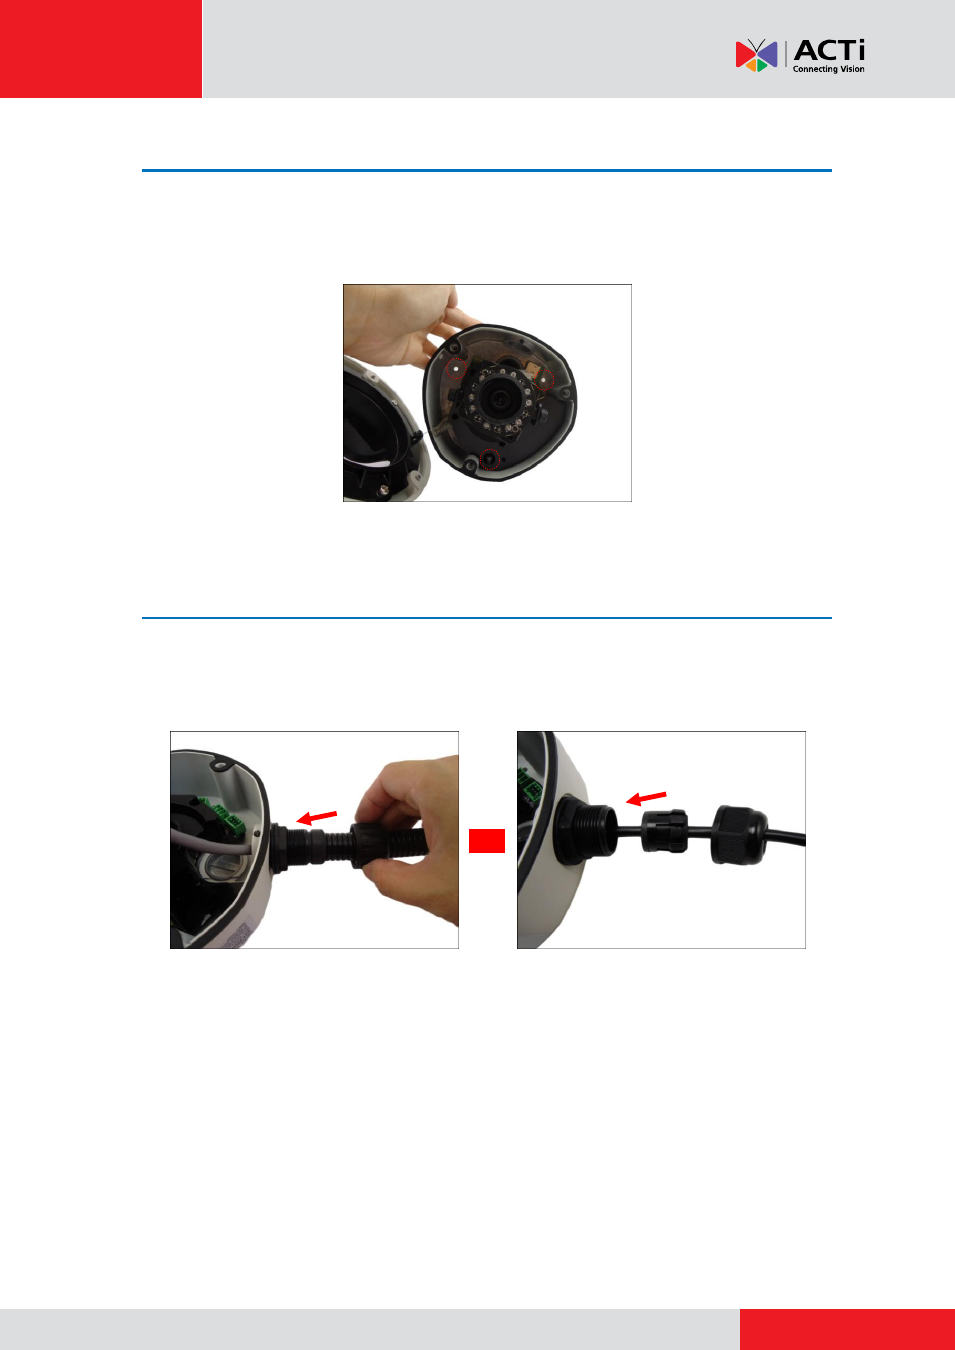
Step 5: Connect the Cable(s)
1.
If the cable will be routed along the wall
, pull the network cable through the side conduit
hole and attach the clamping nut to the conduit gland body.
If the cable passes through the
wall
, skip to step 2.
Using Flex Conduit
Using Naked Cable
NOTE:
For camera models that support external power adaptor, audio in/out, or digital
input/output (DI/DO) functions, route the cables without connectors through the flex conduit
together with the network cable. Once cables pass through the conduit hole of the camera,
attach the bundled connectors.
or