Dip-switch settings, S1 status led indication, S1 power on parameter setting – Westermo GDW-11 User Manual
Page 20
20
6615-2203
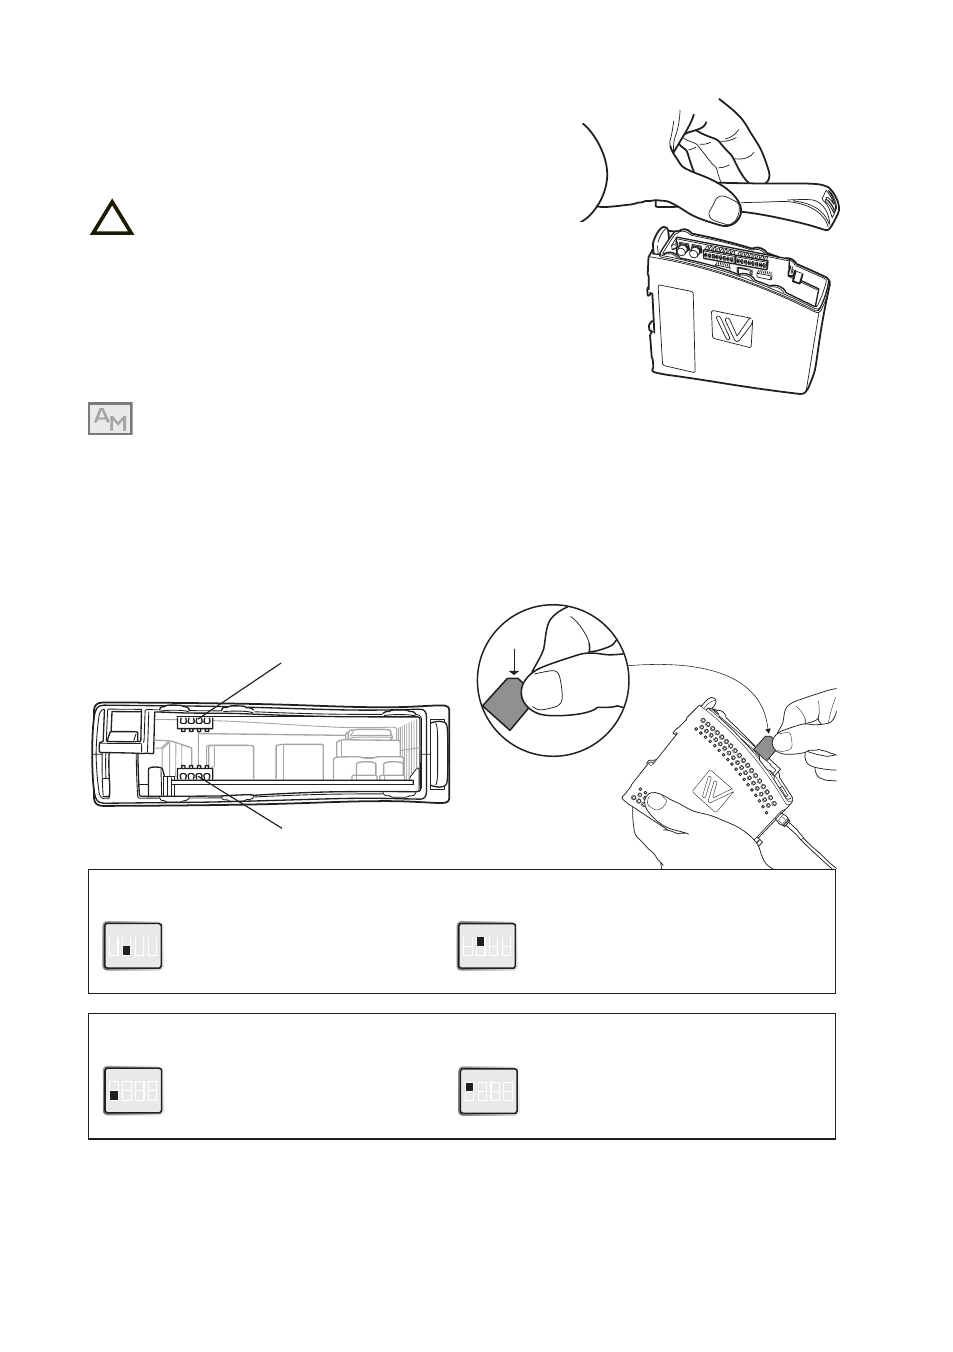
DIP-switch settings
DIP-switches under the lid on top of the unit
Before DIP-switch settings:
Warning! Do not open connected unit
Hazardous voltages may occur within this unit
when connected to a power supply.
Warning!
Prevent damage to internal electronics from electro-
static discharges (ESD) by discharging your body to a
grounding point (e.g. use of wrist strap), before the lid
on top of the unit is removed.
To activate DIP-switches Advanced mode needs to be enabled.
NOTE DIP-switch alterations are only effective after a power on or after a software
reset command (AT+CFUN=1).
A setting configured by any other method during normal operation, overrides
the DIP-switch setting. However, at power up, the DIP-switch settings have prec-
edence over the setting configured by any other method.
!
S1 Status LED indication
ON
1 2 3 4
Status LED not used
LED is OFF
ON
1 2 3 4
Status LED indicates signal
strength, see description of
LED indicators (page 15)
S1
S1 Power on parameter setting
ON
1 2 3 4
Use saved parameter
settings
ON
1 2 3 4
Set factory default at
next power on (AT&F)
S3