Saving pictures to a folder – Epson 650 User Manual
Page 31
4-7
Getting Photos Into Your Computer
L
Proof Sign-off:
KOW E.Yamanouchi K.Pipa_______
M.Fujimori
_______
K.Pipa
_______
PhotoPC 650 U/G
Rev. C
A5 size
INTOP.fm
6/21/00
Pass 0
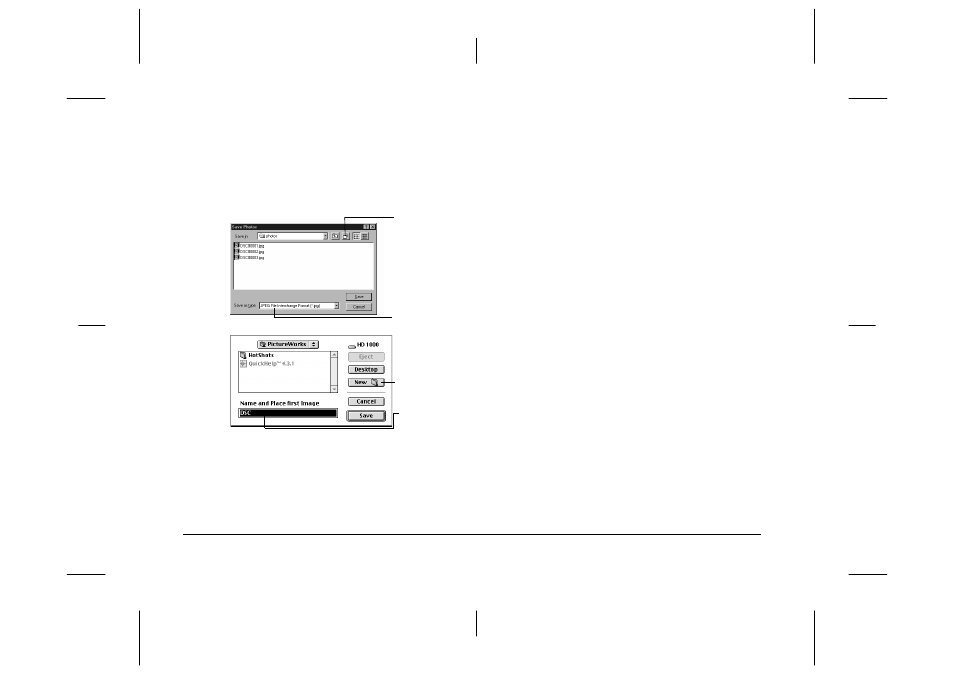
Saving pictures to a folder
1.
To save your pictures to a folder on your hard
disk, click the
Save to Folder
button. One of
these dialog boxes appears:
2.
Select the folder you want to save your pictures
to, or click the create new folder (Windows) or
new folder button (Macintosh) to create a new
folder.
Note:
To select a different default folder for the program to
use each time you open it, click the Setup tab on the
dialog box and click Browse under Default Photo
Folder.
3.
If you want to save your pictures in a format other
than JPEG, select it from the Save as type list
(Windows only). On a Macintosh, you can also
type in a different file name for the image files in
the file naming field.
4.
When you are ready to transfer your pictures,
click
Save
.
As the files are transferred, they are either
automatically given a generic name (Windows),
or given the name you selected (Macintosh), and
then numbered sequentially.
To cancel a transfer in progress, click
Cancel
(Windows) or press the J and period (
.
) keys
(Macintosh).
5.
Close the EPSON PhotoPC 650 TWAIN or Plug-
In dialog box and return to HotShots.
Windows
File naming field
Save as type list
Macintosh
New folder
button
Create new
folder button