Adjusting the computer image, Adjusting the sound, Adjusting sound settings – Dynex DX-24E150A11 User Manual
Page 17: Ge 13
Adjusting the sound
13
DX-24E150A11
Note: You can also press PICTURE on the remote control to
select the picture mode.
• Brightness—Adjusts the brightness.
• Contrast—Adjusts the contrast.
• Color—Adjusts the color saturation.
• Tint—Adjusts the image tint.
• Sharpness—Adjusts the sharpness.
3 Press
or
to
highlight
Advanced Video, then press ENTER
to enter the sub-menu.
4 Press
or to
adjust the option. You can select:
• Aspect Ratio— Selects the aspect ratio of the picture. You
can select:
• Auto (selects the correct aspect ratio automatically.
Available only when Auto Zoom is turned ON).
• Normal (selects the correct aspect ratio to match the
source image).
• Zoom (enlarges the picture but may crop the top and
bottom).
• Wide (shows a full-screen picture).
• Cinema (stretches the picture at the edges, but
maintains a good aspect ratio at the center of the
screen).
• Overscan—Extends part of the display past the visible area
of the screen. The resulting picture will “zoom in” on the
center of the image. Turn this On to adjust the picture’s
reproduction rate.
• Color Temperature—Selects the color temperature. You
can select Warm (to enhance the reds), Cool (to enhance
the blues), or Normal.
• Noise Reduction—Selects the noise reduction mode to
reduce picture noise (snow). You can select Low, Middle,
High, or Off.
• Backlight—Adjusts the screen backlight.
• Adaptive Contrast—Turn this On to optimize the picture
display for a more vivid image.
• Dynamic Contrast Ratio—Enhances the contast ratio
between the light and dark areas of the picture. This feature
enables automatic contrast adjustment, based on the picture
brightness.
5 Press MENU to return to the previous menu, or press EXIT to
close the menu.
Adjusting the computer image
Note: Make sure that your TV is in VGA mode. For more information, see
“Selecting the video input source“ on page 11.
To adjust the computer image:
1 Press MENU. The on-screen menu opens with the PICTURE menu
displayed.
2 Press or to highlight SETTINGS, then press . The
SETTINGS menu opens.
3 Press or to highlight Computer Settings, then press
ENTER. The Computer Settings screen opens.
4 Press or to highlight an option, then press or to adjust
the option. You can adjust:
• Auto Adjust—Automatically adjusts the image settings
such as position and phase
• H.Position—Moves the image right or left
• V.Position—Moves the image up or down
• Clock—Adjusts the sample frequency
• Phase—Adjusts the focus of stable images
5 Press MENU to return to the previous menu, or press EXIT to
close the menu.
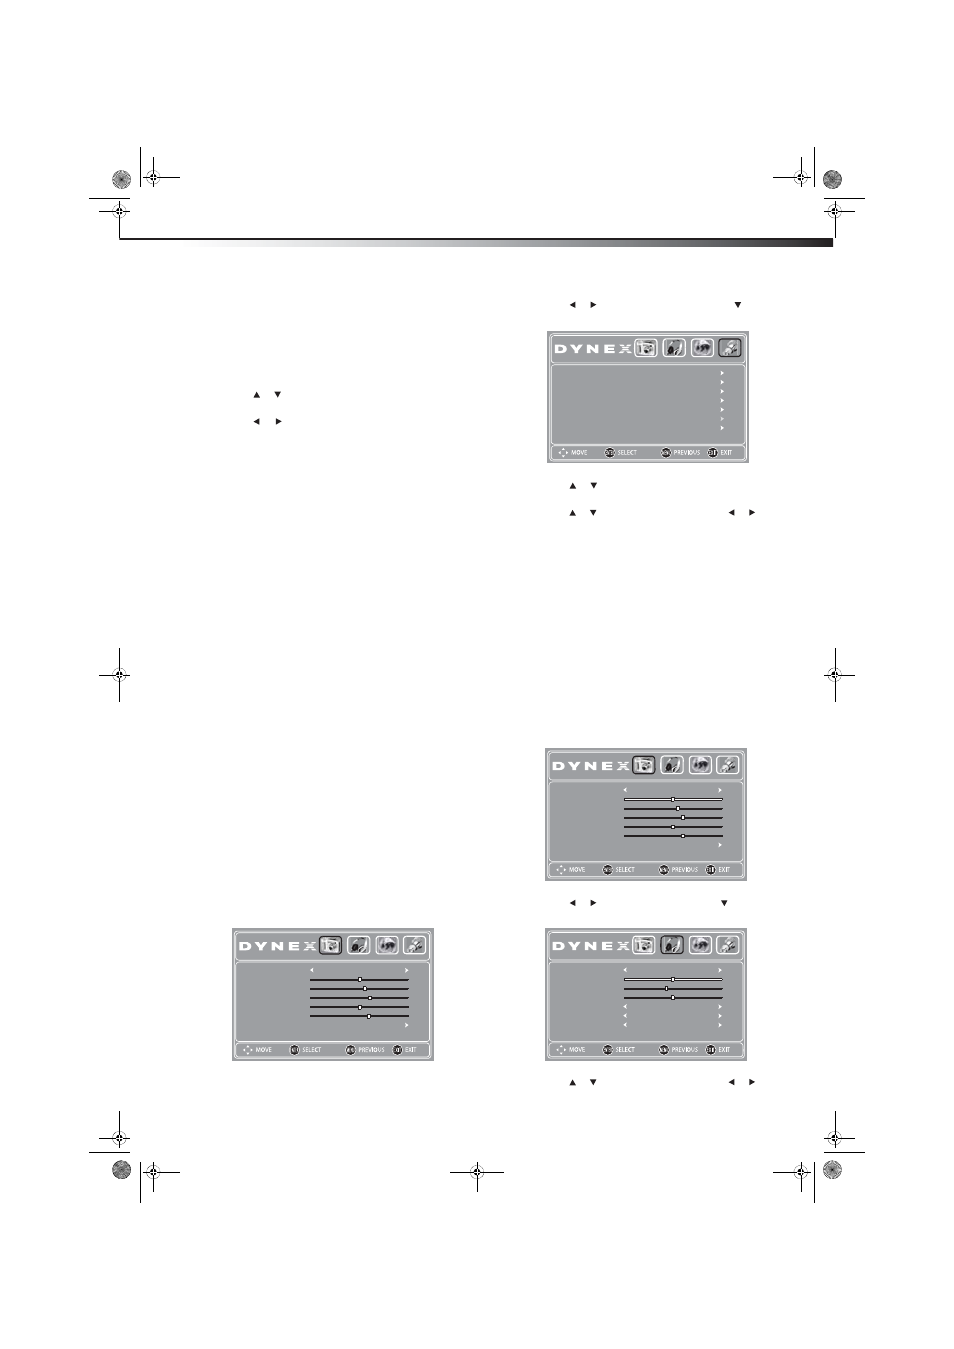
Adjusting the sound
Adjusting sound settings
To adjust the sound:
1 Press MENU. The on-screen menu opens.
2 Press or to highlight AUDIO, then press . The AUDIO
menu opens.
3 Press or to highlight an option, then press or to adjust
the option. You can select:
PICTURE
AUDIO
CHANNELS
SETTINGS
Mode
Advanced Video
Sharpness
Tint
Color
Contrast
Brightness
Energy Savings
6
0
70
57
48
PICTURE
AUDIO
CHANNELS
SETTINGS
Parental Controls
Reset to Default
Computer Settings
Input Labels
Closed Caption
Time
Menu Settings
PICTURE
AUDIO
CHANNELS
SETTINGS
Mode
Advanced Video
Sharpness
Tint
Color
Contrast
Brightness
Energy Savings
6
0
70
57
48
PICTURE
AUDIO
CHANNELS
SETTINGS
Sound Mode
Audio Language
MTS/SAP
Surround
Balance
Bass
Treble
0
40
50
Standard
On
Stereo
English
DX-24E150A11_10-0762.book Page 13 Tuesday, August 31, 2010 1:17 PM