Tri Tool 648RBL Clamshell User Manual
Page 19
19
Model 648RBL Low Profile Clamshell
92-1238 : Rev. 070126
NOTE:
CAUTION:
Tighten 2 and 10 down to 10 ft-lbs (14 N m) of torque.
Tighten 6 and 14 down to 10 ft-lbs (14 N m) of torque.
Tighten 7 and 15 down to 10 ft-lbs (14 N m) of torque.
Verify that the Clamshell is mounted square and centered to the pipe.
Adjust the Jackscrews and Adjustable Bars in opposing pairs to correct any
off center positioning.
Once the Clamshell is mounted square and centered to the pipe, tighten all of the
Adjustable Bars and Jackscrew to 25 ft-lbs (34 N m) to 30 ft-lbs (41 N m) of torque
following the same sequence that was followed to set them up.
The Headstock should be able to be rotated by hand with the Motor(s)
removed.
If not, the Jackscrews and/or the Adjustable Bars are to tight and will need to be
loosened before the Clamshell is powered up.
GENERAL MACHINING SEQUENCE
Install the Motor(s) Drive Housing(s), if required, into the slots and bolt them to the
Clamshell.
The Motor Mount reacts to the torque of the Motor only when the Motor Hold-
Down Bolts are in place.
Connect the power supply to the Model 648RBL.
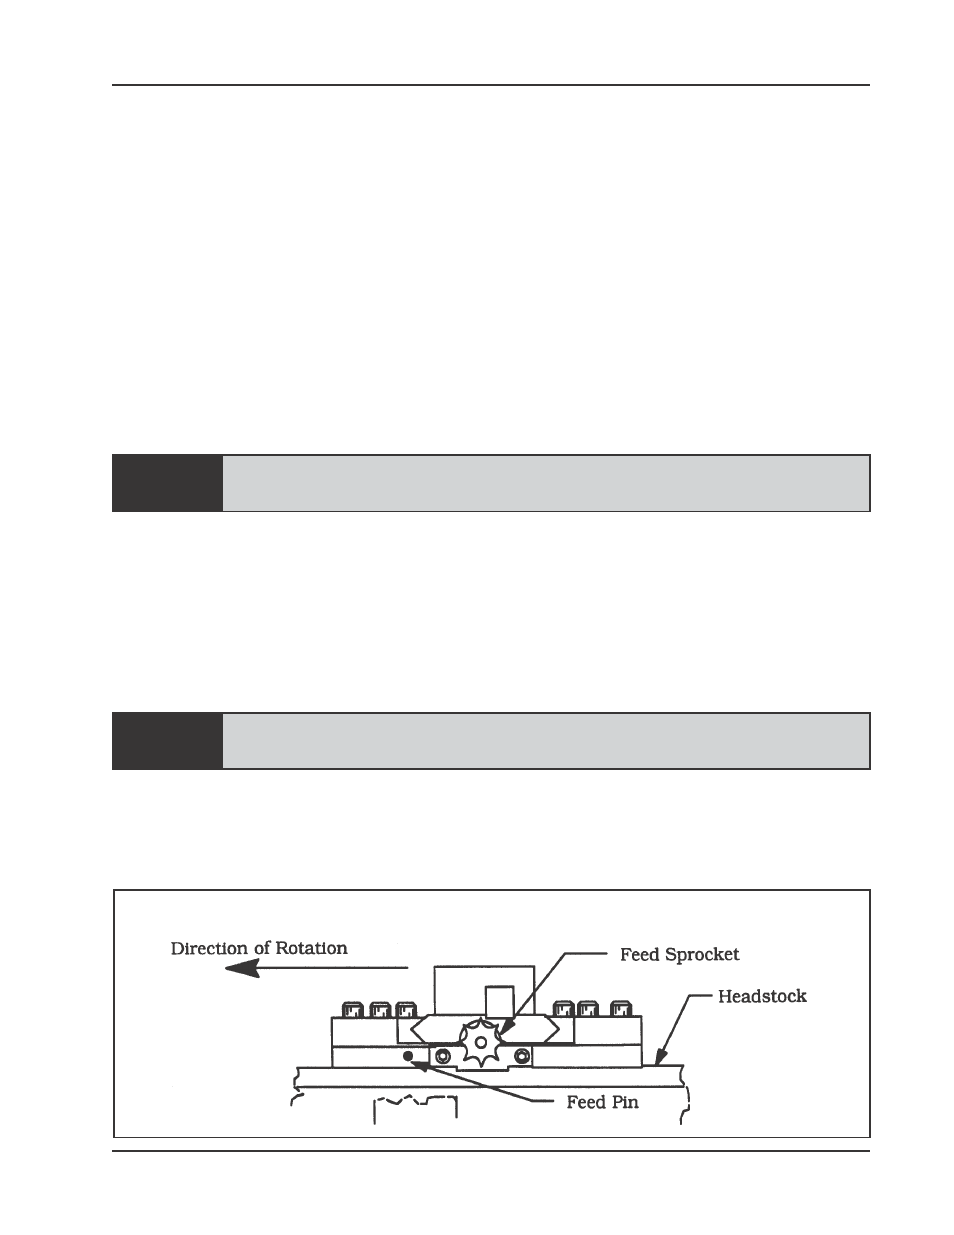
Rotate the Headstock slowly with the Tripper Shaft pushed ‘in’ for one full revolution
to insure that the Feed Pin to Sprocket is set right on both Tool Blocks.
Approach of the Feed Pin to the Feed Sprocket