Adjustments – Smithco Sand Star I 45-001 Parts & Service Manual User Manual
Page 11
9
Service
ADJUSTMENTS
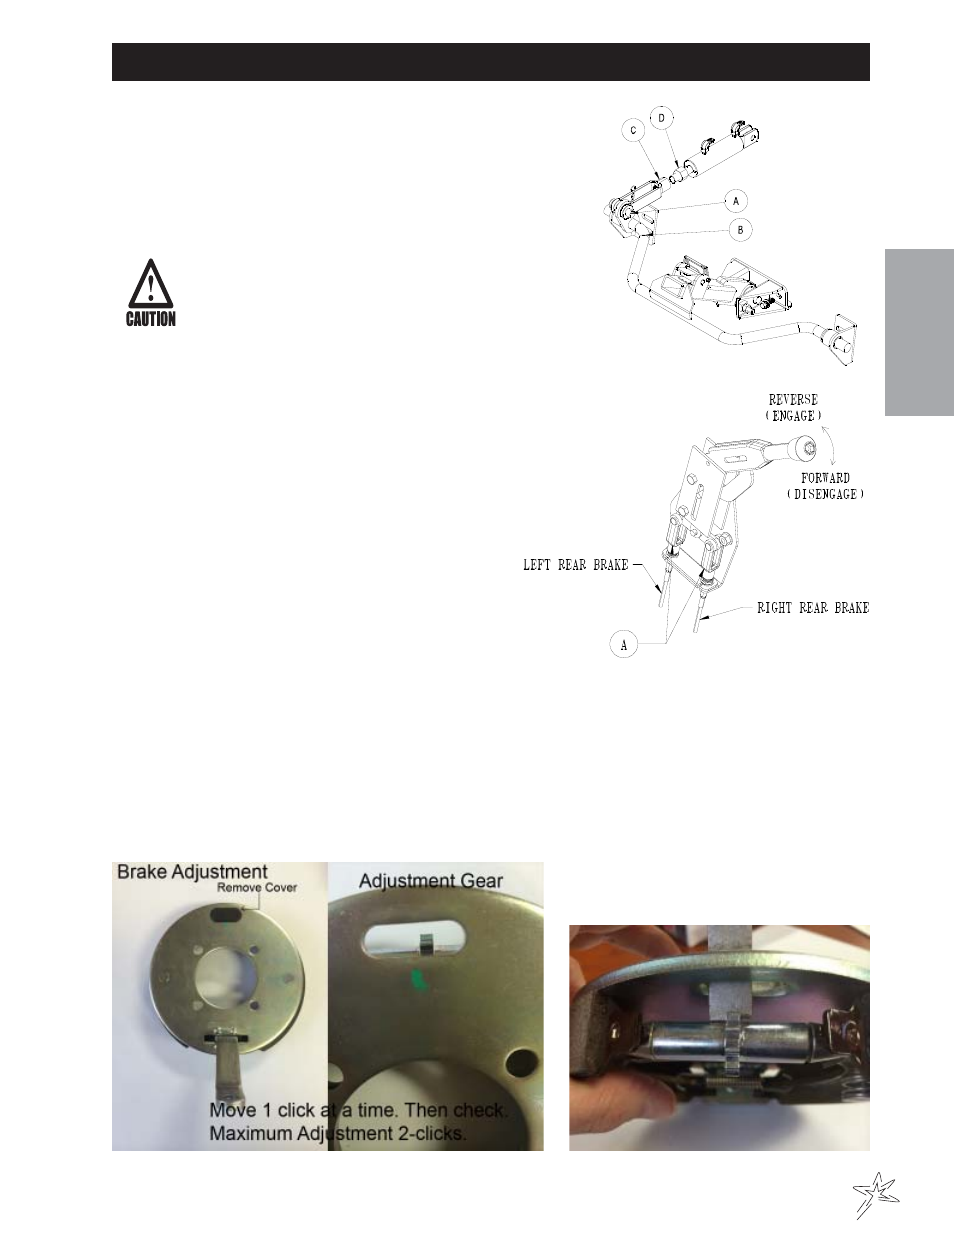
RAKE LIFT CYLINDER
Completely lower Rake Lift. Remove the clevis pin (A). Twist lift
linkage (C) so clevis pin end of cylinder extension lines up with
holes in attachment lift arm (B). Replace clevis and cotter pins.
Tighten Jam Nut (D). Raise and lower Rake Lift to check for proper
clearance.
Tigten until there is sufficient tension between lift arm
and quick hitch and will not move in full up position.
When the rear rake attachment is lowered while
the machine is in forward motion, the forward
speed of the machine will slow drastically. Operator
should be prepared for a rapid change in
speed
PARK BRAKE
The park brake is located on the left hand side of the
machine and operates both rear wheels. Pull lever back to
engage and push forward to disengage.
To adjust, turn the knob on the end of the handle.
DRUM BRAKE ADJUSTMENT
The brake can be adjusted through the access hole in the backing plate. Remove the rubber plug from the back-
ing plate. Using a drum brake adjusting tool, or a suitable flat blade screw driver, rotate the adjusting star to-
wards the axle shaft to expand the shoes,one click at a time. Expand the shoes until slight contact is made
with the drum. It is highly recommended that you adjust 1 click at a time with the maximum adjustment being 2
clicks. Rotate the drum back and forth to insure the brake is not rubbing excessively, if so back off the adjuster
star. Slight rubbing is acceptable as the brake is used it will seat in. Test after each adjustment.