Introduction, Control outputs, Installation – Skutch Electronics AS-2500-3 User Manual
Page 3: Program the access code, Verify the access code
Al Sandige
Page 3
12/05/01
Introduction
The AS-2500-3 allows a method of remotely
controlling up to two different devices via the
telephone lines. Both channel 1 and 2 may be turned
"ON" or "OFF" as desired. The channel status is
stored in a State-Of-The-Art EEPROM which means
that the AS-2500-3 will retain the proper state of the
channels even after long power outages. The
EEPROM is capable of retaining information for up
to 100 years without power. The unit features a 4
digit security access code that prevents non-
authorized persons from controlling the unit. This
code can be changed or verified by the user.
Control outputs
!
Channel 1-an unfused, 110VAC, 3 prong
power outlet, rated at 10 amps. This
outlet can be used to directly control AC
powered devices, including computers.
!
Channel 2-an isolated (up to 1000VAC)
relay contact closure, can pass AC/DC
voltages (110VAC max.), 1/8" mini
phone jack output, rated at 2 amps. This
output is located on the back of the unit
and is labeled RESET SWITCH.
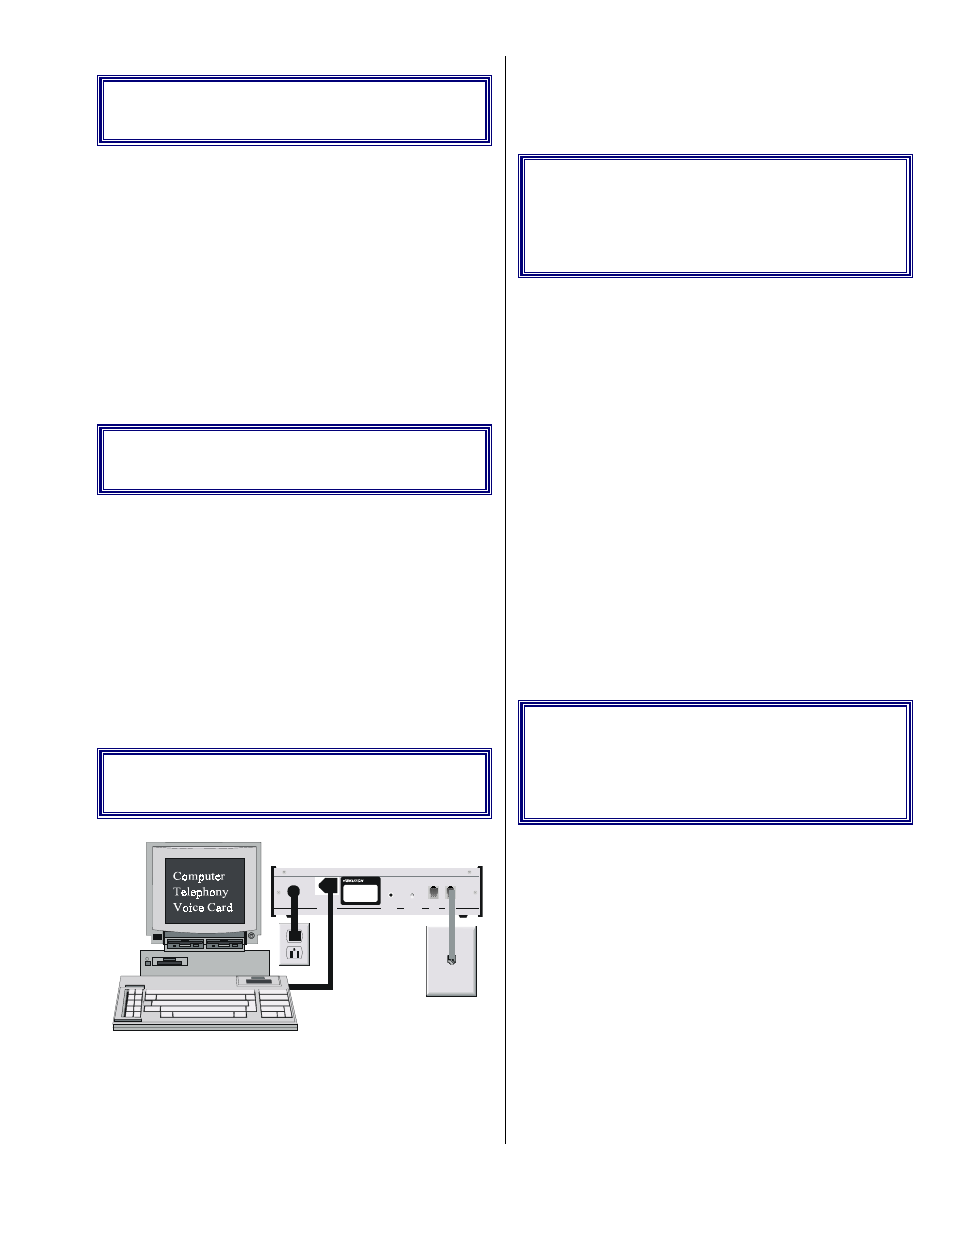
Installation
1) The AS-2500-3 installs the same way as an
answering device.
2) Connect the supplied modular cable to the back
of the AS-2500-3 into the "LINE" jack. Note
that the "TAD" jack is NOT used on this unit.
3) Connect the other end of the supplied modular
cable to any standard telephone company line
(RJ-11).
4) Connect the power cord to power.
Program the
Access code
The AS-2500-3 allows you to program your
own four digit access code; do the following:
1) Place the PROGRAM SWITCH, on the back of
the unit, to the PROGRAM position.
2) Call the telephone line, connected to the unit,
from any touch tone capable telephone.
3) When the unit answers, you will hear a
confirmation tone.
4) After the confirmation tone is finished, dial a
touch tone *; you will then hear a pulsating
acknowledgment tone.
5) Enter your new four digit access code (the * and
# cannot be used in your access code); you will
then hear a pulsating acknowledgment tone.
You can now verify your access code by going
to Step 4 of VERIFYING YOUR ACCESS CODE,
or you can hang up and place the PROGRAM
SWITCH, on the back of the unit, to the NORMAL
position.
Verify the access
code
1) Place the PROGRAM SWITCH, on the back of
the unit, to the PROGRAM position.
2) Call the telephone line, connected to the unit,
from any touch tone capable telephone.
3) When the unit answers, you will hear a
confirmation tone.
4) After the confirmation tone is finished, dial a
touch tone #.
5) The unit will play the access code to you
through a series of BEEPS, i.e. the code 1 2 3 4
will give you: 1 BEEP, two second pause, 2
BEEPS, pause, 3 BEEPS, pause and 4 BEEPS
(NOTE: you will get 10 BEEPS for a 0).
You can now program a new access code by
going to Step 4 of ACCESS CODE
S W ITC H E D
S W ITC H
N O R M A L
R E S E T
P R O G R A M
TA D
LIN E
E L E C T R O N IC S
C O D E
:
M O D E L :
S /N
:
Wall
Phone
Jack