Sim2 Teatro 80 User Manual
Page 21
20
TEATRO 80 - M80
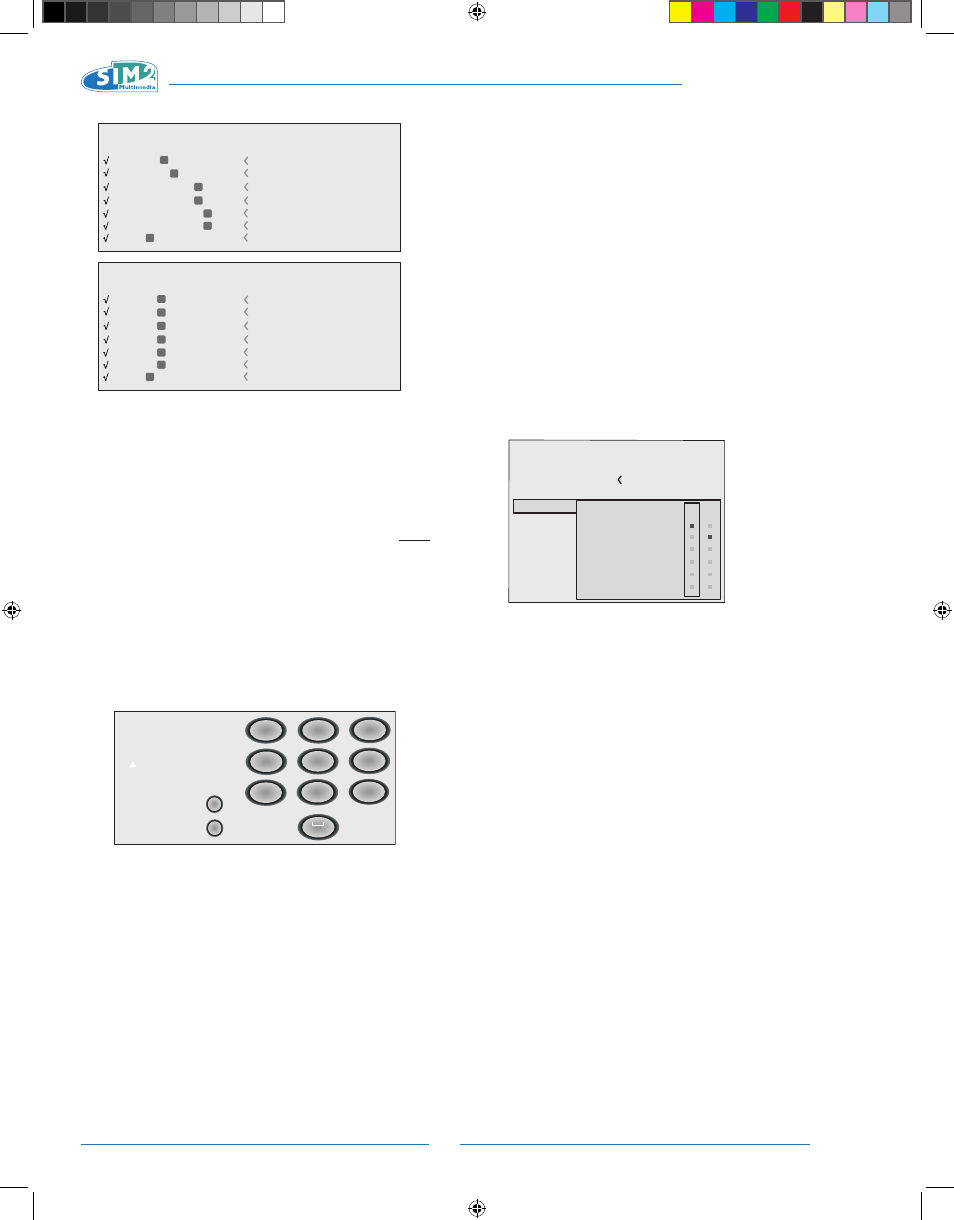
Active video signal sources (shown in the input selection
menu) are ticked.
It may be useful to identify the input with a user defined name
rather than the type of signal (for example, with the name of
the connected device).
When you have decided to display an input, select NAME
in the pull-down menu and rename the source currently
in use.
This makes it easier to remember which source is connected
to a given input; you can use up to 12 alphanumeric charac-
ters for the name (for further details, see ENTERING TEXT).
Entering text
The text entry menu shown in Fig. 33 makes it possible to
enter text quickly and easily.
Annulla
Conferma
Rinomina sorgente
()?@
1
ABC
2
DEF
3
GHI
4
JKL
5
MNO
6
PQRS
7
-
+
TUV
8
0
WXYZ
9
_ _ _ _ _ _ _ _ _ _ _
Text input mode is the same whether you are editing an exist-
ing name or entering a name for the first time. Characters can
be entered in any of the available positions (represented by
horizontal lines). Use the ◀ and ▶ keys to move the cursor
left or right respectively.
Press the number key corresponding to the character;
pressing once selects the first character, twice, the second
character and so forth. The available characters are shown
in the text entry menu that appears in this setup mode. Once
you have entered a character, move to the next space on the
right to enter the next with the ▶ key on the remote control,
and repeat the procedure. This applies even if the letter is
associated with the same key as before. Use the ▲ key to
switch from upper case to lower case characters and vice
versa. Cancel errors with ▼ after selecting the character
to be cancelled. Once you have completed the text entry
procedure confirm your text and save it by pressing the
MENU+ key on the remote control.If you wish to cancel the
changes, press MENU- on the remote control.
F1-F2 KEYS
The remote control is equipped with two keys (F1 and F2)
which are associated with various different functions.
The screen shows six options, one for each line, and two
columns indicating the keys F1-F2. You can select F1 and
F2 with the ◀ and ▶ keys on the remote control; select the
function to assign to F1 or F2 with the ▼ and ▲ keys
The function performed by the key is indicated by the dot
at the line-column intersection (Fig.34).
The six menu items are described below.
Focus
Once selected, the keys ◀ and ▶ allow the image to be
focused.
Enlargement
Activates the electronic zoom, the keys ◀ and ▶ zoom in
on the image. If you press the key again you will enter PAN
mode in which the ◀ and ▶, ▼ and ▲ keys enable you to
pan over the enlarged image. When the ▼ key is pressed a
third time, the system resets the projector to original view-
ing settings.
Blank
Switches off the video signal and displays a blank screen.
As soon as the key is pressed an OSD message lasting a
few seconds confirms that the function has been activated.
You can restore the previous conditions by pressing any key
on the remote control.
Gamma correction
Successive pressing of the key in question (F1 or F2) makes
it possible to select any of the available gamma curves.
Source Information
When enabled (YES) each time the source is changed infor-
mation regarding the signal type is displayed. If disabled,
(NO) no information on the source is displayed.
Fig.32
Fig.34
Fig.33
Source list
F1/F2 keys
Source info
OSD Backgroung
OSD Position
OSD Timeout
Language
Menu
English
Zoom
Focus
Magnification
Blank
Gamma correction
Color temperature
F1 F2
2 S-VIDEO
5 GRAPHICS RGB
3 COMPONENT
1 VIDEO
1
2
3
5
S-VIDEO 3
GRAPHICS 1
COMPONENT 1
VIDEO 1
4 COMPONENT
4
COMPONENT 2
6 GRAPHICS RGB
6
GRAPHICS 2
7 DVI
7
DVI
Source List / Edit Source Name
1/1
9 HDMI
12 HDMI
10 HDMI
8 HDMI
8
9
10
12
HDMI 2
HDMI 5
HDMI 3
HDMI 1
11 HDMI
11
HDMI 4
13 HDMI
13
HDMI 6
14 SDI
14
SDI
Source List / Edit Source Name
2/2
TEATRO 80 MB - EN.indd 20
25/10/10 18.02