Picture – Sim2 Teatro 80 User Manual
Page 15
14
TEATRO 80 - M80
Colour Temperature
Gamma Correction
Position
Y/C Delay
1
Overscan
1
Aspect
Image
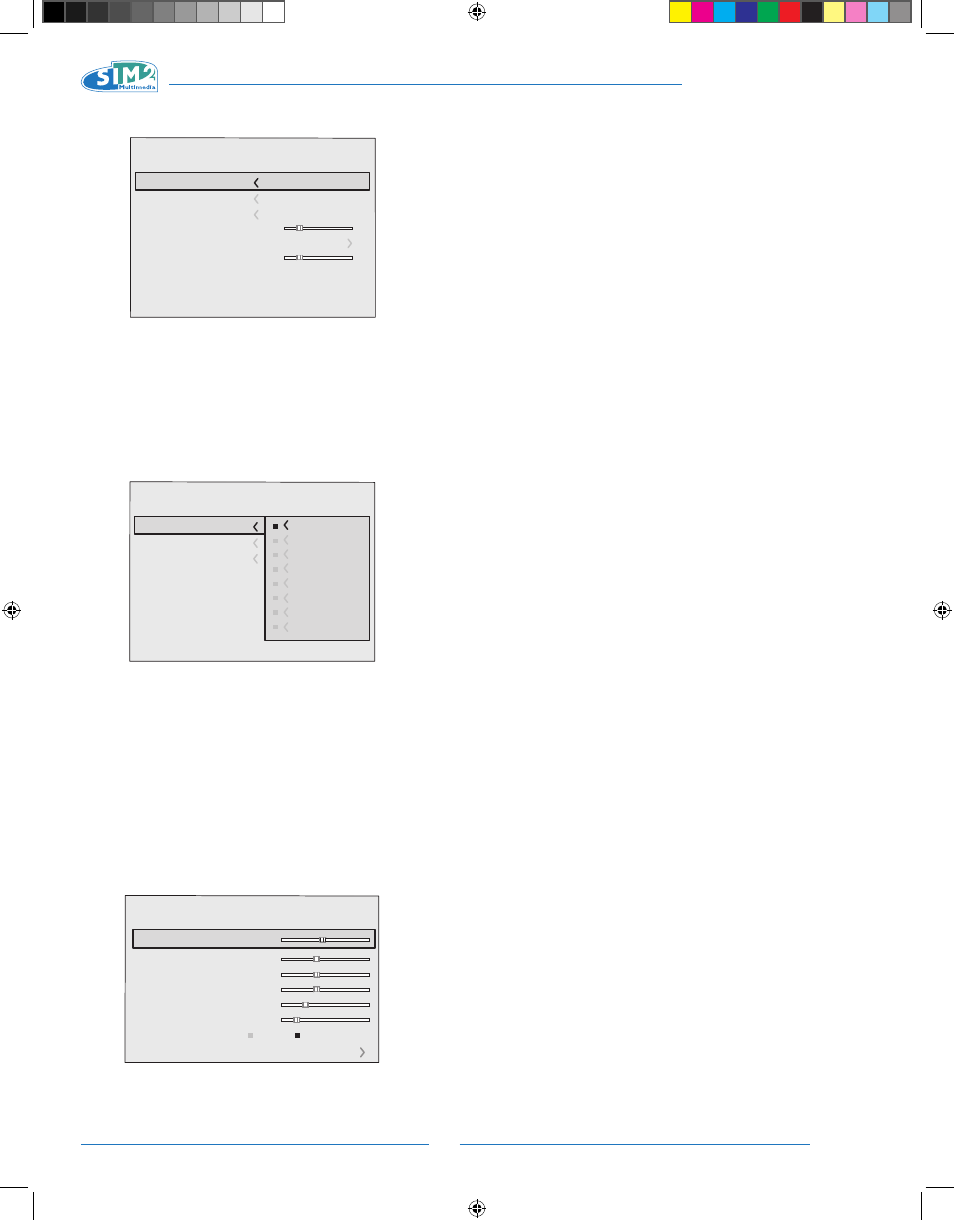
Fig. 18a
These sub-menus are accessed by pressing the key <. To
exit and return to the upper level, press the keys MENU+/-.
To stop viewing the menus, press ESC on the remote con-
trol or keypad, or wait for them to disappear automatically
after the number of seconds set in the SETUP page.
PICTURE
The setup menu groups adjustments that have an impact
on the image characteristics. Any adjustments not available
for a given input will not be displayed in the menu. Table
4 summarises the adjustments available for each input.
For a complete list of the on screen menus, refer to the
paragraph STRUCTURE OF ON SCREEN MENUS in the chapter
ADDITIONAL INFORMATION.
BRIGHTNESS
Use this control to adjust the darker areas of the picture
(black level), without affecting bright areas. Increasing the
value will give more detail in darker parts of the picture.
For correct adjustment it may prove useful to display a grey
scale with at least twenty bands.
Now try to reduce the brightness of the black band as much
as possible while ensuring that it can still be distinguished
from the adjacent band with brightness slightly higher than
black. Alternatively use a scene composed of black objects
alongside other dark coloured objects and try to ensure that
all the objects can be separately identified.
CONTRAST
Use this control to adjust the images white level without af-
fecting its dark areas. For correct adjustment it may prove
useful to display a grey scale with at least twenty bands.
Now try to increase the brightness of the white band as much
as possible while ensuring that it can still be distinguished
from the adjacent band with brightness slightly less than
white. Alternatively use a scene composed of well-lit white
objects surrounded by light objects with lower level light-
ing, and try to ensure that all the objects can be separately
identified.
COLOUR
This control (also called Saturation) increases or decreases
the picture colour intensity. When set to zero, colour images
will be shown in black and white.
Increase the value until the colours appear natural: suit-
able references include skin tones and the blue in grass in
landscape shots.
TINT
This adjustment controls the purity of colours. Basically it
determines the red-green ratio of the picture.
Decreasing the value increases the red content of the image,
increasing it increases the green content. For this adjust-
ment use skin tones or a test card image with colour bars
as a reference.
SHARPNESS
This adjustment serves to modulate the signal to increase
or decrease the level of picture detail. When the sharpness
value is reduced the image details appear less pronounced,
while increasing the value raises image definition, making
the outline of objects sharper. Note that an excessively high
value may result in a noisy picture and the edges of objects
may appear unnaturally clearly defined.
SHARPNESS MODE
This allows you to select the type of processing associated
with sharpness adjustment. For an interlaced or progressive
video signal, set to VIDEO; for PC graphics signals, set to
GRAPHICS. If the VIDEO option is set, it applies Noise Reduction
to increase the clarity of the image.
FILTER
This allows you to select the mode in which the input signal
is processed. Selecting the most appropriate value for a
Fig.18b
Colour Temperature
Gamma Correction
Position
Overscan
Y/C Delay
Aspect
Image
1
Normal
Anamorphic
Letterbox
Panoramic
Pixel to pixel
User 1
User 2
User 3
Picture
Contrast
Colour
Tint
Sharpness
Filter
Cinema Mode
50
50
50
3
2
Off
Auto
Auto
Noise Reduction
Brightness
60
Fig.19
TEATRO 80 MB - EN.indd 14
25/10/10 18.02