Installation, Rear vent venting runs, Heat shields – Montigo C42DV User Manual
Page 9: Page 9 c42-dv gas fireplace
Page 9
C42-DV Gas Fireplace
®
Part No. XG0119C
Installation
2. 45° Corner Installation.
Attach an PEL-45 (45° elbow) directly onto the flue collar. Cut the
PXT-20 to suit, and attach it to the PEL-45. Slide the fireplace into
position and attach to the termination.
Rear Vent Venting Runs
The C42-DV Rear Vent has three possible installations which do
not require vertical lift:
Heat Shields
Due to high flue temperatures, heat shields are required on all
C42-DV installations (except those with vertical terminations) at the
point where the venting connects to the termination. With the heat
shield, vent clearances can be maintained at 1". *Heat Shields are
included.
See Figure 8.
1. Straight Installation.
The height from the hearth to the center of the termination
is 31 ½". C42-DV Rear Vent versions are supplied with a 20"
extension pipe (PXT-20) with female/female connections. For
shorter installations, cut the PXT-20 to the desired length.
For extended installations, use the PXT-20 section as supplied for a
20" vent run.
Note:
For Rear Vent models, maximum horizontal run with no
vertical lift must never exceed 20".
Flue Collar
Heat Shield
EXT-18
Termination
Figure 15.
Extended installation.
Heat Shield
EXT-18
Termination
EEL-45
Elbow
Flue Collar
Figure 16.
Corner installation.
3. Corner Installation — 45° or less.
Use an PTO-3 termination and an PFL-1 or PFL-2 (12" or 24"
compressed length) and a frame, if appropriate. Flex may be
turned to obtain desired degree of angle required but must not
exceed 45°.
Figure 17.
Flex installation.
Heat Shield
Termination
Flex
Section
Flue Collar
PXT-20
PXT-20
PEL-45
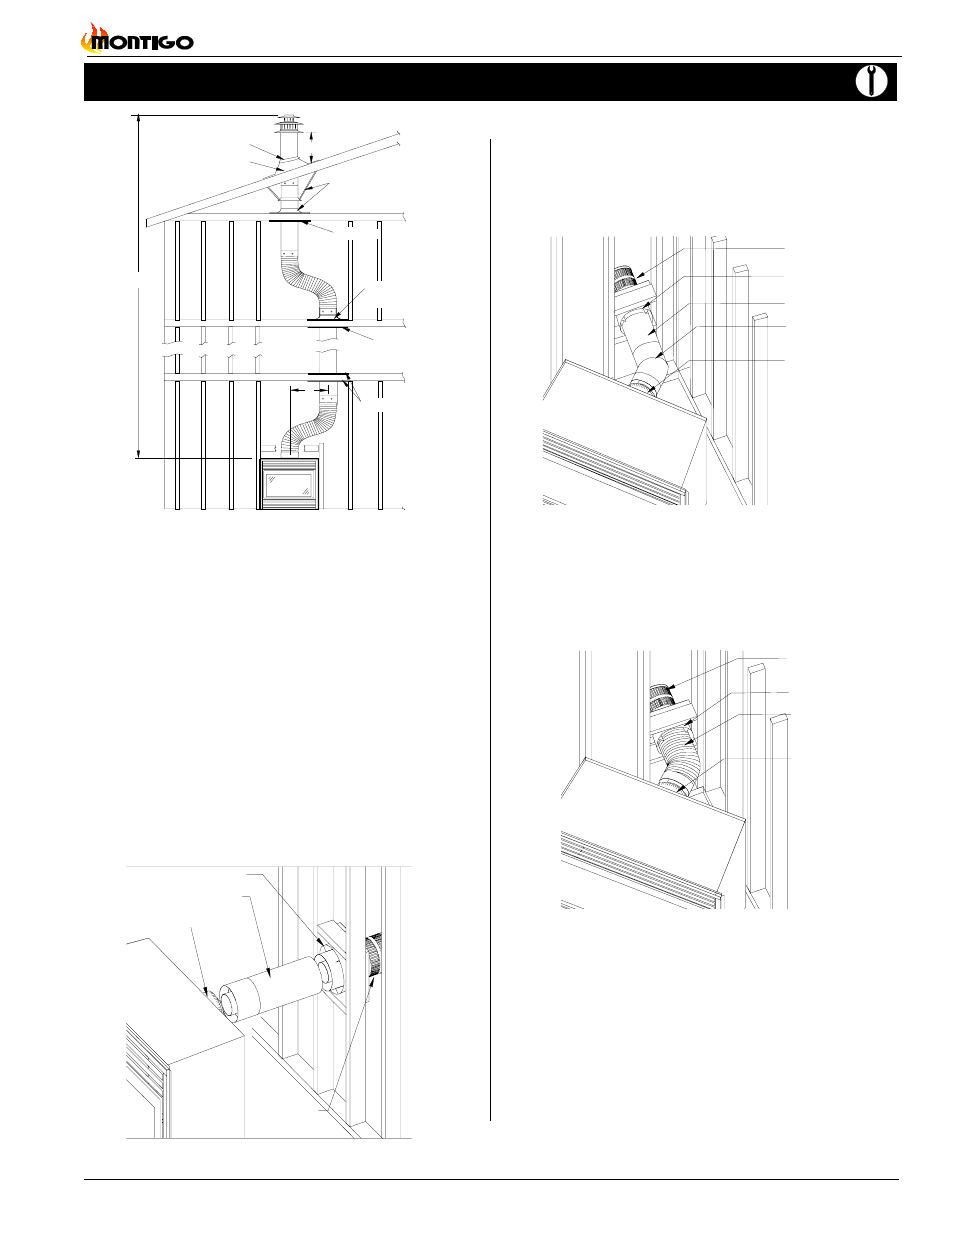
Figure 14b.
Vertical venting with 2 offsets (1 offset= two 90° bends).
2' min.
2'
Storm collar
Roof flashing
30' max.
* Minimum 1" clearance to all combustibles
Support straps or
support plate & ring
Firestop
Firestop
Firestop
Support plate
& ring
35' max