Service – Montigo PVHFL58-300 User Manual
Page 18
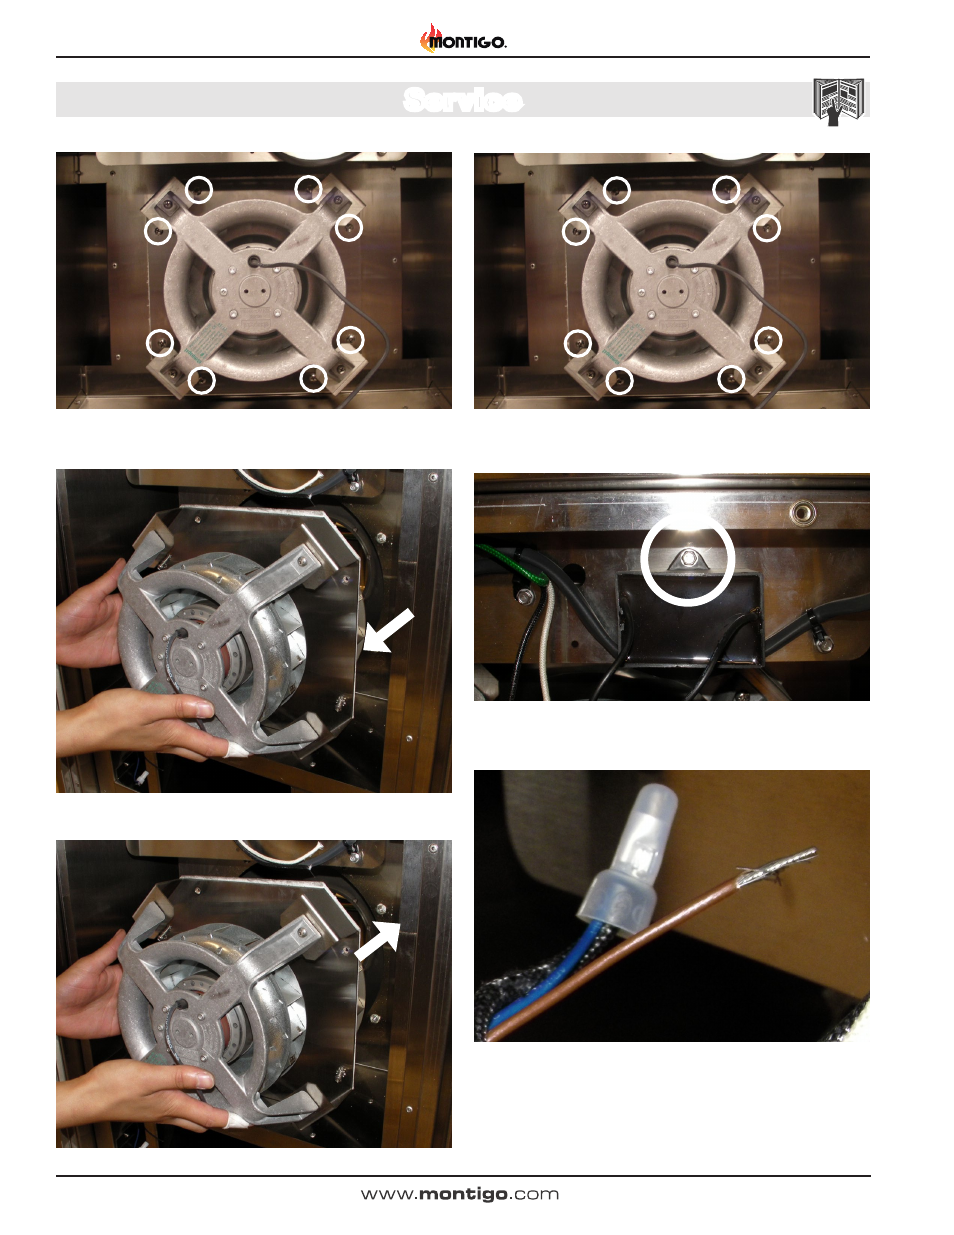
Service
Page 18
XG0519 - 070714
PVHFL58-300 & PVHFL510-300 Horizontal Power Vent
Step 6: Unscrew 8 screws securing the motor mounting plate.
Figure 10f.
Step 7: Remove the motor.
Figure 10g.
Step 8: Install the new motor.
Figure 10h.
Step 9: Secure motor mounting plate with supplied 8 screws & star washers.
Figure 10i.
Step 10: Secure new capacitor with supplied screw.
Figure 10j.
Step 11: Using suppled small bell connector, connect the blue wire from the
motor to the black fibre wire from the power cable.
Figure 10k.
This manual is related to the following products:
See also other documents in the category Montigo For Home:
- H36PVN (40 pages)
- H42VO (22 pages)
- L38DF (40 pages)
- L42DF (40 pages)
- HL34DF (42 pages)
- P42DF (34 pages)
- R820 (44 pages)
- P52DF (34 pages)
- Flush Face (DF) Door Removal (1 page)
- Flush Face (DF) (14 pages)
- B38DV (26 pages)
- L52DF-ST (34 pages)
- HL38DF ST (38 pages)
- HL42DF ST (36 pages)
- RP620 (48 pages)
- HL38SVO-ST (20 pages)
- HP38DF-CLCR (38 pages)
- HP38DF PFC (38 pages)
- HP38DF PRC (38 pages)
- R620-ST (38 pages)
- DHS (22 pages)
- R324-ST (22 pages)
- 34FID Traditional (70 pages)
- 1001-A (6 pages)
- 34FID - Linear (64 pages)
- 1001 TH-A (9 pages)
- PF2RK (4 pages)
- RX100 (6 pages)
- H42 (2 pages)
- RX82 (12 pages)
- RX200 (8 pages)
- HFK-Series Cross-Flow Blower (2 pages)
- P-Series Fireplace Surround (2 pages)
- RX88 (20 pages)
- HFK50R (2 pages)
- RFK1080 (2 pages)
- HFK50 (4 pages)
- IOSK3 (2 pages)
- IOSK4 (2 pages)
- IOSK5 (2 pages)
- IOSK6 (2 pages)
- RFK3004 (4 pages)
- RFK3004R (4 pages)
- EPVRW (6 pages)
- EPVRR (6 pages)