Installation, Venting installation, Installing the power vent – Montigo EDVRSPV47 User Manual
Page 5
EDVRSPV Vertical Power Vent System
Part No. XG1302 - 120110
f i r e f e a t u r e
Installation
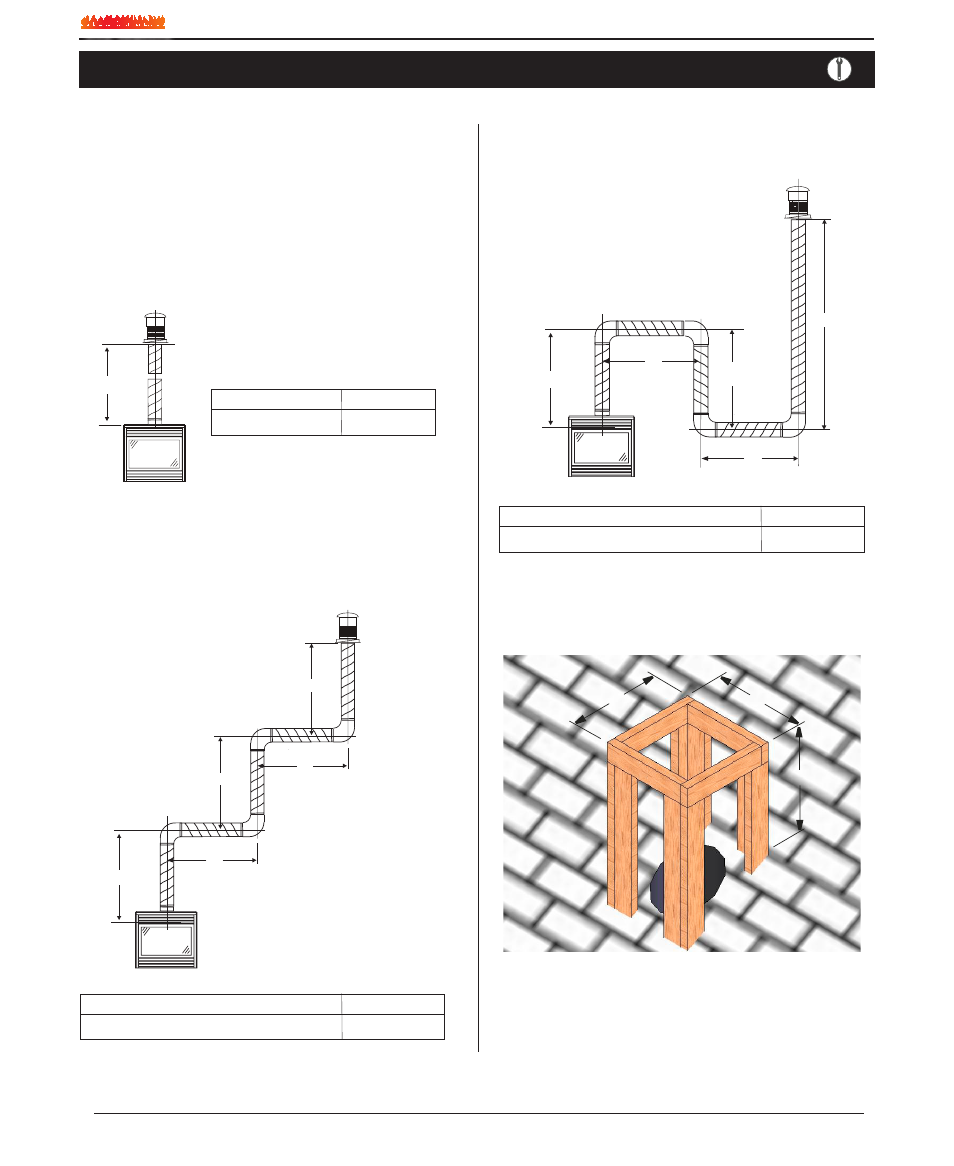
Figure 1. Typical Venting Installations.
Venting Installation
It is recommended that the External Power Vent System be used with
a gas fireplace that is equipped with HSI. When installing the vent-
ing, the installation must adhere to the Vent Installation Section in the
fireplace's Installation Operation and Maintenance Instructions, as well
as the following guidelines:
■Ensure that the planned termination location is acceptable as
shown in Appendix A.
■
Maximum allowed vent run is 100 feet.
Figure 2. Multi-elbow Venting Installations.
Multi-Elbow Installations
Multi-elbow installations are possible up to a maximum of six 90°
elbows.
V
Restrictor #1
Max V Max Elbows
100’ feet six 90
Elbow 1
Elbow 2
Elbow 3
Elbow 5
Elbow 4
H2
H1
V1
V2
V3
Restrictor #1
Max V1 + H1 + V2 + H2 + V3 + H3 Max Elbows
100’ feet six 90
Installing the Power Vent
Figure 4.
Step 1.
Construct a chase box around the vent penetration with exterior
dimensions of 17"x 17" x 16"MIN in height.
17”
17”
18”
Figure 3. Downward Venting Installations.
Downward Vertical Venting (HSI Models Only)
Downward venting installations are only possible with gas fireplaces
equipped with Electronic or Hot Surface Ignition (HSI).
Restrictor #1
Max V1 + H1 + D + H2 + V3 Max Elbows
100’ feet six 90
Elbow 1
Elbow 2
Elbow 3
Elbow 5
H1
V1
D = 6’ foot
MAX
V3
H2
Elbow 4
Page 5