Installation – Montigo RX100 User Manual
Page 4
Installation
Page 4
XT0012 - 092214
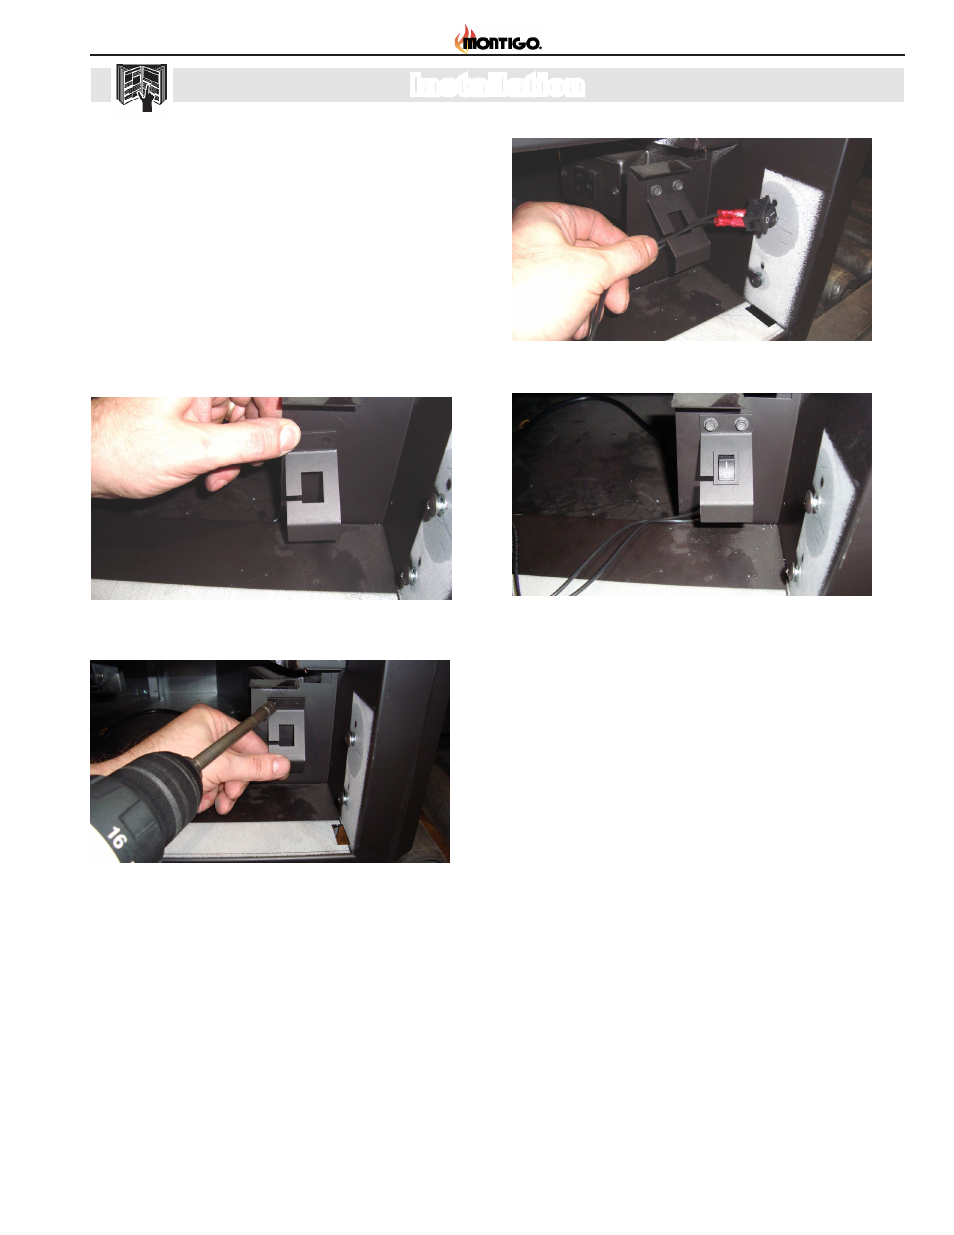
Figure 11
Attach switch bracket to front of fireplace
C. Main ON/OFF Switch Installation:
1. Position the Main ON/OFF Switch bracket on the right leg of the
firebox as shown in
Figure 11 and Figure 12.
2. Use the two supplied selftapping screws to attach the bracket.
See
Figure 12.
3. Feed the switch and the wires through the slot in the bracket as
shown and install the switch to the bracket. See
Figure 14.
4. Secure the wires to the floor of the fireplace using the supplied
cable tie and cable tie mounts.
5. Attach the "Main ON/OFF" label supplied to the valve bracket.
Figure 12
Attach switch bracket to front of fireplace
Figure 13
Attach switch to bracket.
Figure 14
Attach switch to bracket.
See also other documents in the category Montigo For Home:
- H36PVN (40 pages)
- H42VO (22 pages)
- L38DF (40 pages)
- L42DF (40 pages)
- HL34DF (42 pages)
- P42DF (34 pages)
- R820 (44 pages)
- P52DF (34 pages)
- Flush Face (DF) Door Removal (1 page)
- Flush Face (DF) (14 pages)
- B38DV (26 pages)
- L52DF-ST (34 pages)
- HL38DF ST (38 pages)
- HL42DF ST (36 pages)
- RP620 (48 pages)
- HL38SVO-ST (20 pages)
- HP38DF-CLCR (38 pages)
- HP38DF PFC (38 pages)
- HP38DF PRC (38 pages)
- R620-ST (38 pages)
- DHS (22 pages)
- R324-ST (22 pages)
- 34FID Traditional (70 pages)
- 1001-A (6 pages)
- 34FID - Linear (64 pages)
- 1001 TH-A (9 pages)
- PF2RK (4 pages)
- H42 (2 pages)
- RX82 (12 pages)
- RX200 (8 pages)
- HFK-Series Cross-Flow Blower (2 pages)
- P-Series Fireplace Surround (2 pages)
- RX88 (20 pages)
- HFK50R (2 pages)
- RFK1080 (2 pages)
- HFK50 (4 pages)
- IOSK3 (2 pages)
- IOSK4 (2 pages)
- IOSK5 (2 pages)
- IOSK6 (2 pages)
- RFK3004 (4 pages)
- RFK3004R (4 pages)
- EPVRW (6 pages)
- EPVRR (6 pages)