Installation – Montigo RX100 User Manual
Page 3
Installation
Page 3
XT0012 - 092214
A. Disconnecting Wall Switch Harness:
1. Remove valve blind and glass door.
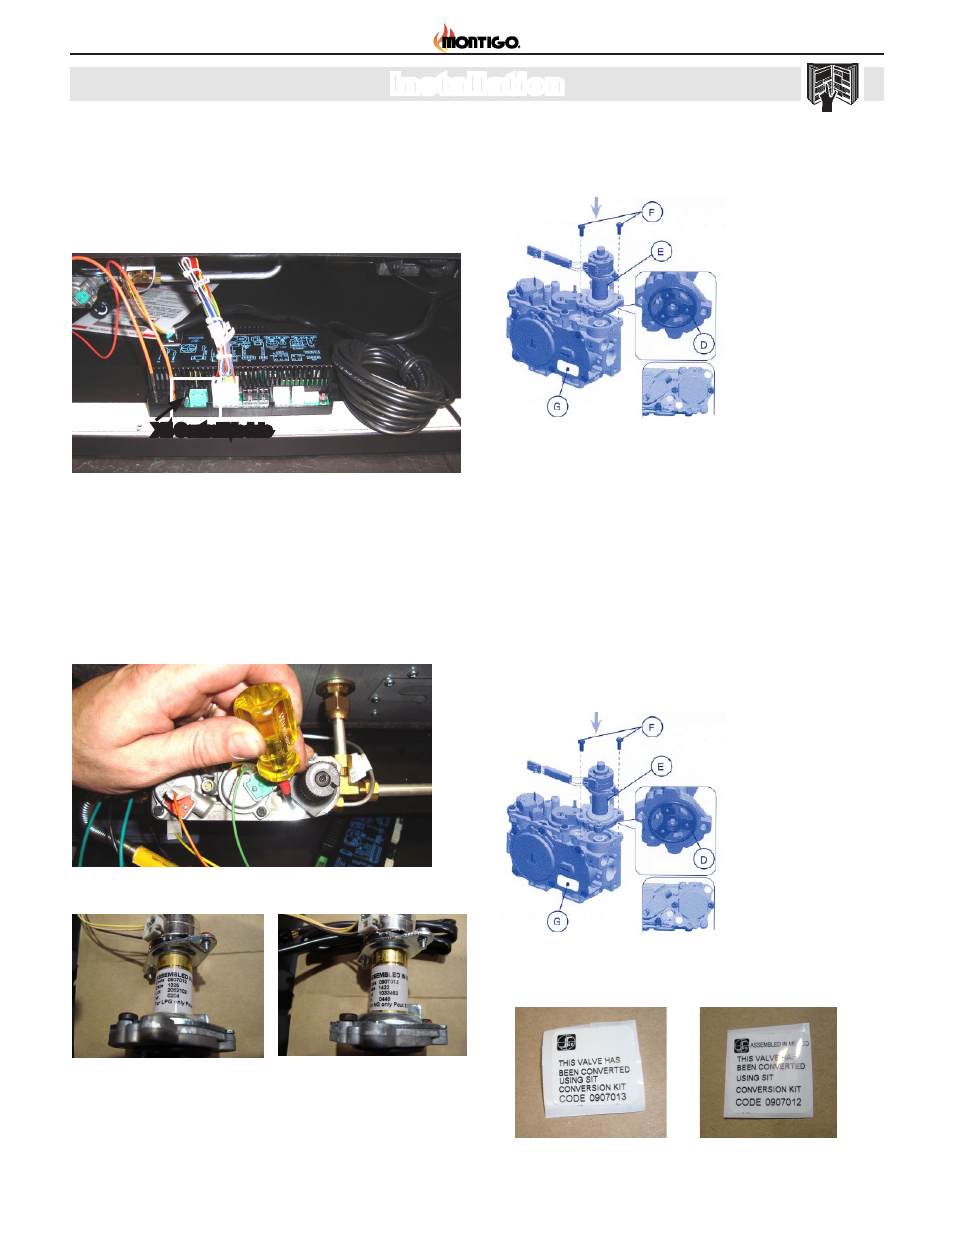
Figure 3
Control module with wires
2. Disconnect the wall switch harness from X4 Control
Module and discard.
B. Stepper Motor Installation:
1. Using a Torx T20 or slotted screw driver, remove the two screws
that are attached to the Hi-Low knob on the Gas Control Valve
(Figure 4) and discard the screws and the knob. Remove gas-
ket and discard.
2. Ensure the prefitted rubber gasket is properly positioned
(Figure 7 - D). Otherwise, fit the gasket as shown.
Figure 4
Replace Hi-Lo knob on valve
Figure 5
Stepper Motor - LP
Figure 6
Stepper Motor - NG
Figure 7
SIT Instructions Figure
4. Manually thread the two
supplied mounting screws into
the valve body. Use a torque screw driver with Torx T20
bit, to tighten the two screws to a torque setting of of 25
lb-in +/- 5%.
5. Install the enclosed identification label to the valve body
Figure 8 - G.
3. Position the stepper motor on the gas control valve as
shown in
Figure 8 - E.
Figure 8
SIT Instructions Figure
Figure 9
Identification Label - NG
Figure 10
Identification Label - LP
X4 Control Module